Install HBA Drivers (Windows)
Perform these steps during the actual Windows OS installation, to ensure that the drivers for your HBA are installed.
Note - If you used OSA to install the Windows OS, you do not need to perform this procedure because OSA installs the required HBA drivers.
-
In the Installation Type window, click Custom (Advanced).
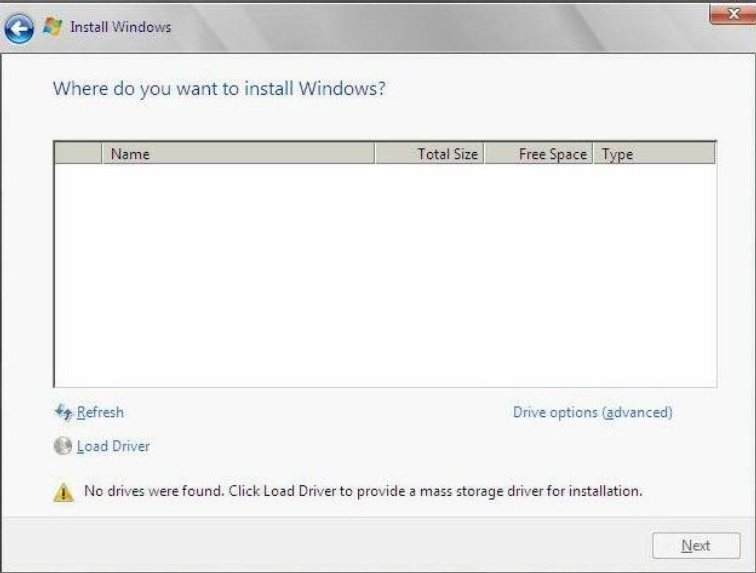
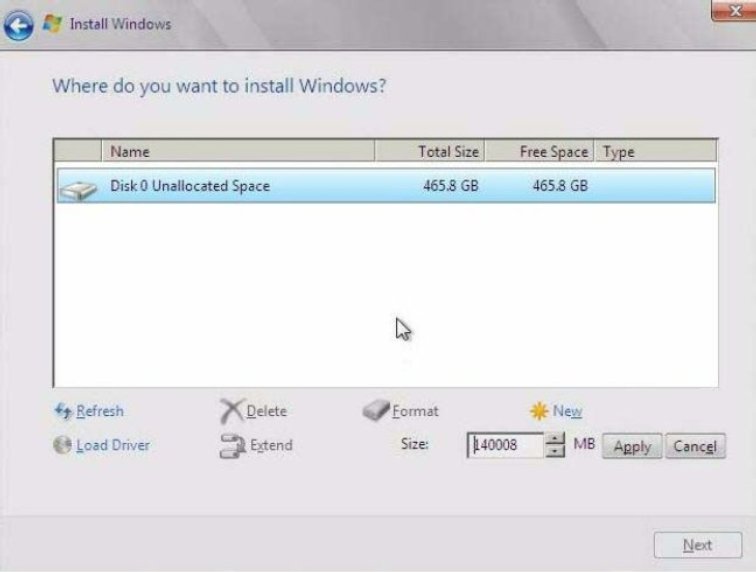
The Where Do You Want to Install Windows window appears.
-
Perform one of these tasks.
- If you do not see any storage targets listed, click Load Driver, then proceed to Step 3.
- If you see the storage target where you want to install the OS but want to change the default partition settings associated with that target, select the target, click Drive Options (advanced), then proceed to Step 4.
- Otherwise, select the storage target listed, and go to Step 5
-
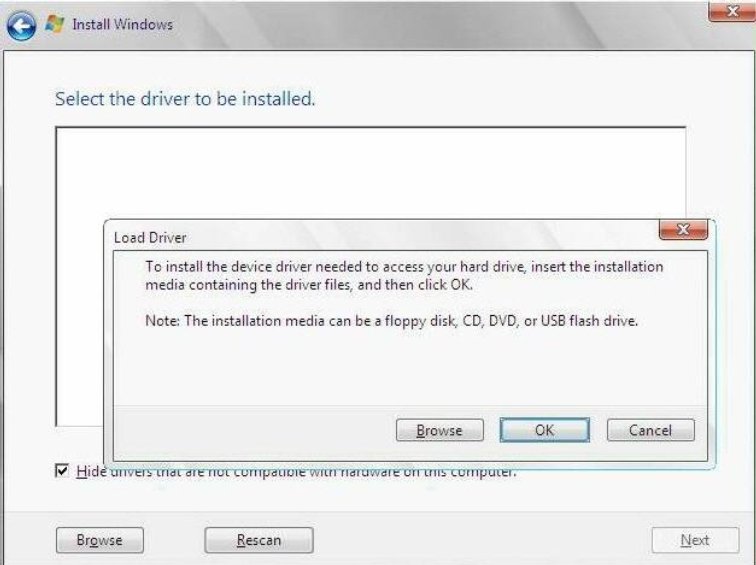
In the Load Drive dialog box, perform these steps.
-
Ensure that the drivers are accessible according to the
installation method chosen.
For example:
-
Drivers are on a disk mounted as a device from the Oracle ILOM Remote Console.
-
Storage drivers are on a local physical storage media such as the OSA USB drive (if installed), which is mounted internally in the server's chassis, a CD/DVD, or virtual media mounted from the Oracle ILOM Remote Console.
-
-
In the Load Driver dialog box, click Browse to navigate to the
appropriate driver media folder on the OSA USB drive.
The drivers are located in the windows sub-directory.
-
In the Browse for Folder dialog box, select the appropriate
driver, then click OK to load the driver.
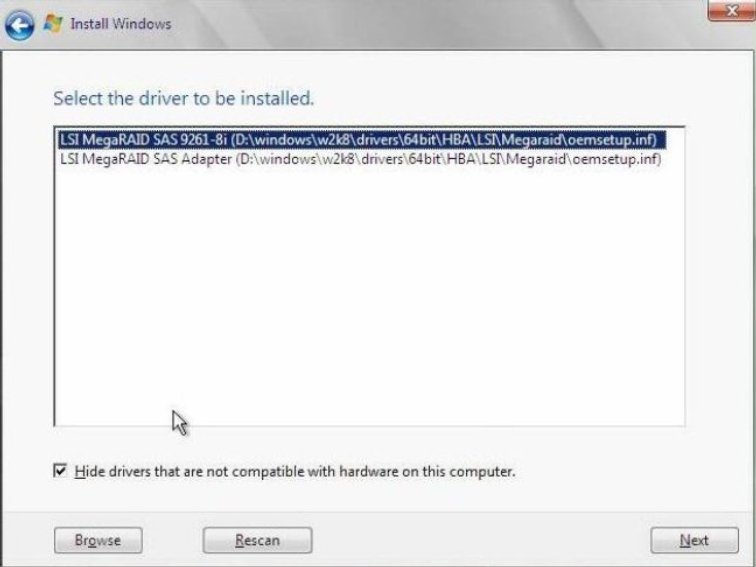
The selected driver appears in the Select the Driver to Be Installed window.
For example:
-
In the Select the Driver to Be Installed window, click Next to
install the driver.
The Where Do You Want to Install Windows window appears.
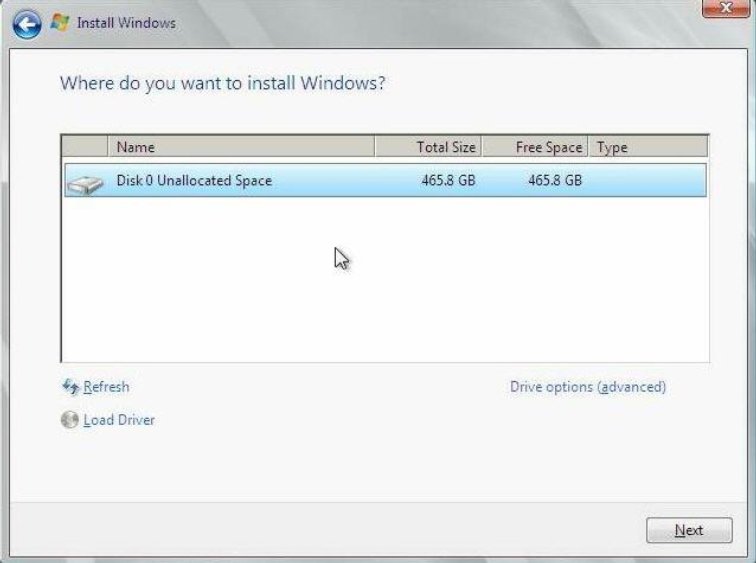
Note - If you previously removed or unmounted the Windows OS installation media to load the drivers from the internal OSA USB drive, you might see this message: “Windows Cannot be installed to this disk.” If this message appears, insert or re-mount the Windows installation media, then click Refresh. - In the Where Do You Want to Install Windows window, perform one of these actions:
-
Ensure that the drivers are accessible according to the
installation method chosen.
-
In the lower portion of the Where Do You Want to Install Windows window,
perform these steps.
-
Click Delete to delete the selected storage target existing
partition configuration.
A confirmation window appears.
- Click OK to confirm the partition deletion.
- If any additional partitions exist on the target drive, repeat Step a and Step b.
- Go to Step 5.
-
Click Delete to delete the selected storage target existing
partition configuration.
-
Click Next to install the OS to the selected storage target.
The Windows installation program begins and will reboot the server multiple times during the installation process.
-
Change the user password when prompted.
When the installation is complete, Windows starts and prompts you to change the user password.
-
In the User Password dialog box, click OK and set up the initial user
login account.
After the initial user account is created, the Windows OS desktop appears.
- Perform post-installation tasks.