Adjust the Front RETMA Rails
Note - With the new racks, you can move the front rails back 150 mm (5.90 in.) into the rack from the default position. For older racks, you can move the front rails back 35 mm (1.4 in.) from the default position.
- Open
both rack doors.
You might prefer to remove the doors from the rack before adjusting the RETMA rails. For instructions, see Servicing Doors.
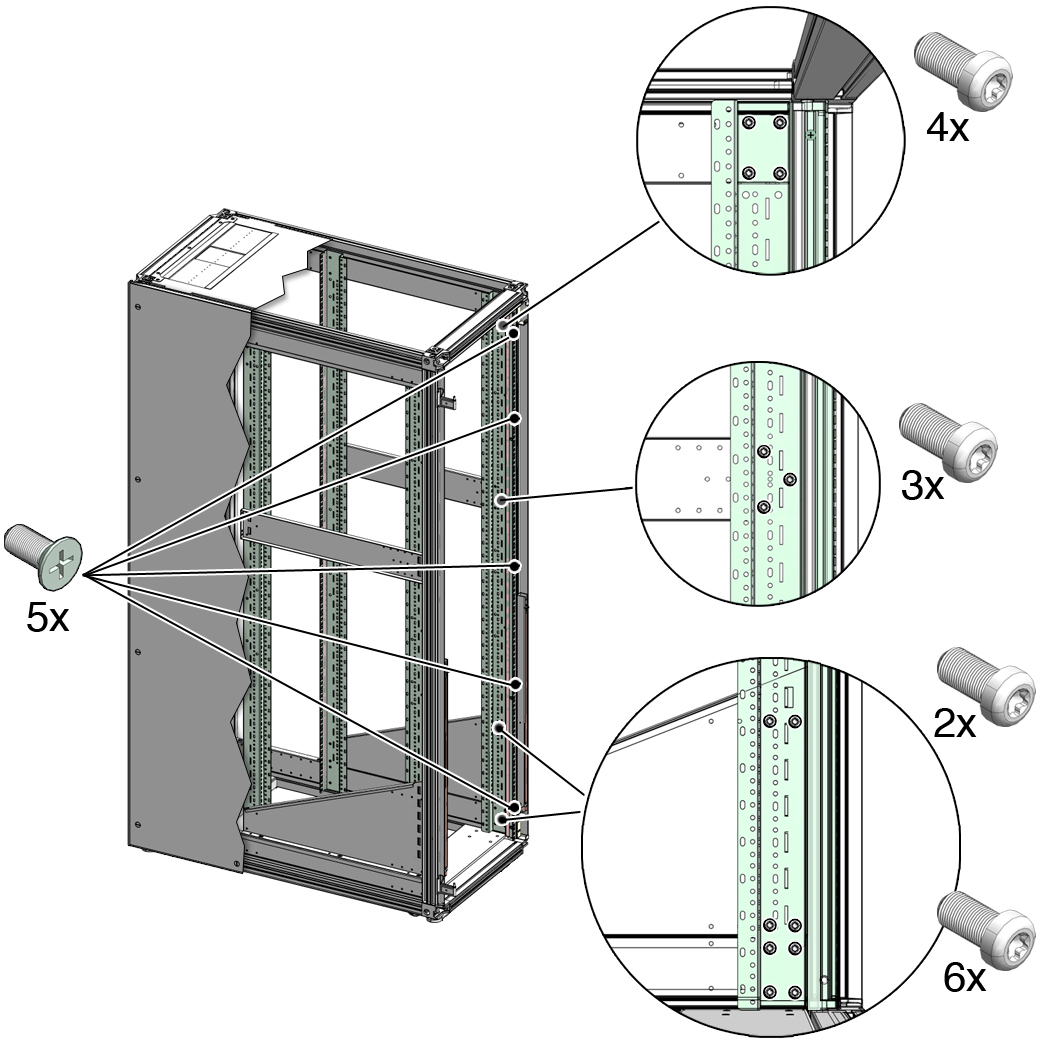
- Using a No. 2 Phillips screwdriver, remove the five No. 2 Phillips screws securing the right, front RETMA rail to the front rack frame.
- Using a T-30 Torx wrench key,
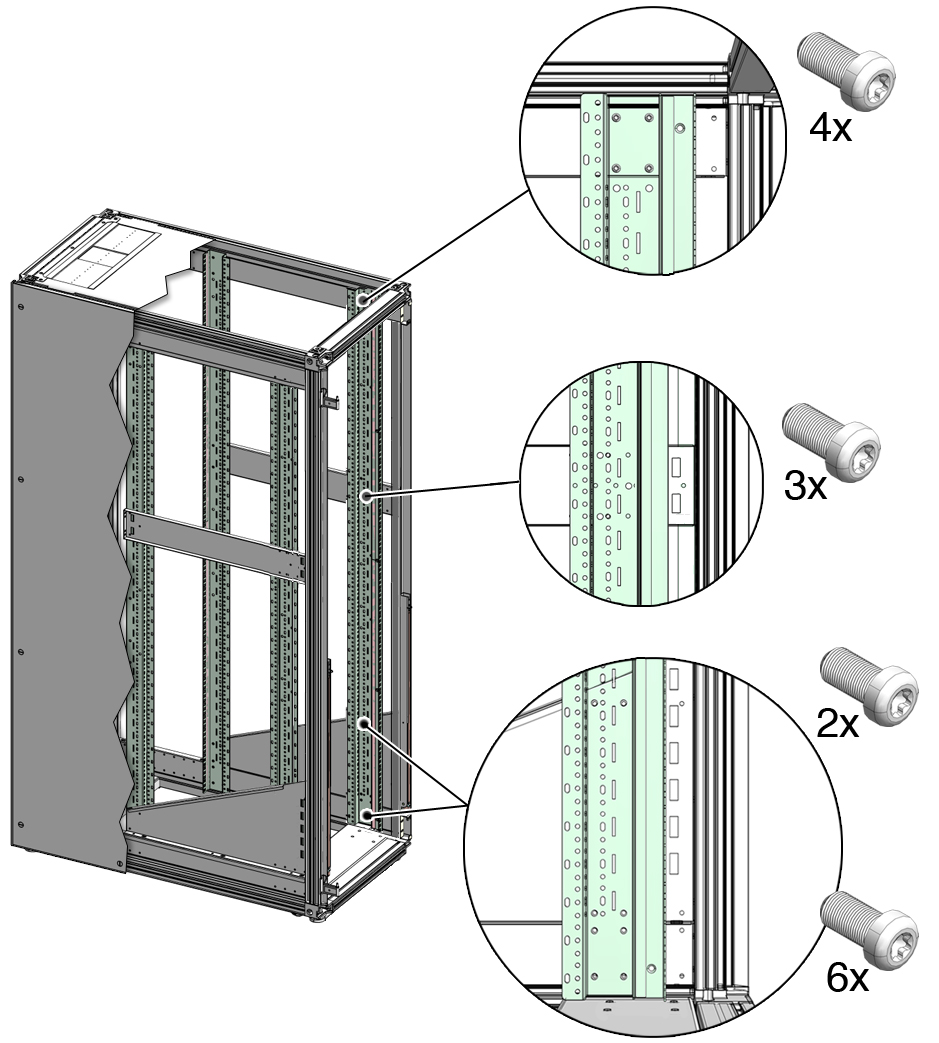
remove and save the 15 self-tapping M6 screws securing the right
rail to the rack frame.
Note - Do not discard these self-tapping screws.4 screws at the top the rail
3 screws securing the rail to the horizontal brace
4 screws securing the rail to the triangular brace
4 screws at the bottom of the rail
Note - To prevent stripping the screw threads, carefully remove these screws from the rack.

There are four sets of screws securing the rail to the frame and the support braces:
- Move the rail back into the rack.
An indentation and screw holes are 150 mm or 35 mm inside the rack on the frame.
- Using a T-30 Torx wrench key,
secure the rail to the rack frame and braces using the 15 M6 self-tapping
screws you removed in Step 3.
You do not need to reuse the No. 2 Phillips screws you removed in Step 2, so save these screws for future use.

- Repeat Step 2 to Step 5 for the left rail.