If you want to create additional security for UI Options, you must follow this general procedure:
If the option is for a Self Service site, create the site and instantiate a new set of segment options.
Create a Service Admin deployment project.
Within the project, navigate to the role/organization that should have access to the option, and create a new access right object for each option you want to secure.
Add the access right object to the matching UI option and deploy the project.
To customize option-level access rights, use the following procedure:
If you are editing segment-level options, open Service Administration, navigate to Site Management, and create a new set of segment options. (For detailed instructions, see Defining ATG Service User Segments.)
If you are editing site-level options, skip this step and go to step 2.
In the BCC, navigate to Service Admin Publishing > Service Admin. Create a new project (type Service Admin) to manage the rest of this procedure. Name it so you can find it easily later; for example, “Adding FieldRights for SiteOption”.
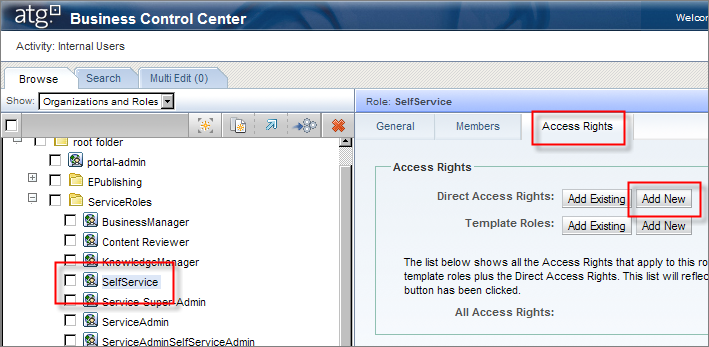
Go to BCC Home and navigate to Personalization > Internal Users. In the Show dropdown, choose Organizations and Roles. Select or create the organization or role whose access you want to modify.
Click on the organization or role’s Access Rights tab. Click Add New.
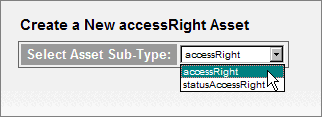
In the next screen, select the accessRight subtype from the dropdown and click Next.
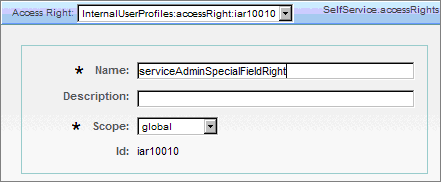
In the Access Right editor that appears, fill in the Name and Scope fields. Click Create when you are finished.
Note: New access rights should have names that match existing Service Administration access rights. For example, to secure the Self Service > Global Settings > P3P UI Options, create a right with a name like serviceAdminSelfServiceGlobalSettingsP3PFieldRight.
Verify the new right appears in the list of available access rights on the organization/role, by choosing the organization/role in the dropdown at the top of the pane.

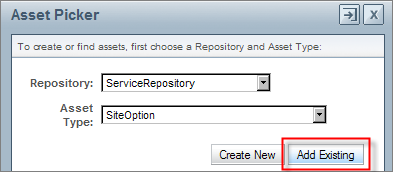
Go to BCC Home and navigate to Content Administration > Browse Projects. Locate and select the project you created in step 2. Click on the project’s Assets tab. Click the gray Add asset to project link in the middle-right. In the Asset Picker that appears, in the Repository dropdown, choose ServiceRepository; in the Asset Type dropdown, choose SiteOption or SegmentedOption as appropriate. Click Add Existing.
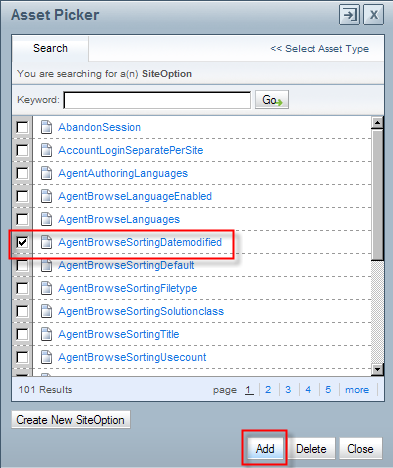
In the Asset Picker that appears, click Go to view existing options.
Select the checkbox next to the option you want to edit and click Add. Click Close when you are done adding options.
In the Assets tab, click the option you just added. Edit its accessRight property to point to the access right you created in steps 3-5. Do not change other property values. Click Apply at the bottom of the screen to save your changes.
Go to the project’s Tasks tab, choose the Check In and Deploy action, and click Go to complete the project. Deploying the project pushes the changes out to the ATG Knowledge and ATG Self Service servers.
After completing this procedure, the UI option is now secure; access to the option must be explicitly granted to any users who need it. Any user without the access right will no longer be able to view the associated UI option.
