When a Multi Edit operation completes, its tile changes to reflect the status of the operation. If all assets were successfully updated, the tile displays a check mark. If some or all assets could not be updated, the tile displays a warning icon. Open the tile to view a report that displays the results of the operation.
To view a Multi Edit report:
Open the Multi Edit tile whose report you want to view.
The report is divided into a number of categories, each on its own tab.
Failed. These assets were not changed, saved, or added to the project because the suggested edits cased errors. Each asset on the Failed tab is followed by a description of the problem that caused the failure.
Updated. These assets were successfully changed, saved, and added to the project.
Unchanged. These assets already had the suggested property values so no change was necessary. These assets were not saved or added to the project.
Cancelled. The Multi Edit operation was stopped before Merchandising could update these assets. These assets were not changed, saved, or added to the project.
The report includes tabs only for categories that have assets in them. For example, if all assets were successfully updated, the report contains only the Updated tab.
To fix assets that appear on the Failed or Cancelled tab, copy and paste their IDs from the report to the Find Panel in the Navigation pane, then search for them.
You can edit the assets one at a time from the search results list, or add them to a new Multi Edit operation.
When you finish reviewing the report you can remove it from the workbench permanently by clicking the X in the upper-right corner of its tile.
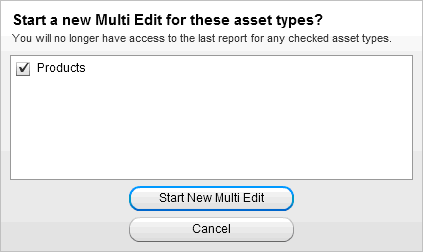
You cannot move assets to the Workbench while it still contains a Multi Edit report for assets of the same type. To start a new Multi Edit operation, select the type of assets to add and click the Start New Multi Edit button.