Replacing a ZS4-4 Power Supply
Storage controllers are equipped with redundant, hot-swappable power supplies. If a power supply fails and you do not have a replacement available, leave the failed power supply installed to ensure proper air flow. A faulted power supply is indicated by an amber-colored status LED. Use the following procedure to replace a ZS4-4 power supply.
- Gain access to the rear of the storage controller where the power supplies are located.
- Disconnect the power cord from the faulted power supply.
-
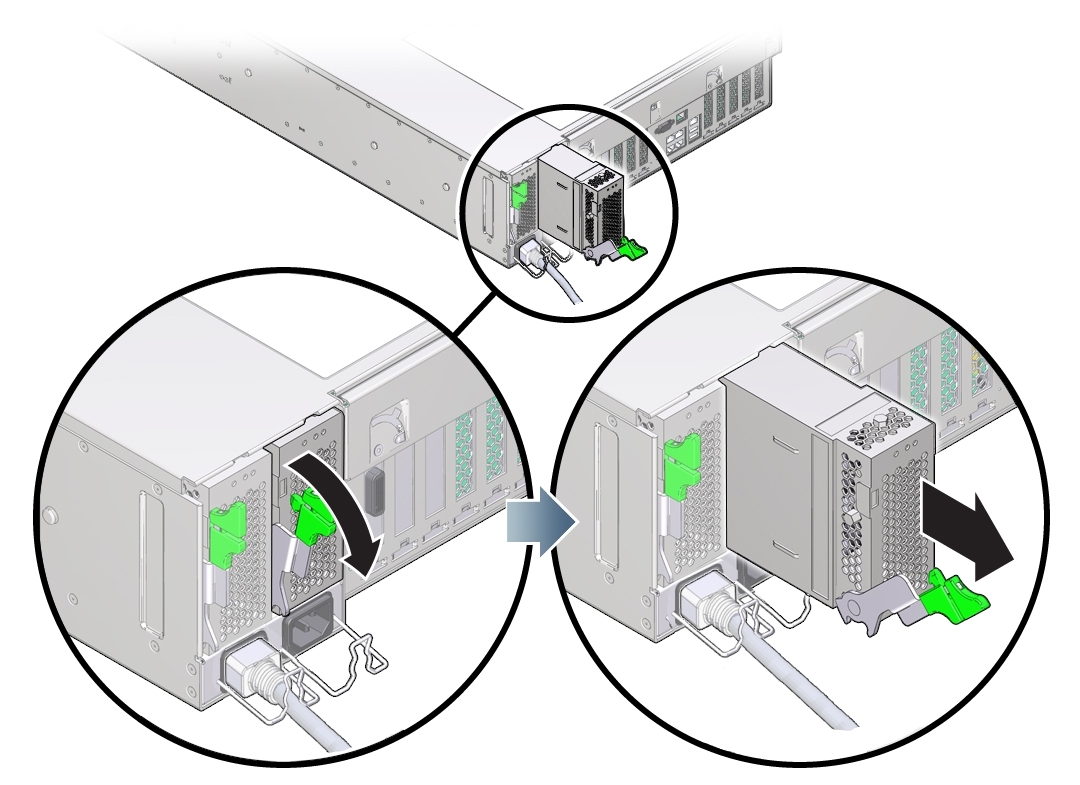
To unlock the power supply handle, squeeze the release latch.

- Rotate the release latch fully downward, to disengage the power supply from the internal power supply backplane connector.
- Shut down the controller using one of the power-off methods described in Powering Off the Controller.
- Ensure that the replacement power supply handle is in the open position.
-
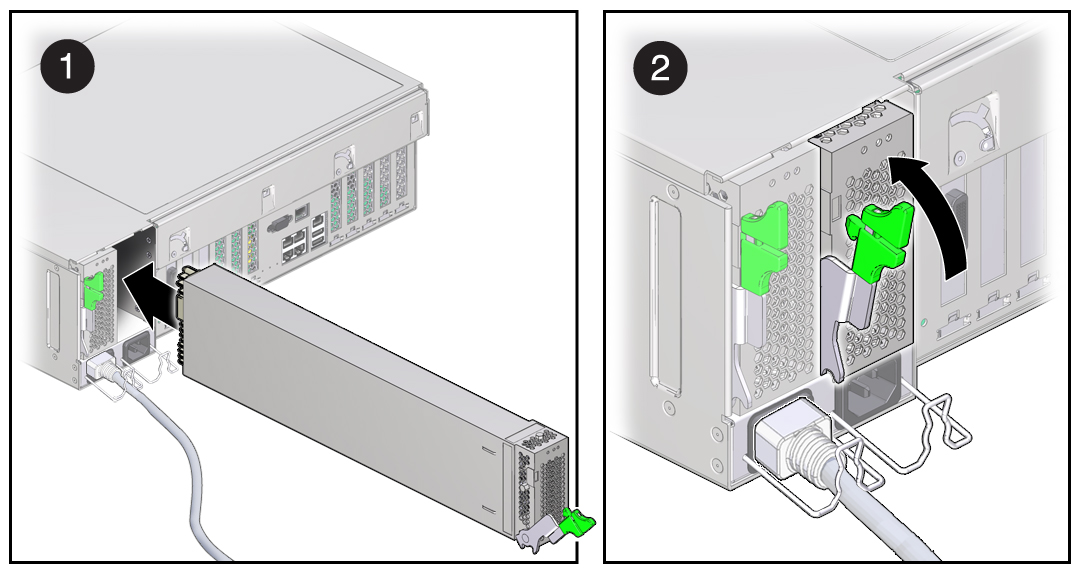
Align the replacement power supply with the empty power supply bay.

- Slide the power supply into the bay (1) until it stops.
-
To seat the power supply, rotate the release handle upward (2) until it
locks in place. This action of rotating the handle upward draws the power
supply into the controller and engages it with the internal
connector.
Note - The latch at the hinge of the handle must engage the slot at the bottom of the power supply bay. - Connect the power cord to the power supply.
- Verify that the green AC Present status indicator is lit.
-
Go to the Maintenance > Hardware screen of the BUI. Click the
right-arrow icon for the controller, click PSU, and verify that the status
icon
 is green for the newly installed power supply. To view
details about the new power supply, click its information icon.
- If a fault does not self-clear, see Repairing Active Problems.