Remove the Fan Board
This is a cold-service procedure that must be performed by qualified service personnel. Power down the server completely before performing this procedure.
 | Caution - This procedure requires that you handle components that are sensitive to ESD which can cause server components to fail. |
- Prepare for servicing.
- Remove all fan modules.
See Remove a Fan Module.
- Remove all memory risers.
See Remove a DIMM.
- Disconnect any cables plugged into the USB or video connectors on the front of the server.
-
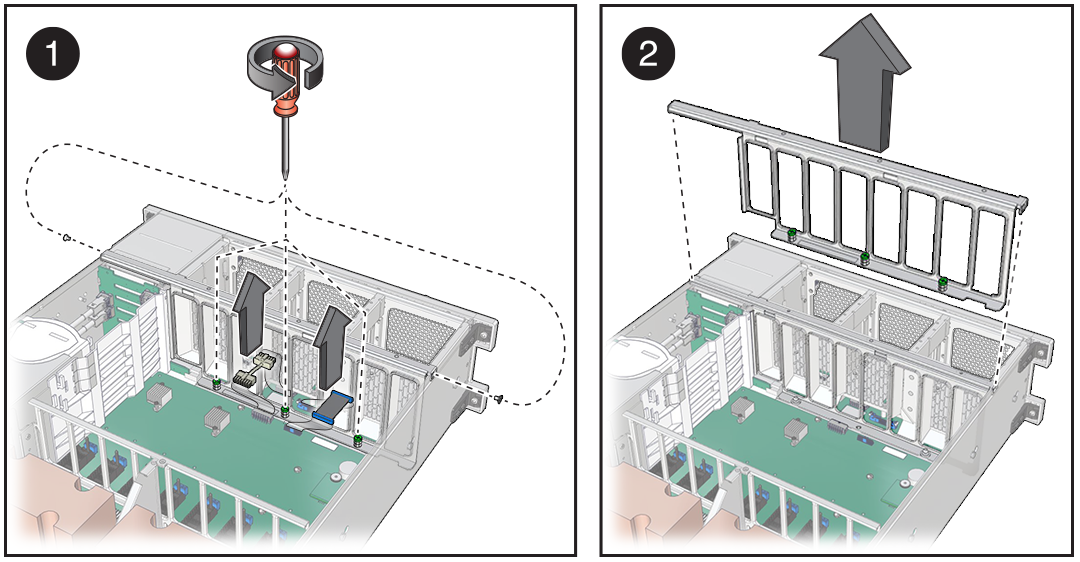
Loosen the three captive screws connecting the front memory riser guide to the
motherboard, and remove the two screws on each side of the outside of the
chassis that hold the fan board in place (panel 1).

-
Carefully unplug the fan board cable and the power cable from motherboard
(panel 1).

Caution - When removing the ribbon cable from the motherboard, grasp the cable connector on either side and pull straight up to disconnect the cable. Do not rock the cable side to side. Doing so could damage the connector.
Save the cables for use with the new fan board.
- Remove the front memory riser guide by pulling it up and out of the chassis (panel 2).
-
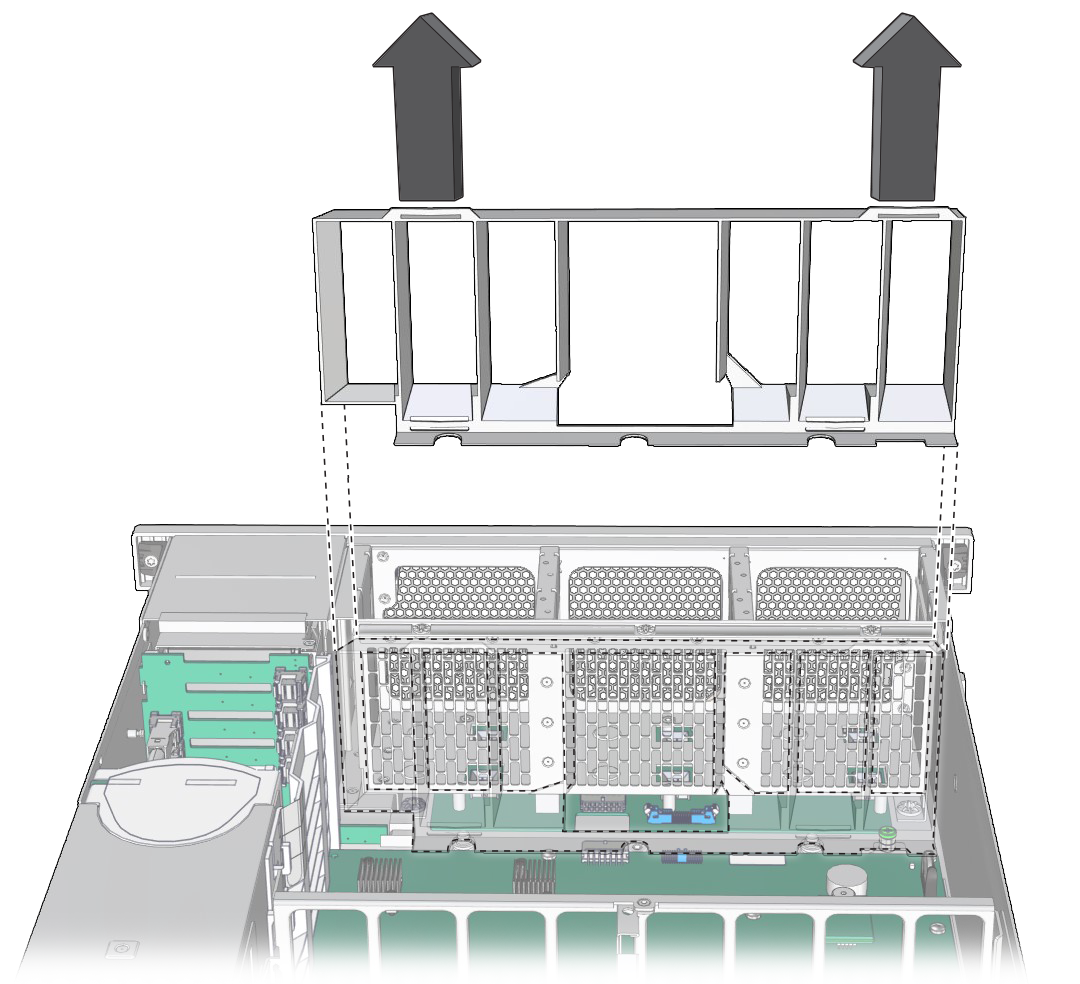
Remove the air baffle by pulling it up and out of the chassis.

-
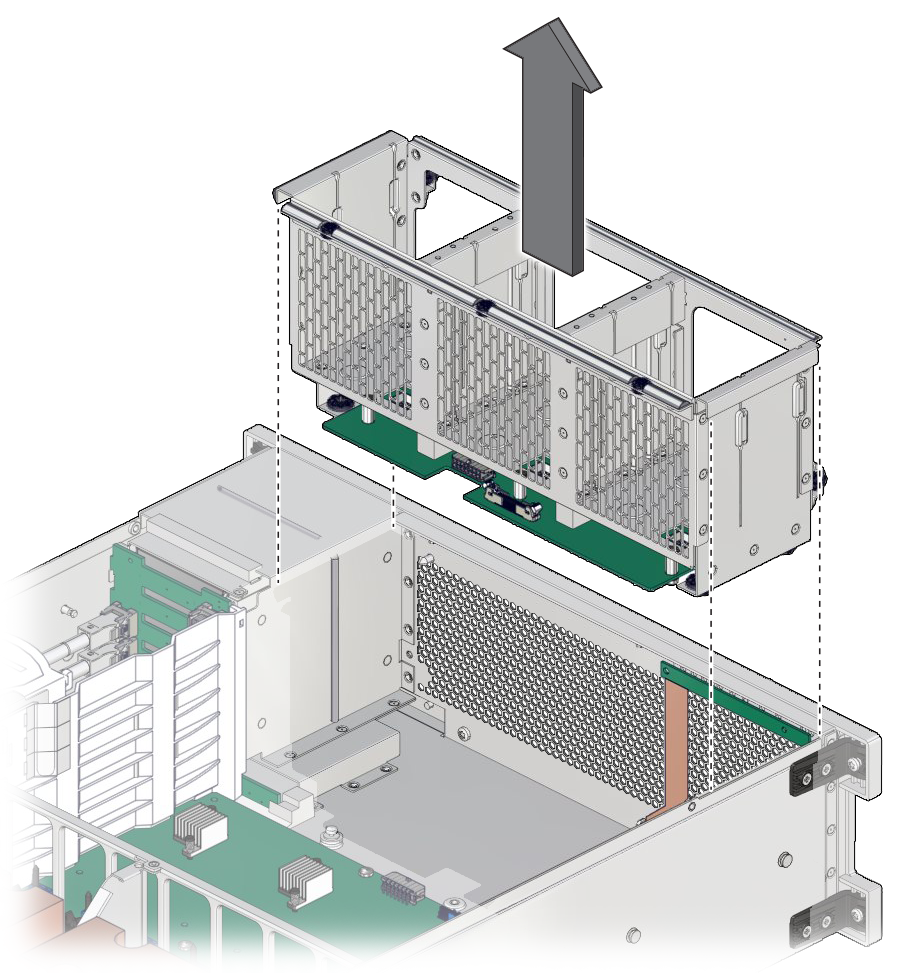
Pull the fan board back and out of chassis.
The circuit board and the fan holder portions of the fan board should remain together.

- Install a new fan board.