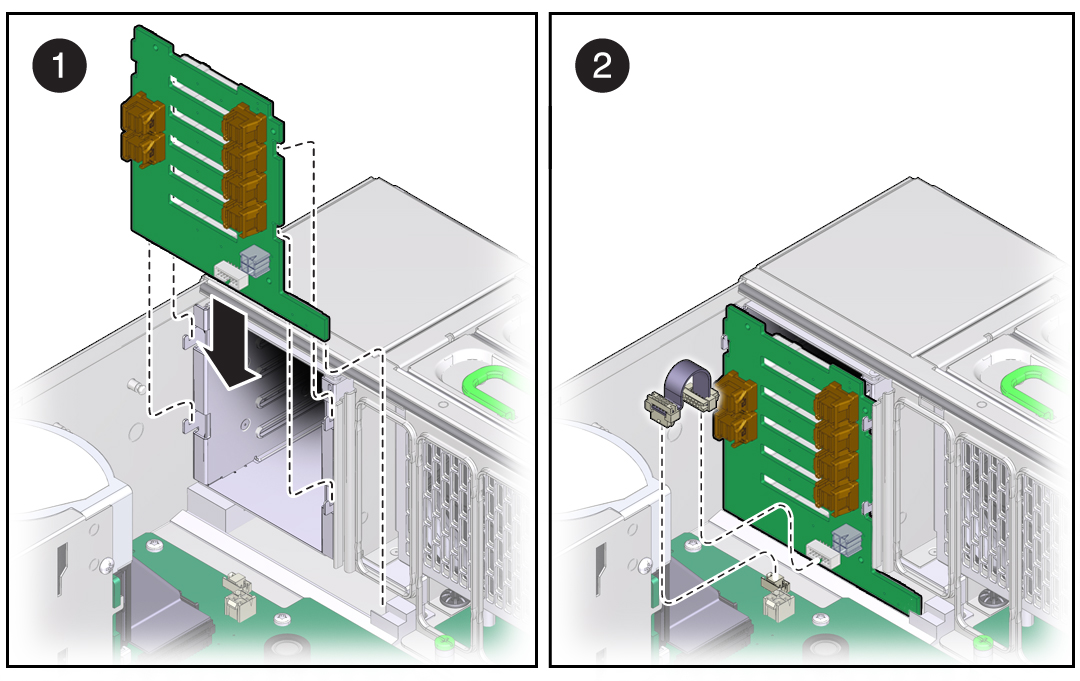
Install the Drive Backplane
This is a cold-service procedure that must be performed by qualified service personnel. Power down the server completely before performing this procedure.
 | Caution - This procedure requires that you handle components that are sensitive to ESD which can cause server components to fail. |
- Take the necessary ESD precautions.
See Prevent ESD Damage.
- Insert the drive backplane into the chassis.
Angle the bottom of the backplane into position first, then move the backplane forward to align the side hooks, then press the backplane into position.
Verify that the drive backplane is seated properly at the bottom in the small slot.
- Lift up the metal hook and press the drive backplane to the front until it snaps into place.
- Replace the power cable, ribbon data cable, SAS cables, and four NVMe cables to their original
locations.
Note - The SAS cable connectors on the motherboard are labeled top and bottom. Plug the both SAS cables into the drive backplane, then install the top SAS cable into the motherboard connector labeled top. Install the other SAS cable into the bottom connector.
- Replace the System Remind button assembly (air divider).
- Replace all memory risers you removed.
- Replace all drives and filler
panels.
See Install a Drive.
- Return the server to operation.
See Returning the Server to Operation.
Note - Authorized service personnel might need to reprogram the product serial number on the drive backplane. This number is used for service entitlement and warranty coverage. The correct product serial number is located on a label on the front of the chassis. - Verify that the component was successfully installed.