Modify iSCSI Virtual Drive Properties in UEFI Boot Mode (BIOS)
Use this task to configure iSCSI virtual drives using the iSCSI BIOS Setup Utility screens on systems configured to use UEFI Boot Mode.
iSCSI virtual drives are used primarily to run supported operating systems that reside on an external server and that function as the local server host operating system.
iSCSI virtual drives must be configured in the UEFI BIOS Setup Utility iSCSI screens.
Before You Begin
-
You should be familiar with iSCSI theory of operation and with iSCSI server setup procedures.
-
Refer to the operating system documentation to verify that iSCSI targets can be mounted on a client.
-
You need access to an external iSCSI server running on a supported operating system.
-
The server must be in UEFI Boot Mode, not Legacy BIOS Boot Mode. See Select UEFI Boot Mode or Legacy BIOS Boot Mode (BIOS).
-
You must provide iSCSI target parameters. The following table shows examples:
ItemExampleTarget nameiqn.1988-12.com.oracle:platform-targetiSCSI initiator nameiqn.1988-12.com.oracle:0010E02E458FNote - iSCSI requires iSCSI Qualified Names (iqn) formats for its initiator and target names.
Logical Unit NumberLUN 0IP address of iSCSI server192.167.1.24 (IPv4)Port number3260
-
Access the BIOS Setup Utility.
-
Boot the system.
Boot messages scroll across the console screen.
-
Press the F2 key (or Ctrl +E from a serial terminal) continuously.
The BIOS Setup Utility main screen appears.
-
Boot the system.
-
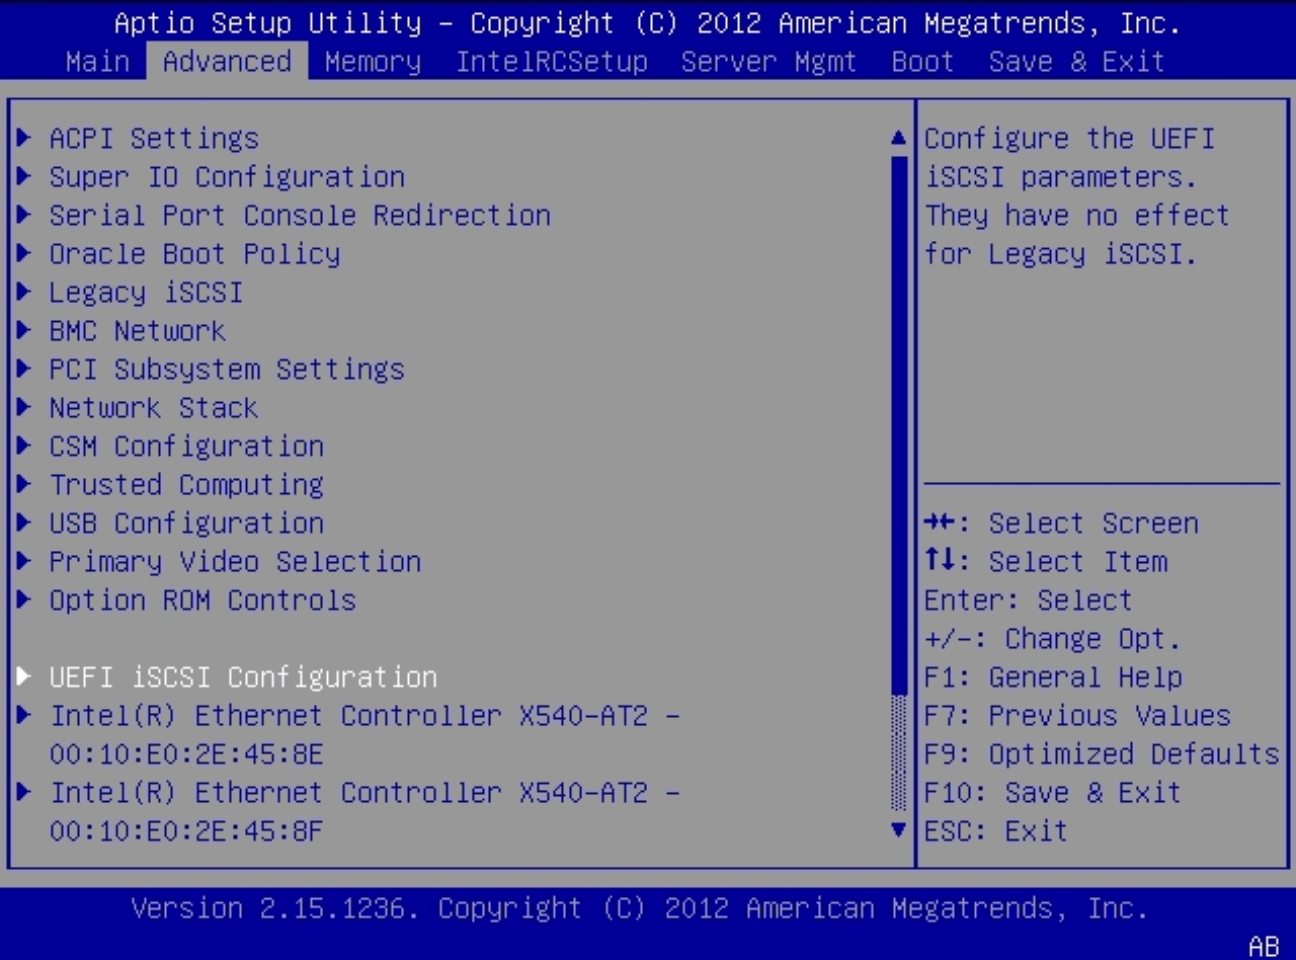
In the BIOS Setup Utility menus, select Advanced.
Note - Ensure Legacy BIOS Boot Mode is not enabled.A list of all controllable devices appears.
-
To access the iSCSI screen, select UEFI iSCSI Configuration.
The UEFI Driver Control screen appears.
-
Enter the iSCSI Initiator Name.
-
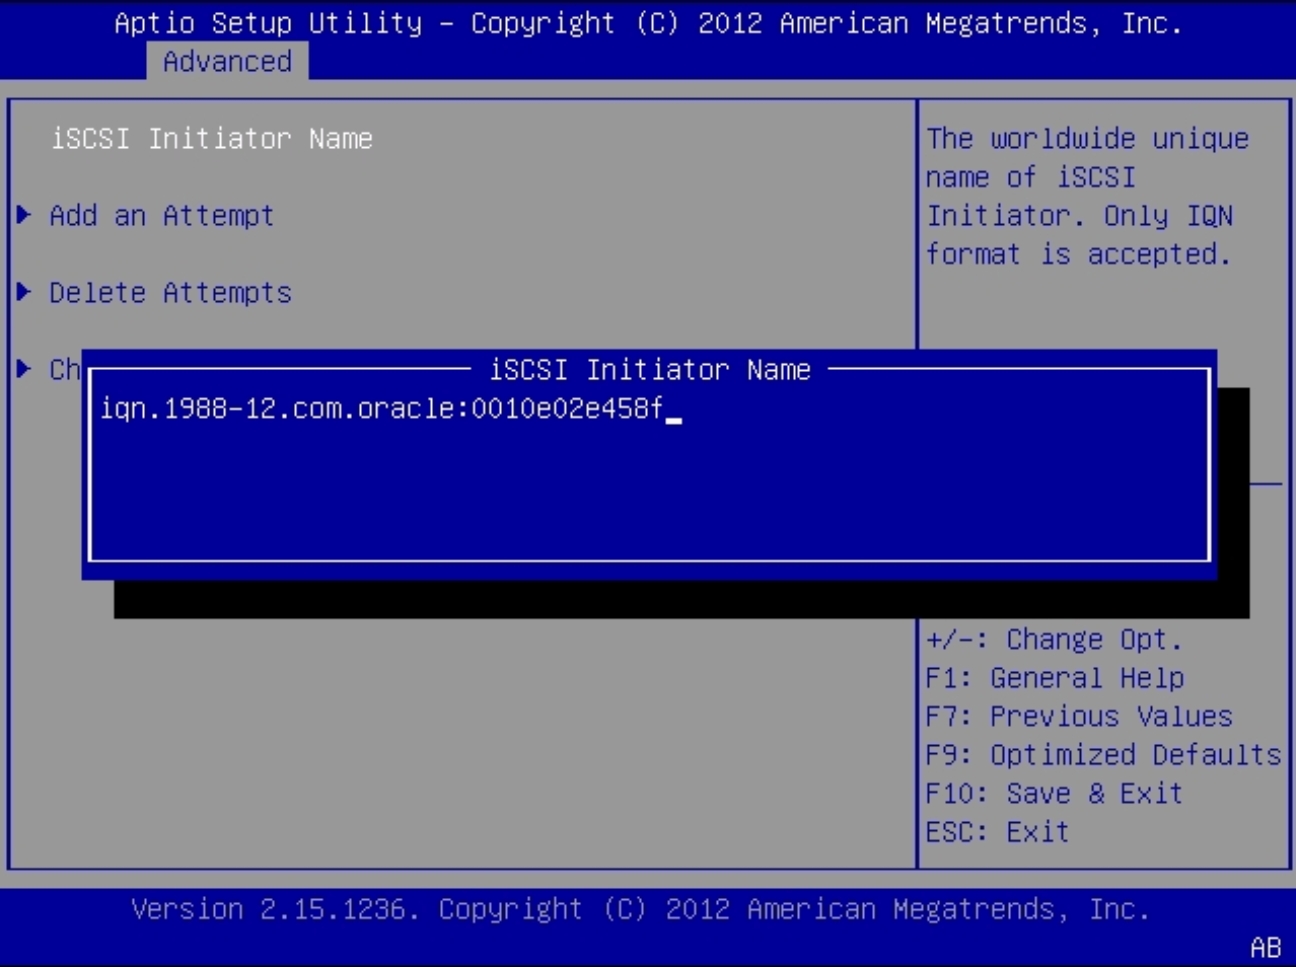
Select iSCSI Initiator Name.
The iSCSI Initiator Name dialog box appears.
-
Type the initiator name in iSCSI Qualified Name (iqn) format. For
example:
iqn.1988-12.com.oracle:0010e02e458f
-
Select iSCSI Initiator Name.
-
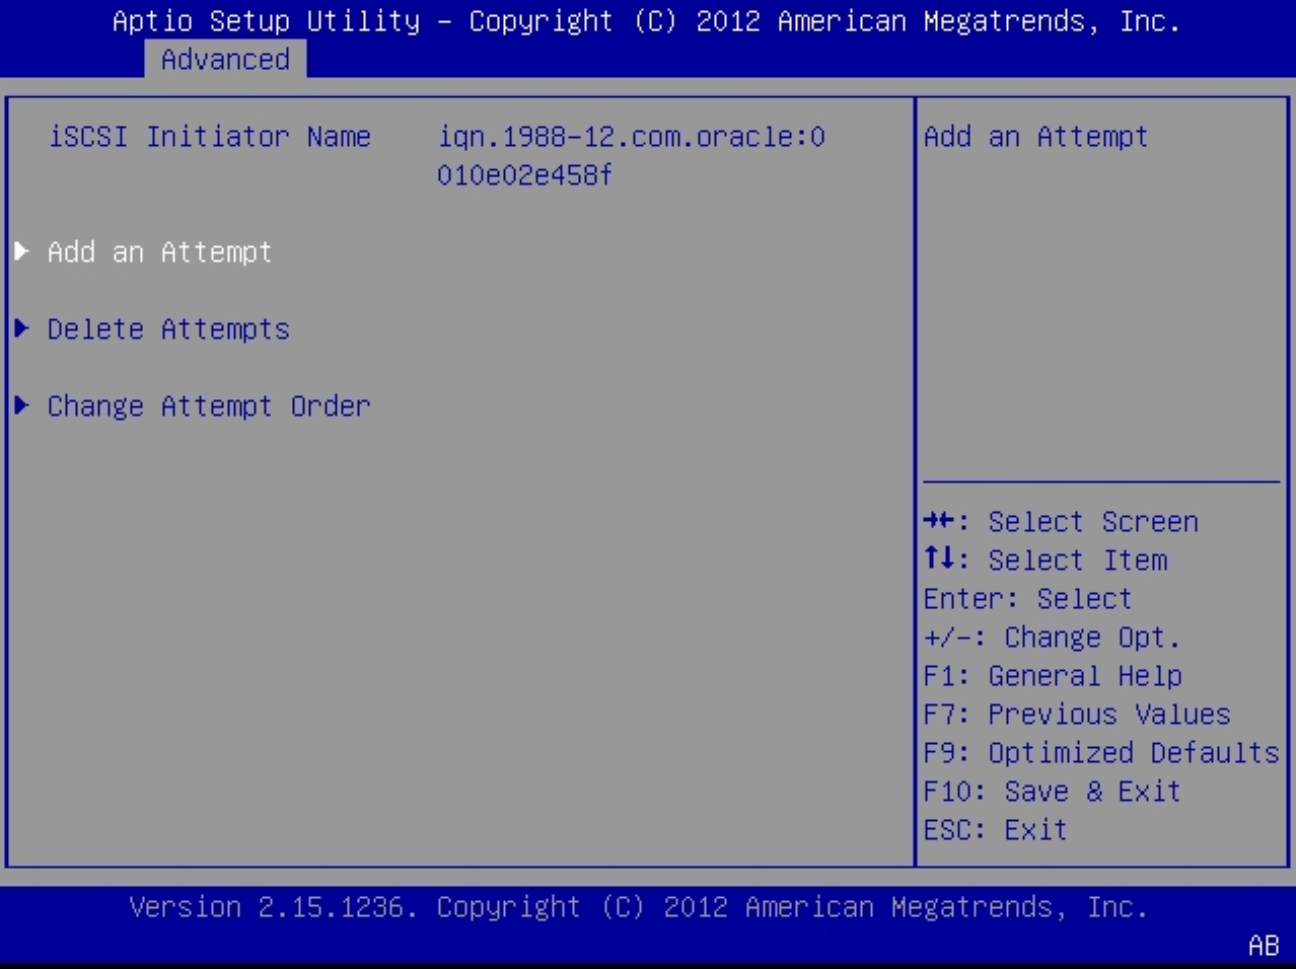
Select Add an Attempt, and then do the following:
-
Select the first iSCSI NIC port MAC address.
-
Select the first iSCSI NIC port MAC address.
-
To connect to the iSCSI drive, select the appropriate NIC port MAC
address, for example:
0010e02e458f
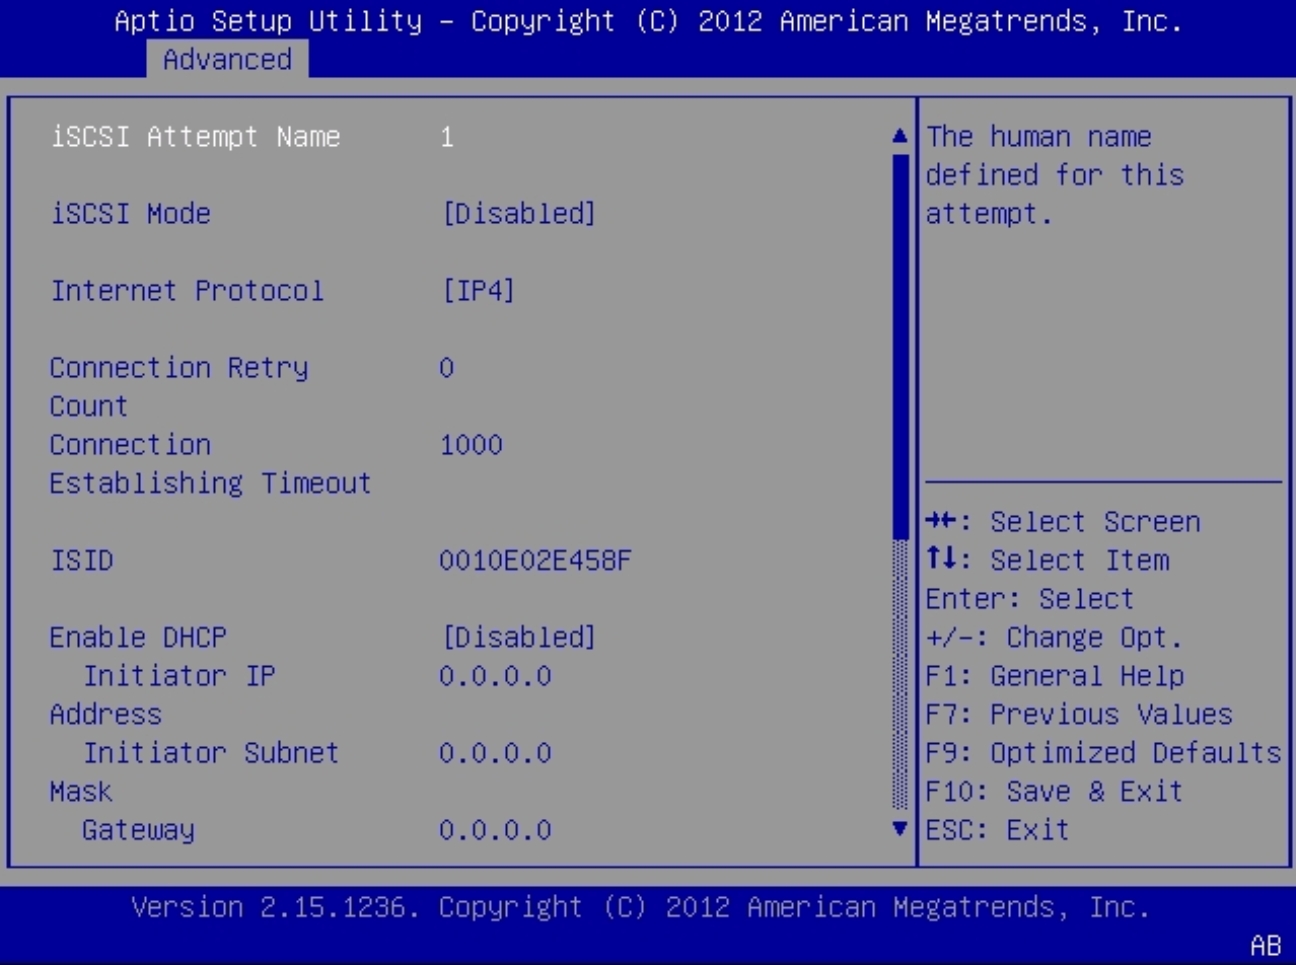
The port configuration screen appears.
-
Set the following values:
- Set the iSCSI mode to Enabled.
- Set the Internet Protocol to IPv4.
- Set the Connection Retry Count to 1.
-
Set the Enable DHCP value to Enabled or Disabled, as required.
Enabled is preferred.
If DHCP is enabled, the Initiator IP address, Initiator Subnet Mask, and Gateway settings are removed.
-
If you set DHCP to disabled:
- Type the Initiator IP address.
- Type the Initiator Subnet Mask.
- Type the Gateway.
Note - Use the same subnet.
-
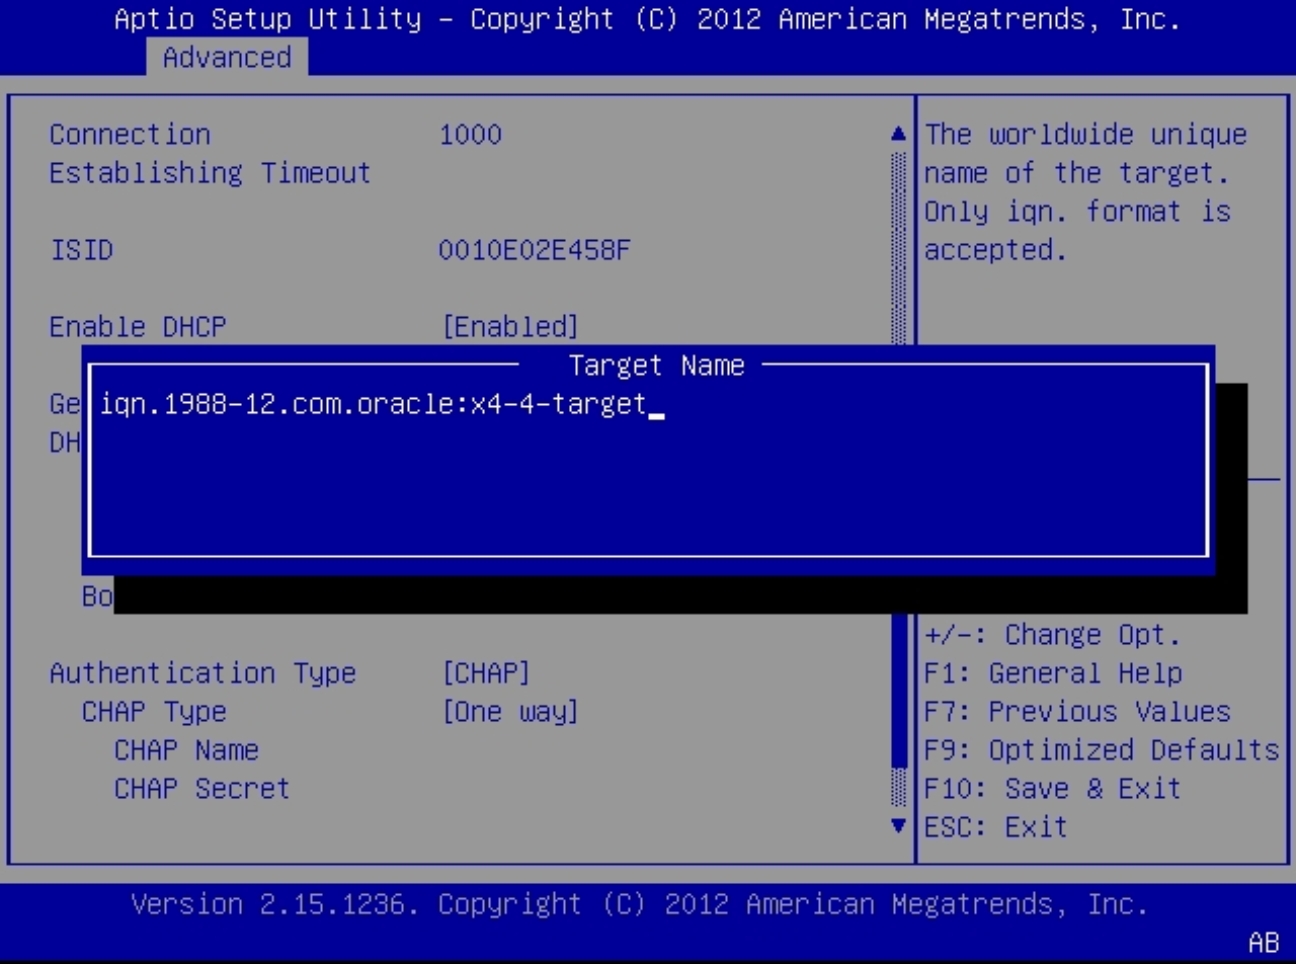
Set the Target Name.
-
Select Target Name.
The Target Name dialog box appears.
-
Type the iSCSI Qualified Name (iqn) of the target. For
example:
iqn.1988-12.com.oracle:platform-target
-
Select Target Name.
-
Set the iSCSI server IP address.
-
Select Target IP address.
The Target IP address dialog box appears.
-
Type the target IP address of the iSCSI server in dotted-decimal
notation, for example:
192.168.1.24.
-
Select Target IP address.
-
Set the Target port.
- Select Target port.
-
Type the target port of the iSCSI server, for example:
3260.
Note - When iSCSI is enabled on a network port, PXE is disabled for that port.
-
Set the Logical Unit Number.
-
Select Boot LUN.
The Boot LUN dialog box appears.
- Type the logical unit number. For example: 0
-
Select Boot LUN.
-
Verify that your settings match the iSCSI target information on the iSCSI
server.
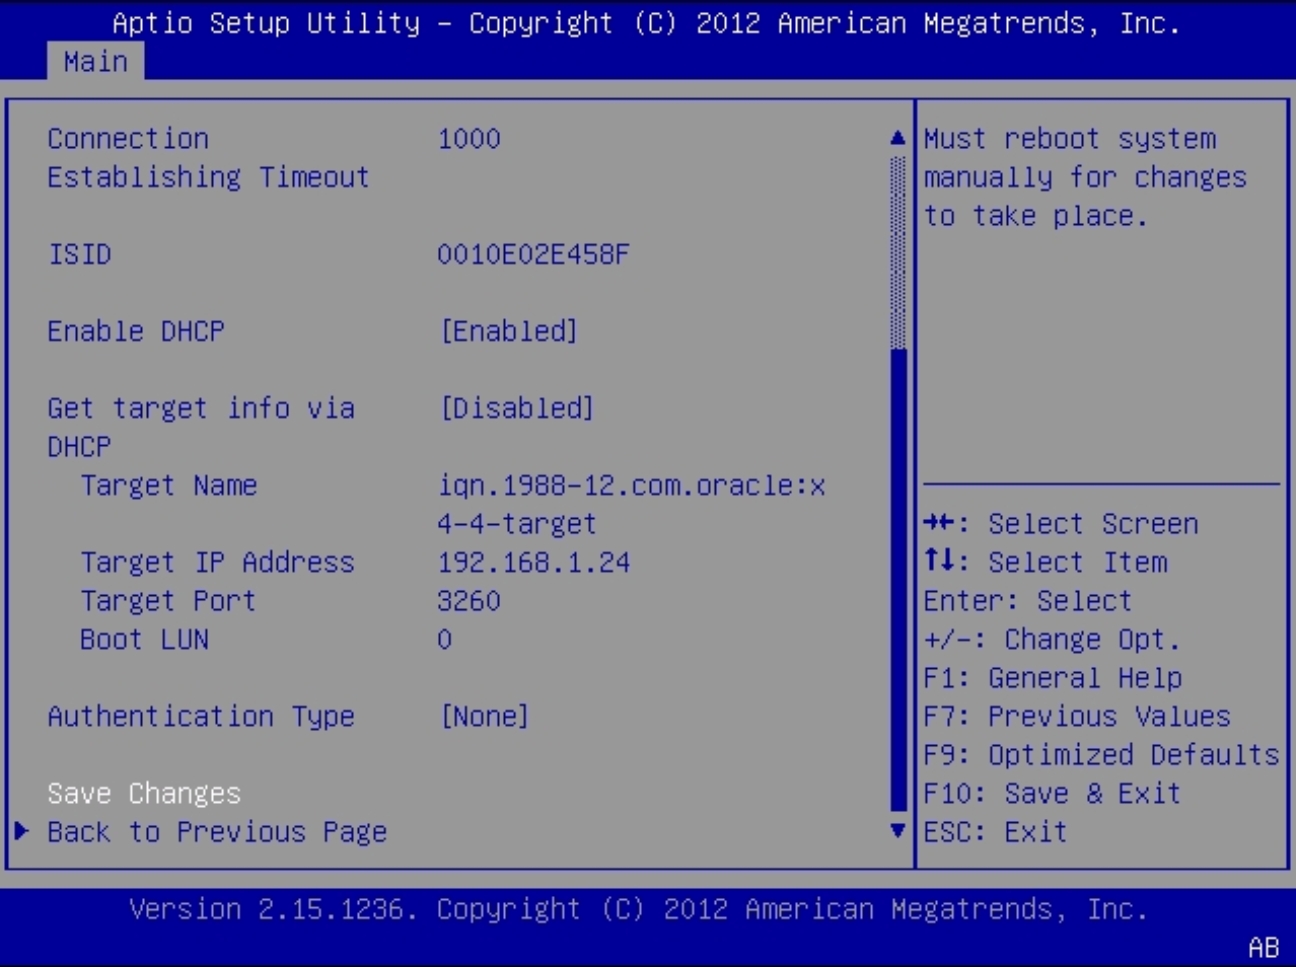
- Set the Authentication Type to CHAP or None.
- Save the changes and exit the BIOS Setup Utility.
- Restart the server.
-
Press the F8 key (or Ctrl+P from a serial connection) when prompted while
the BIOS is running the power-on self-test (POST) checkpoints.
The Please Select Boot Device dialog box appears.
- Verify that the iSCSI target entry appears in the boot list.
- For instructions on installing an operating system on an iSCSI drive, refer to the supported operating system installation documentation.
See Also