Modify iSCSI Virtual Drive Properties in Legacy BIOS Boot Mode (BIOS)
Before You Begin
-
You should be familiar with iSCSI theory of operation and with iSCSI server setup procedures.
-
Refer to the operating system documentation to verify that iSCSI targets can be mounted on a client.
-
Ensure that you have access to an external iSCSI server running on a supported operating system.
-
The server must be in Legacy BIOS Boot Mode, not UEFI Boot Mode. For servers in UEFI Boot Mode, use Modify iSCSI Virtual Drive Properties in UEFI Boot Mode (BIOS).
-
Provide iSCSI target parameters. The following table shows examples:
ItemExampleTarget nameiqn.1988-12.com.oracle:platform-targetiSCSI initiator nameiqn.1988-12.com.oracle:0010E02E458FNote - iSCSI requires iSCSI Qualified Names (iqn) formats for its initiator and target names.
Logical Unit NumberLUN 0IP address of iSCSI server192.167.1.24 (IPv4)Port number3260
-
Access the BIOS Setup Utility.
-
Boot the system.
Boot messages scroll across the console screen.
-
Press the F2 key (or Ctrl +E from a serial terminal) continuously.
The BIOS Setup Utility main screen appears.
-
Boot the system.
-
Select Advanced and then select Legacy iSCSI.
Note - If you do not see Legacy iSCSI on the Advanced menu, select the IO menu, and then select Legacy iSCSI.The Launch Legacy iSCSI window appears.
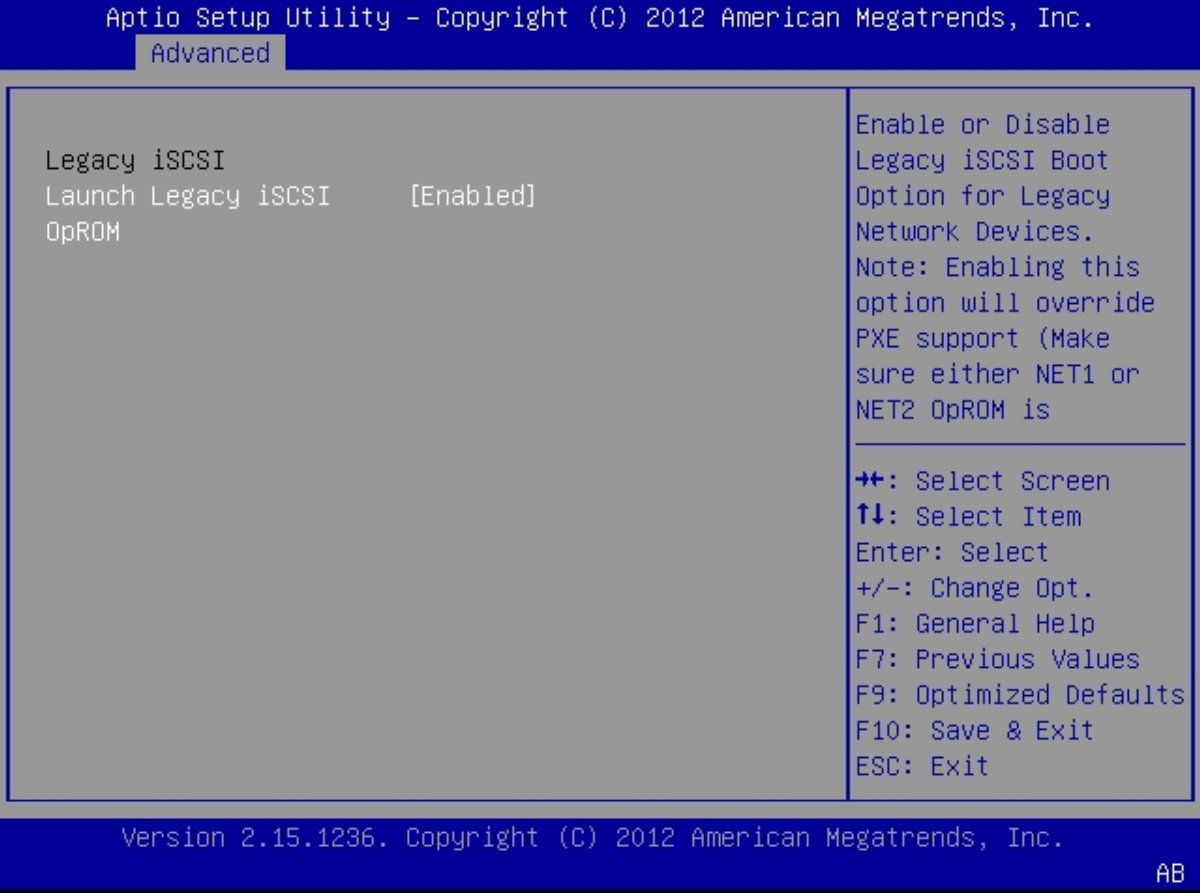
- Select Launch Legacy iSCSI OpROM, and then select Enabled.
-
Press F10.
The system boots. POST messages appear.
-
When the following messages appear, press Ctrl+D several times to access
the iSCSI option ROM.

The iSCSI Port Selection screen appears. The following figure shows an example.
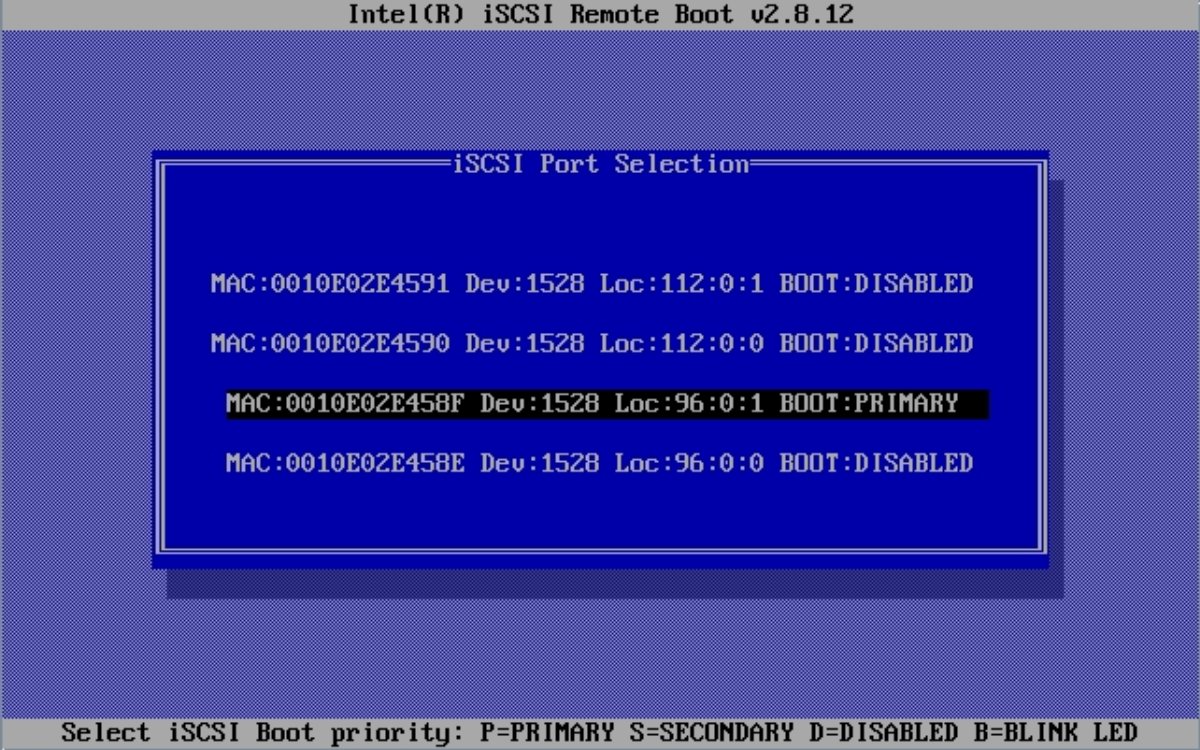
- Select the network adapter MAC address configured in the iSCSI server and Type "P" to change its state to Boot:PRIMARY.
-
Press Return to enter the network adapter MAC address for iSCSI
configuration.
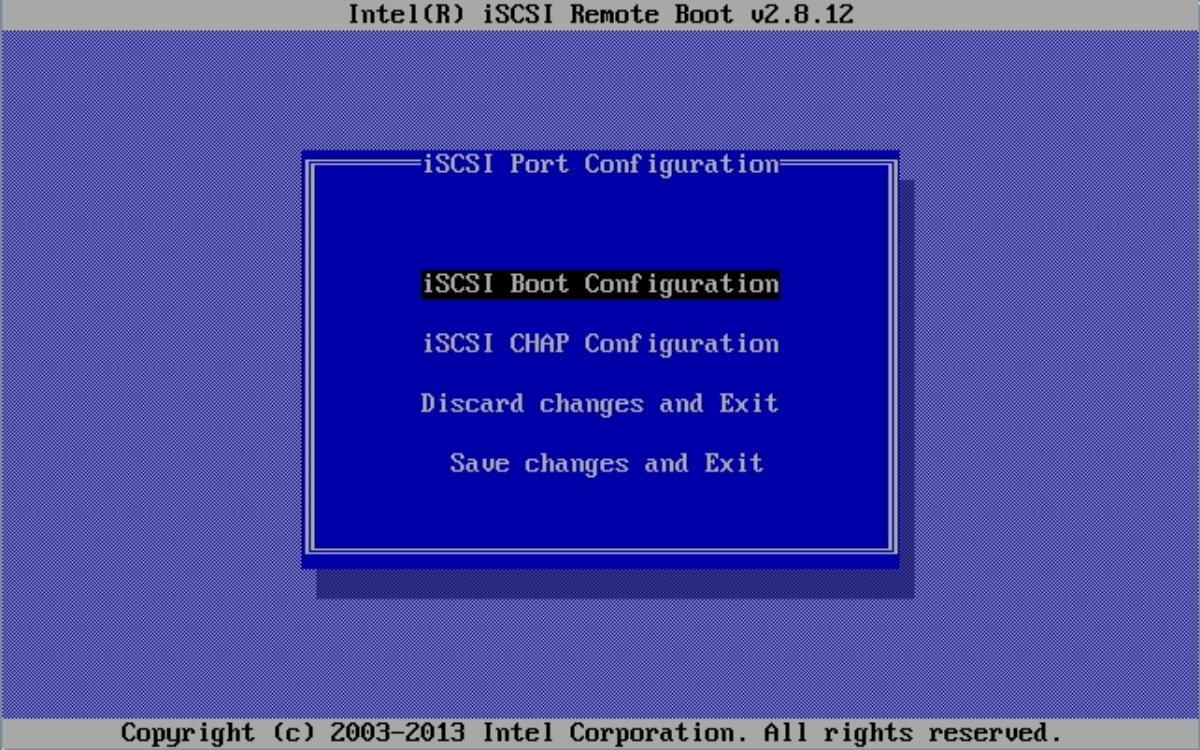
The iSCSI Port Configuration window appears.
-
Select iSCSI Boot Configuration.
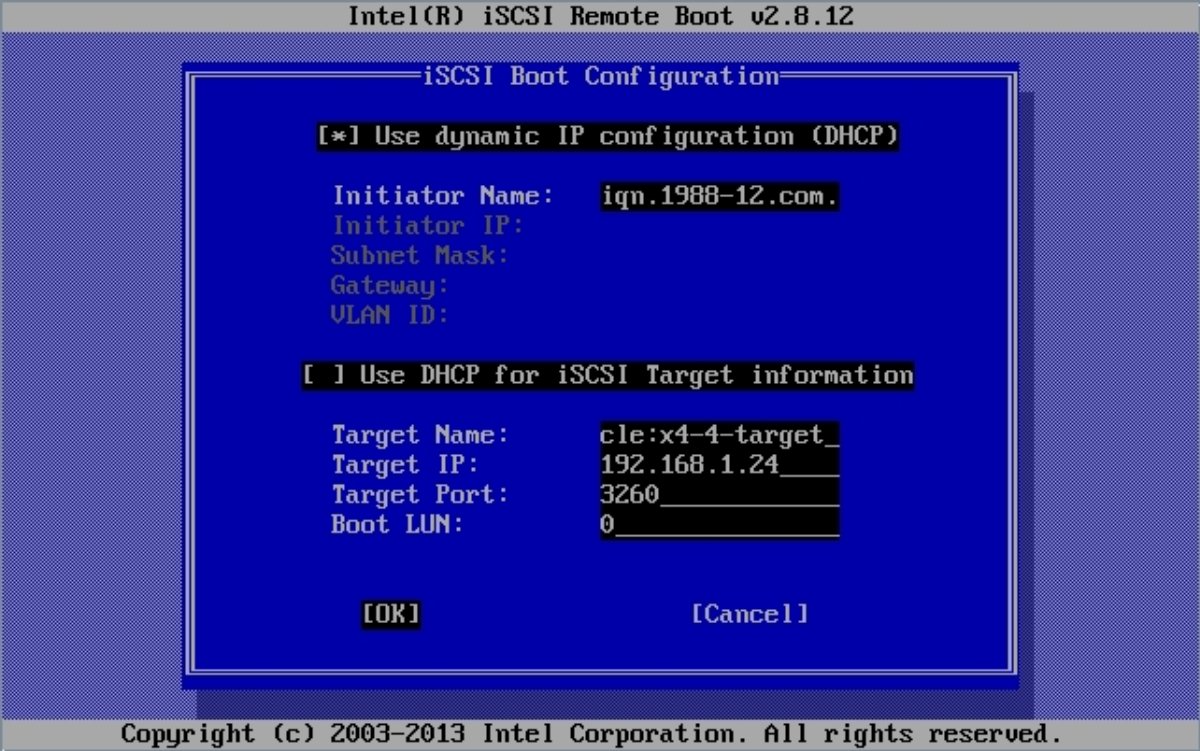
Note - If you do not see iSCSI boot configuration, select iSCSI Port Configuration instead.The iSCSI Boot Configuration window appears.
-
Do the following:
- Configure the initiator to use DHCP (or not) by selecting or deselecting Use dynamic IP Configuration (DHCP).
-
Type the initiator name in iSCSI Qualified Name (iqn) format. For
example:
iqn.1988-12.com.oracle:0010e02e458f
-
If the initiator is not going to use DHCP, fill in the other
network information.
If the initiator is going to use DHCP, these selections are unavailable.
-
Select Use DHCP for iSCSI Target information if you want DHCP to
provide the iSCSI target parameters.
Otherwise, fill in the Target IP, Target Port, and Boot LUN.
- Fill in the target name iSCSI Qualified Name (iqn) format.
- If the target is not going to use DHCP, fill in the Target IP, Target Port, and Boot LUN.
-
Select OK.
The iSCSI Port Configuration window appears.
-
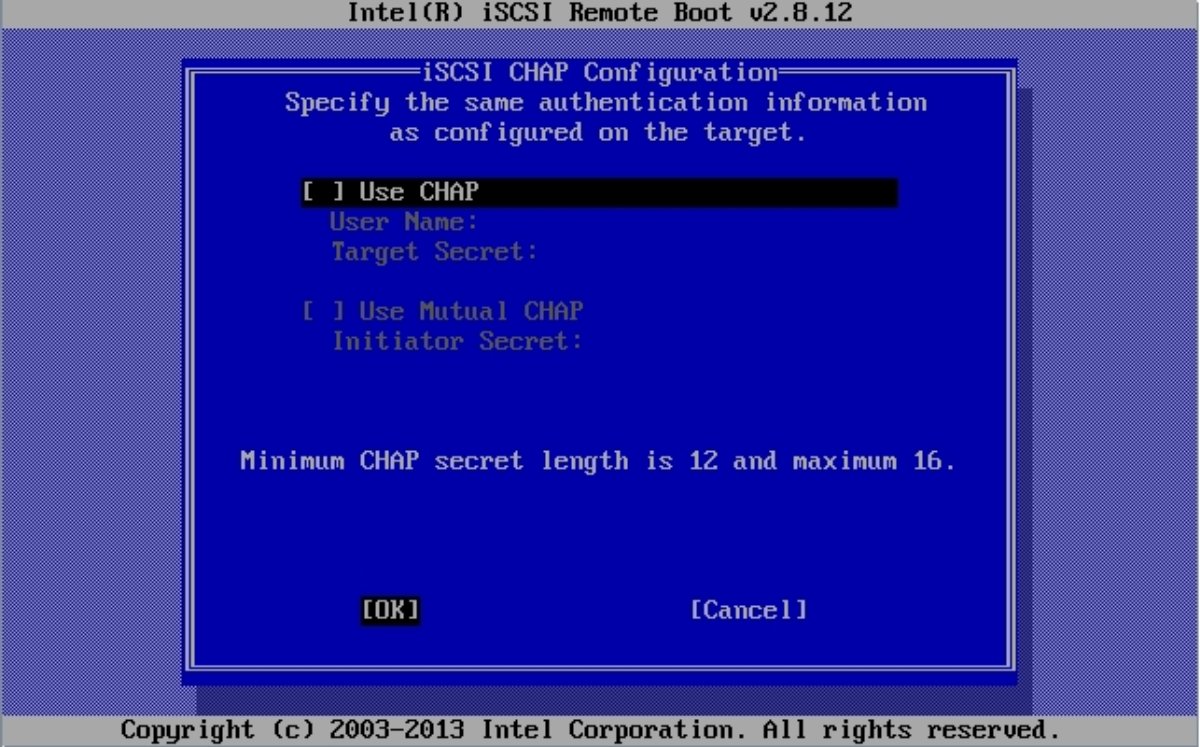
Select iSCSI CHAP Configuration.
The iSCSI CHAP Configuration window appears.
-
Enter the following items:
-
Select one of the CHAP options:
- If you use CHAP, fill in the User Name and Target Secret.
- If you use Mutual CHAP, fill in the Initiator Secret.
- Select Cancel if no CHAP service is available.
-
Select OK.
The iSCSI Port Configuration window appears.
-
Select one of the CHAP options:
- Select Save changes and Exit.
See Also