Install Expansion Racks
Use this procedure to add storage expansion racks to SuperCluster M8 or SuperCluster M7. Depending on the number of expansion racks and their distance from the SuperCluster rack, you might need to obtain longer cables than those internally installed in the SuperCluster rack.
- Position the expansion racks adjacent to SuperCluster.
- Connect the expansion rack
power cords to facility power and apply power.
This action enables the expansion racks to initialize while you perform the remaining installation steps. Refer to the Sun Rack II User's Guide. To locate this document, see Hardware Installation Documents.
-
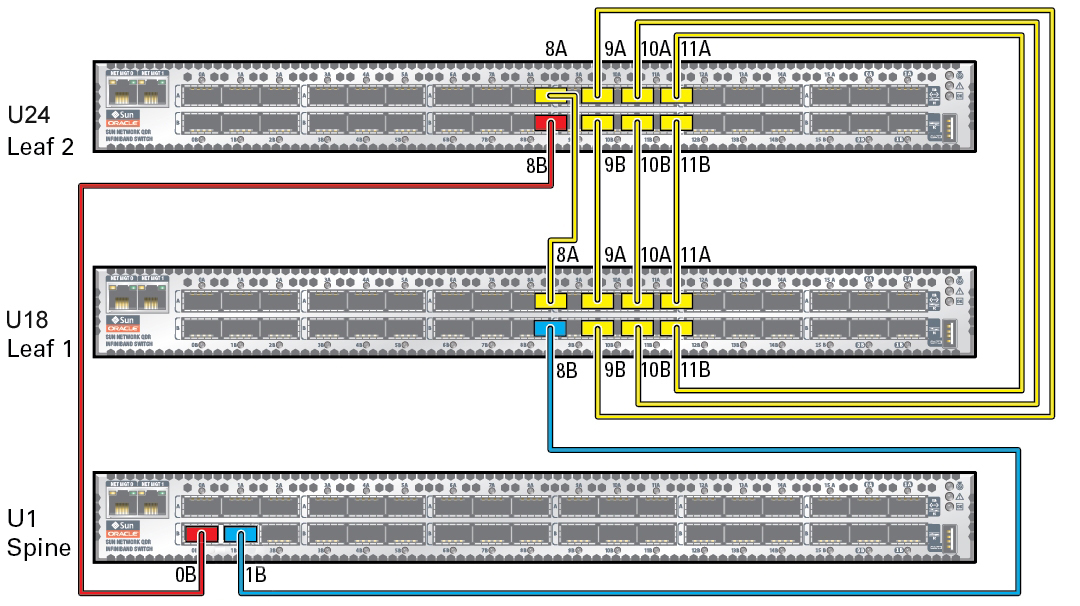
In the SuperCluster rack, disconnect the IB switch-to-switch cables.
Remove the seven existing inter-switch connections between each leaf switch, and the two connections between the leaf switches and the spine switch as shown in this diagram.

The disconnected ports are used to make connections to the IB switches in the racks.
- Cable the expansion racks
to the IB switches in SuperCluster and to each other.
Note - For SuperCluster M8, the leaf to leaf switches are factory installed with 1 meter cables. After removing the factory cables, use the 3 or 5 meter cables in the ship kit to cable expansion racks.Use one of these sections based on the number of expansion racks you are adding:
- Continue to the next installation step.