This section contains sample cartridge customizations that demonstrate how to use the various cartridge extension mechanisms to address different use cases.
The sample cartridges are intended to demonstrate the cartridge extension mechanisms and provide a model for your own cartridge customizations.
The sample code provided is written to be generic and easy to follow, rather than production-quality code. Oracle recommends that you follow a few best practices when working with the examples:
Set up a new instance of the Discover Electronics application to use as a sandbox for deploying the sample cartridges. This isolates the samples from the out-of-the-box configuration for Discover Electronics as well as your own application.
Within your sandbox application, create a separate Spring context file for the custom cartridge handlers described in this guide.
When copying and pasting examples from this guide, pay attention to the end-of-line marker (
¬) that indicates that a long line of text has been wrapped. Ensure that any occurrences of the symbol and the corresponding line break are deleted and any remaining space is closed up.
The steps described for creating and deploying the components of the sample cartridges correspond to the steps described in previous sections for the "Hello, World" cartridge. If you need additional information to complete a particular step in deploying one of the sample cartridges, refer to the more detailed procedures for the "Hello, World" example.
Oracle recommends that you use a test application to test the sample cartridges instead of deploying them in Discover Electronics or your own application.
Because a test application is for development use only, we do not need to deploy a live instance of the application.
To deploy a copy of Discover Electronics to use as a test for the sample cartridges:
Deploy a new test application using the Deployment Template.
Deploy a copy of the authoring instance of the Discover Electronics application.
Navigate to
%ENDECA_TOOLS_ROOT%\reference(on Windows) or$ENDECA_TOOLS_ROOT/reference(on UNIX).Make a copy of the directory
discover-electronics-authoringand save the copy with the namesandboxin the same parent directory.Navigate to the
testdirectory and then to theWEB-INFsubdirectory.Locate the
CARTRIDGE SUPPORTsection:<!-- ######################################################################## # CARTRIDGE SUPPORT # # The following section configures managers and other supporting objects. # -->In the
mdexResourcebean, update the Dgraph port:<bean id="mdexResource" scope="request" class="com.endeca.infront.navigation.model.MdexResource"> <property name="appName" value="${workbench.app.name}" /> <property name="host" value="localhost" /> <property name="port" value="15102" /> <property name="sslEnabled" value="${mdex.sslEnabled}" /> <property name="recordSpecName" value="common.id" /> </bean>Locate the
Content Sourcessection:<!-- ~~~~~~~~~~~~~~~~~~~~~~~~~~~~~~~~~~~~~~~~~~~~~~~~~~~~~~~~~~~~~~~~~~~~~~ ~ Content Sources -->
In the
ContentSourcebean, update the application name:<bean id="ContentSource"" class="com.endeca.infront.content.source.WorkbenchContentSource" scope="singleton" init-method="init" destroy-method="destroy"> <property name="storeFactory" ref="storeFactory"/> <property name="defaultSiteRootPath" ref="defaultSiteRootPath" /> <property name="appName" value="${workbench.app.name}"/> <property name="siteManager" ref="siteManager"/> </bean>In the
authoringMediaSourcesbean, update the application name:<bean id="authoringMediaSources" class="java.util.ArrayList" lazy-init="true"> <constructor-arg> <list> <bean class="com.endeca.infront.cartridge.model.MediaSourceConfig"> <property name="sourceName" value="IFCRSource" /> <property name="sourceValue" value="http://localhost:8006/ifcr/sites/Test/media/" /> </bean> <bean class="com.endeca.infront.cartridge.model.MediaSourceConfig"> <property name="sourceName" value="default" /> <property name="sourceValue" value="http://localhost:8006/ifcr/sites/Test/media/" /> </bean> </list> </constructor-arg> </bean>Navigate to
%ENDECA_TOOLS_CONF%\conf\Standalone\localhost(on Windows) or$ENDECA_TOOLS_CONF/conf/Standalone/localhost(on UNIX).Make a copy of
discover-authoring.xmland save the copy with the nametestin the same directory.Change the value of
docBaseas follows:docBase="${catalina.base}/../../reference/test"
Validate your new sandbox application:
Navigate to
http://<WorkbenchHost>:8006/loginand verify thatTestdisplays as an option in the Application drop-down.Select the
Testapplication and verify that the sample page content from Discover Electronics is available in Experience Manager.In a separate browser window, navigate to the newly deployed sandbox application, at
http://<WorkbenchHost>:8006/testand verify that it displays.
Optionally, update the Workbench configuration to use the test Web application for preview.
Oracle recommends that you specify the configuration for the sample cartridges in a separate Spring context file from the core cartridges.
To create a Spring context file for the sample cartridges:
Navigate to
%ENDECA_TOOLS_ROOT%\reference\sandbox\WEB-INF(on Windows) or$ENDECA_TOOLS_ROOT/reference/sandbox/WEB-INF(on UNIX).At the top of the file, add the following
import:<beans xmlns="http://www.springframework.org/schema/beans" xmlns:xsi="http://www.w3.org/2001/XMLSchema-instance" xsi:schemaLocation=" http://www.springframework.org/schema/beans http://www.springframework.org/schema/beans/spring-beans-3.0.xsd "> <bean class="org.springframework.beans.factory.config.PropertyPlaceholderConfigurer"> <property name="locations"> <list> <value>WEB-INF/assembler.properties</value> </list> </property> </bean> <import resource="endeca-url-config.xml"/> <import resource="perf-logging-config.xml"/> <import resource="sample-cartridge-config.xml" />Delete the configuration for the "Hello, World" sample cartridge that we added in an earlier example.
<!-- ~~~~~~~~~~~~~~~~~~~~~~~~~~~~~~~~~~~~~~~~~~~~~~~~~~~~~~~~~~ ~ BEAN: CartridgeHandler_Hello --> <bean id="CartridgeHandler_Hello" class="com.endeca.sample.cartridges.UppercaseCartridgeHandler" scope="prototype" />Create a new file named
sample-cartridge-config.xmlin the same directory with the following contents:<beans xmlns="http://www.springframework.org/schema/beans" xmlns:xsi="http://www.w3.org/2001/XMLSchema-instance" xsi:schemaLocation="http://www.springframework.org/schema/beans http://www.springframework.org/schema/beans/spring-beans-2.5.xsd"> <!-- ~~~~~~~~~~~~~~~~~~~~~~~~~~~~~~~~~~~~~~~~~~~~~~~~~~~~~~~~~~ ~ BEAN: CartridgeHandler_Hello --> <bean id="CartridgeHandler_Hello" class="com.endeca.sample.cartridges.UppercaseCartridgeHandler" scope="prototype" /> </beans>Validate the new configuration by adding the "Hello, World" cartridge to your new sandbox application.
Copy the "Hello, World" directory and its contents (
HelloWorld\) from the Discover Electronics application (<APP-DIR>\config\cartridge_templates) to the sandbox application.Upload the template to Workbench using the
set_templatesscript.Using Experience Manager, add the cartridge to the default page of the sandbox application and save your changes.
Verify that the
Hello.jsprenderer andUppercaseCartridgeHandlerare present in the sandbox Web application. (These should have been included when you copied the Discover Electronics authoring application.)Refresh the sandbox application (
http://<WorkbenchHost>:8006/sandbox) and verify that the text you entered in Experience Manager displays, and has been converted to all-uppercase letters.
In this example, we build a cartridge that displays items from an RSS feed.
This cartridge enables a business user to specify some basic information about an existing RSS feed in Experience Manager. The cartridge handler fetches the RSS results and returns an output model to the client suitable for rendering.
It demonstrates the following use cases:
In this cartridge, we create the following components:
|
Component |
Description |
|---|---|
|
cartridge template |
Enables the business user to specify the URL to an RSS feed and the number of entries to display. |
|
cartridge handler |
Fetches results from the RSS feed and returns a number of entries up to the value specified by the business user or the number of entries in the feed, whichever is lower. |
|
cartridge renderer |
Displays the name of the feed with a link to the channel URL, and the title and description of each entry with a link to the entry on the original site. |
The business user needs to be able to configure the RSS Feed with a URL and the number of entries to display.
To create the RSS Feed template and add it to your application:
Create a new template based on the example below.
Since the number of entries is expected to be an integer, the example uses a
NumericStepperEditorfor this property. In the example, we specify a default value of5for the number of entries.Create a directory with the name
RssFeedin the templates directory of your application.Save the template with the name
_.jsonto theRssFeeddirectory of your application.Add the cartridge to the default search and navigation page.
Note
The sample renderer for this cartridge works best with RSS feeds that have brief descriptions with no images or advertisements in the description field. A possible enhancement to this cartridge would be to make displaying the description configurable.
The cartridge instance configuration is saved as JSON. At this point, because there is no cartridge handler specified for this cartridge, the same configuration is passed to the client as the response from the Assembler.
The following shows the sample template for the RSS Feed cartridge:
{
   "ecr:type": "template",
   "@group": "SecondaryContent",
   "@description":"A cartridge that displays entries from an RSS feed.",
   "@thumbnailUrl":"/ifcr/tools/xmgr/img/template_thumbnails/sidebar_content.jpg",
   "defaultContentItem":{
      "@name":"RSS cartridge",
      "feedUrl": "",
      "numEntries": "5"
   },
   "editorPanel":{
      "editor":"editors/DefaultEditorPanel",
      "children":[
         {
            "editor": "GroupLabel",
            "label": "${group.contents.label}"
            },
         {
            "editor":"editors/StringEditor",
            "label":"Feed URL",
            "propertyName":"feedUrl",
            "bootomLabel":"The address of the RSS feed, such as http://www.oracle.com/us/corporate/press/rss/rss-pr.xml"
         },
         {
            "editor":"editors/NumericStepperEditor",
            "label":"Number of entries to display",
            "minValue":1,
            "maxValue":15,
            "propertyName":"numEntries"
         }
      ]
   },
    "typeInfo": {
        "feedUrl": {"@propertyType": "String"},
        "numEntries": {"@propertyType": "String"}
    }
}
The cartridge handler fetches the RSS results and returns an output model to the client suitable for rendering.
To create the RSS Feed cartridge handler and add it to the application:
Create a new Java class in the package
com.endeca.sample.cartridgesbased on the example below, which extendsAbstractCartridgeHandler.Compile the cartridge handler and add the compiled class to your application.
Configure the Assembler to use the
RssFeedHandlerfor the RSS Feed cartridge by adding the following to the Spring context file:<!-- ~~~~~~~~~~~~~~~~~~~~~~~~~~~~~~~~~~~~~~~~~~~~~~~~~~~~~~~~~~ ~ BEAN: CartridgeHandler_RssFeed --> <bean id="CartridgeHandler_RssFeed" class="com.endeca.sample.cartridges.RssFeedHandler" scope="prototype" />
The RSS feed does yet appear because we have not created the renderer. Nevertheless, you can validate that the response model has been populated with the information that we want to display in the JSON view:
{

    "@type": "RssFeed",
    "name": "RSS cartridge",
    "feedUrl": "http://www.wired.com/reviews/feed/",
    "numEntries": "5",
    "chanTitle": "Product Reviews",
    "chanUrl": "http://www.wired.com/reviews",
    "entries": [
        {
            "@type": "rssEntry",
            "itemDesc": "(description text omitted from this example)",
            "itemTitle": "(title text omitted from this example)",
            "itemUrl": "(url omitted from this example)"
        },
        {
            "@type": "rssEntry",
            "itemDesc": "(description text omitted from this example)",
            "itemTitle": "(title text omitted from this example)",
            "itemUrl": "(url omitted from this example)"
        },
        {
            "@type": "rssEntry",
            "itemDesc": "(description text omitted from this example)",
            "itemTitle": "(title text omitted from this example)",
            "itemUrl": "(url omitted from this example)"
        },
        {
            "@type": "rssEntry",
            "itemDesc": "(description text omitted from this example)",
            "itemTitle": "(title text omitted from this example)",
            "itemUrl": "(url omitted from this example)"
        },
        {
            "@type": "rssEntry",
            "itemDesc": "(description text omitted from this example)",
            "itemTitle": "(title text omitted from this example)",
            "itemUrl": "(url omitted from this example)"
        }
    ]

}
The following shows the code for the sample RSS Feed cartridge handler:
package com.endeca.sample.cartridges;

import com.endeca.infront.assembler.AbstractCartridgeHandler;
import com.endeca.infront.assembler.CartridgeHandlerException;
import com.endeca.infront.assembler.ContentItem;
import com.endeca.infront.assembler.BasicContentItem;
import java.net.URL;
import java.util.ArrayList;
import javax.xml.parsers.DocumentBuilderFactory;
import javax.xml.parsers.DocumentBuilder;
import org.w3c.dom.CharacterData;
import org.w3c.dom.Document;
import org.w3c.dom.Element;
import org.w3c.dom.NodeList;
import org.w3c.dom.Node;

public class RssFeedHandler extends AbstractCartridgeHandler {

	public ContentItem process(ContentItem pContentItem)
			throws CartridgeHandlerException {

		final String urlString = (String) pContentItem.get("feedUrl");
		final int numEntries =
    Integer.parseInt((String)pContentItem.get("numEntries"));

		try {
			URL url = new URL(urlString);
			DocumentBuilderFactory factory = DocumentBuilderFactory.newInstance();
			DocumentBuilder docBuilder = factory.newDocumentBuilder();
			Document RssContents = docBuilder.parse(url.openStream());

			// get the channel info
			Element channel =
    (Element)RssContents.getElementsByTagName("channel").item(0);
			pContentItem.put("chanTitle", getElementValue(channel, "title"));
			pContentItem.put("chanUrl", getElementValue(channel, "link"));

			// get the entries and add them to a list
			ArrayList<ContentItem> entries = new ArrayList<ContentItem>(numEntries);
			NodeList nodes = RssContents.getElementsByTagName("item");
			for(int i=0; i<numEntries; i++) {
				Element element = (Element)nodes.item(i);
				if (element!=null) {
					ContentItem entry = new BasicContentItem("rssEntry");
					entry.put("itemTitle", getElementValue(element, "title"));
					entry.put("itemUrl", getElementValue(element, "link"));
					entry.put("itemDesc", getElementValue(element, "description"));
					entries.add(entry);
				}
			}
			pContentItem.put("entries", entries);
		}
		catch (Exception e) {
			throw new CartridgeHandlerException(e);
		}

		return pContentItem;
	}

	private static String getCharacterDataFromElement(Element e) {
		try {
			Node child = e.getFirstChild();
			if(child instanceof CharacterData) {
				CharacterData cd = (CharacterData) child;
				return cd.getData();
			}
		}
		catch(Exception ex) {
		}
		return "";
	}

	private static String getElementValue(Element parent, String label) {
		return getCharacterDataFromElement(
    (Element)parent.getElementsByTagName(label).item(0));
	}

}The renderer displays a summary of the results with links that take the site visitor to the site that originated the RSS feed.
To create a renderer for the RSS feed:
The results from the RSS feed display in the right sidebar.
The following shows the code for the sample RSS Feed renderer in JSP:
<%@page language="java" pageEncoding="UTF-8"
contentType="text/html;charset=UTF-8"%>

<%@include file="/WEB-INF/views/include.jsp"%>

<div style="padding:2ex 0">
<b><a href="${component.chanUrl}">${component.chanTitle}</a></b>
<c:forEach var="rssEntry" items="${component.entries}">
    <p><a href="${rssEntry.itemUrl}">${rssEntry.itemTitle}</a><br/>
    ${rssEntry.itemDesc}</p>
</c:forEach>
</div>In this example, we extend the Record Details cartridge to display information about the availability of a product.
It demonstrates the following use cases:
In this cartridge, we create the following components:
|
Component |
Description |
|---|---|
|
cartridge handler |
Extends the
|
|
mock "availability service" |
Stands in for a real source of availability information such as an inventory system. |
Because this cartridge does not introduce any change in the configuration options for the business user, there are no template changes for this cartridge. To enable the full functionality of this cartridge, the renderer should be updated to display the availability information, however that is not demonstrated in this guide.
The
AvailabilityRecordDetailsHandler extends the core
RecordDetailsHandler to call a simple mock availability
service to retrieve availability information about a particular record.
To create a cartridge handler that calls an availability service:
Create the following classes:
Availability,AvailabilityService, andFixedAvailabilityServicebased on the examples below.The
AvailabilityServicedefines an interface that returns availability information based on a record identifier, andFixedAvailabilityServiceprovides a basic implementation of the interface.Create a new Java class in the package
com.endeca.sample.cartridgesbased on the example below, which extendsRecordDetailsHandler.The handler takes the results of the MDEX Engine query and adds an additional property that represents the product availability.
Configure the Assembler to use the
AvailabilityRecordDetailsHandlerfor the Record Details cartridge by editing the Spring context file as in the following example.Note
If you have created a
sample-cartridge-config.xmlfile for configuring the example cartridges, copy theCartridgeHandler_ResultsListbean fromassembler-context.xmlto your sample context file, comment out the version inassembler-context.xml, and then modify the version in your sample context file as indicated below.<bean id="CartridgeHandler_RecordDetails" class="com.endeca.sample.cartridges.AvailabilityRecordDetailsHandler" parent="NavigationCartridgeHandler" scope="prototype" > <property name="recordState" ref="recordState" /> <property name="availabilityService" ref="availabilityService" /> <property name="recordSpec" value="common.id" /> <property name="availabilityPropertyName" value="product.availability" /> </bean> <bean id="availabilityService" class="com.endeca.sample.cartridges.FixedAvailabilityService" scope="singleton" > <!-- Implementation-specific configuration for the service could be specified here --> </bean>Refresh the application and then click on any record to view its details page.
The availability property is now returned as part of the record details information:
{
    "@type": "RecordDetailsPageSlot",
    "name": "Record Details Page",
    "contentCollection": "Record Details Pages",
    "ruleLimit": "1",
    "contents": [
        {
            …
            },
            "recordDetails": {
                "@type": "RecordDetails",
                "record": {
                   "@class": "com.endeca.infront.cartridge.model.Record",
                   "numRecords": 1,
                   "attributes": {
                        …
                        "product.availability": [
                            "BACKORDER"
                        ],
                        …
                   },
                   "records": [ … ]
                },
                "name": "Record Details"
            }
        }
    ],
    …
}
The renderer can now be updated to display availability information based on the value of this property.
The following shows the code for the availability service and its supporting classes:
package com.endeca.sample.cartridges;

public enum Availability {
    IMMEDIATE,
    WEEK,
    DROP_SHIP,
    BACKORDER;

}
package com.endeca.sample.cartridges;
public interface AvailabilityService {
Availability getAvailabilityFor(String identifier);
}package com.endeca.sample.cartridges;
public class FixedAvailabilityService implements AvailabilityService {
public Availability getAvailabilityFor(String identifier) {
try {
return Availability.valueOf(identifier);
} catch (IllegalArgumentException e) {
return Availability.BACKORDER;
}
}
}The following shows the code for the custom cartridge handler:
package com.endeca.sample.cartridges;

import com.endeca.infront.assembler.CartridgeHandlerException;
import com.endeca.infront.cartridge.RecordDetails;
import com.endeca.infront.cartridge.RecordDetailsConfig;
import com.endeca.infront.cartridge.RecordDetailsHandler;
import com.endeca.infront.cartridge.model.Attribute;
import org.springframework.beans.factory.annotation.Required;

public class AvailabilityRecordDetailsHandler extends RecordDetailsHandler {

    private AvailabilityService availabilityService;
    private String recordSpec;
    private String availabilityPropertyName;

    @Required
    public void setAvailabilityService(
      AvailabilityService availabilityService_) {
        availabilityService = availabilityService_;
    }

    @Required
    public void setRecordSpec(String recordSpec_) {
        recordSpec = recordSpec_;
    }

    @Required
    public void setAvailabilityPropertyName(
      String availabilityPropertyName_) {
        availabilityPropertyName = availabilityPropertyName_;
    }

    @Override
    public RecordDetails process(RecordDetailsConfig detailsConfig)
      throws CartridgeHandlerException {
        RecordDetails details = super.process(detailsConfig);
        if (null == details) return null;
        Attribute attr =
          details.getRecord().getAttributes().get(recordSpec);
        if (null == attr || 1 != attr.size()) {
            throw new CartridgeHandlerException("No record spec
              available on record, or spec is multiassign");
        }
        Attribute<Availability> availability =
          new Attribute<Availability>();
        availability.add(
          availabilityService.getAvailabilityFor(attr.toString()));
        details.getRecord().getAttributes().put(availabilityPropertyName,
          availability);
        return details;
    }

}
In this example, we extend the Results List cartridge to boost certain products based on information from a recommendation engine.
It demonstrates the following use cases:
In this cartridge, we create the following components:
|
Component |
Description |
|---|---|
|
cartridge handler |
Extends the
|
|
mock recommendations service |
Stands in for a real source of recommendations. |
Because this cartridge does not introduce any change in the configuration options for the business user, there are no template changes for this cartridge. Additionally, the response model for the customized cartridge is the same as the default Results List (only with the records in a different order), so there is no need for changes to the default renderer.
The
RecommendationsResultsListHandler extends the core
ResultsListHandler to call a simple mock recommendations
service and boosts the recommended products.
To create a cartridge handler that boosts recommended records:
Create the interface
RecommendationServiceand the concrete implementationTestRecommendationServicebased on the examples below.As a proof of concept, the recommendations service always returns the same recommendations from the Discover Electronics data set.
Create a new Java class in the package
com.endeca.sample.cartridgesbased on the example below, which extendsResultsListHandler.The handler retrieves a list of recommended records from the service and adds them to a boost stratum for the MDEX Engine query. If the records are present in the results set, they are boosted to the top of the results list.
Configure the Assembler to use the
RecommendationsResultsListHandlerfor the Results List cartridge by editing the Spring context file as follows:Note
If you have created a
sample-cartridge-config.xmlfile for configuring the example cartridges, copy theCartridgeHandler_ResultsListbean fromassembler-context.xmlto your sample context file, comment out the version inassembler-context.xml, and then modify the version in your sample context file as indicated below.<bean id="CartridgeHandler_ResultsList" class="com.endeca.sample.cartridges.RecommendationsResultsListHandler" parent="NavigationCartridgeHandler" scope="prototype"> <property name="contentItemInitializer"> <!-- additional elements omitted from this example --> </property> <property name="sortOptions"> <!-- additional elements omitted from this example --> </property> <property name="recommendationService" ref="recommendationService" /> <property name="recordSpec" value="common.id"/> </bean> <bean id="recommendationService" class="com.endeca.sample.cartridges.TestRecommendationService" scope="singleton" > <!-- Implementation-specific configuration for the service could be specified here --> </bean>
The recommended records are boosted to the top of the results.
The following shows the code for the recommendations service interface and concrete implementation:
package com.endeca.sample.cartridges;

import java.util.List;

public interface RecommendationService {
    public List<String> getRecommendedProductIds();
}
package com.endeca.sample.cartridges;
import java.util.Arrays;
import java.util.List;
public class TestRecommendationService
implements RecommendationService {
public static final List<String> IDS =
Arrays.asList("5891932", "6001963", "1438066", "1581692",
"2708142", "1235424", "3422480");
public List<String> getRecommendedProductIds() {
return IDS;
}
}The following shows the code for the custom cartridge handler:
package com.endeca.sample.cartridges;

import java.util.ArrayList;
import java.util.List;

import com.endeca.infront.assembler.CartridgeHandlerException;
import com.endeca.infront.cartridge.ResultsListConfig;
import com.endeca.infront.cartridge.ResultsListHandler;
import com.endeca.infront.navigation.model.CollectionFilter;
import com.endeca.infront.navigation.model.PropertyFilter;

public class RecommendationsResultsListHandler extends ResultsListHandler {
    private RecommendationService recommendationService;
    private String recordSpec;

    public String getRecordSpec() {
        return recordSpec;
    }

    public void setRecordSpec(String recordSpec_) {
        this.recordSpec = recordSpec_;
    }

    public void setRecommendationService(
      RecommendationService recommendationService_) {
        recommendationService = recommendationService_;
    }

    /**
     * This cartridge will get the list of recommended products
     * (by record spec) and explicitly boost each one of them using
     * a PropertyFilter.
     */
    @Override
    public void preprocess(ResultsListConfig pContentItem)
      throws CartridgeHandlerException {
        List<String> ids =
          recommendationService.getRecommendedProductIds();
        List<CollectionFilter> boostFilters =
          new ArrayList<CollectionFilter>(
                ids.size());
        for (String s : ids) {
            boostFilters.add(new CollectionFilter(new PropertyFilter(
                    recordSpec, s)));
        }

        pContentItem.setBoostStrata(boostFilters);
        super.preprocess(pContentItem);
    }

}In this example, we extend the "Hello, World" example cartridge to demonstrate the layering of configuration from several sources.
In this scenario, we can define a default color for the message in our "Hello, World" cartridge, which the business user can override on a per-instance basis in Experience Manager. The site visitor can also select a preferred color from the client application.
It demonstrates the following use cases:
In this cartridge, we create the following components:
|
Component |
Description |
|---|---|
|
cartridge handler |
Uses the
|
|
cartridge configuration bean |
Provides a means of specifying default values for this cartridge via Spring. |
|
cartridge renderer |
Provides a drop-down list from which the site visitor can choose a color for the message. |
Because this cartridge does not introduce any change in the configuration options for the business user, there are no template changes for this cartridge.
The cartridge handler combines the various sources of
configuration for message color using the
ConfigInitializer and
RequestParamMarshaller helper classes.
To create the "Hello, World" cartridge handler with color configuration and add it to the application:
Create a new Java class in the package
com.endeca.sample.cartridgesbased on the example below, which extendsAbstractCartridgeHandler.Create a configuration bean for this cartridge based on the example below. This enables us to define default values for the cartridge properties in the Spring context file.
Compile the cartridge handler and configuration bean and add them to your application.
Configure the Assembler to use the
ColorConfigHandlerfor the "Hello, World" cartridge by editing the Spring context file as follows:<bean id="CartridgeHandler_Hello" class="com.endeca.sample.cartridges.ColorConfigHandler" scope="prototype"> <property name="contentItemInitializer"> <bean class="com.endeca.infront.cartridge.ConfigInitializer" scope="singleton"> <property name="defaults"> <bean class="com.endeca.sample.cartridges.ColorConfig" scope="singleton"> <property name="messageColor" value="#FF6600"/> </bean> </property> <property name="requestParamMarshaller"> <bean class="com.endeca.infront.cartridge.RequestParamMarshaller" scope="singleton"> <property name="httpServletRequest" ref="httpServletRequest"/> <property name="requestMap"> <map> <entry key="color" value="messageColor"/> </map> </property> </bean> </property> </bean> </property> <property name="colorOptions"> <map> <entry key="Red" value="#FF0000"/> <entry key="Green" value="#00FF00"/> <entry key="Blue" value="#0000FF"/> <entry key="Black" value="#000000"/> </map> </property> </bean>
The color options do not display yet because we have not updated the renderer, but you can validate that the response model has been populated with the information that we want the renderer to use in the JSON view:
{

    "@type": "Hello",
    "name": "Hello cartridge",
    "message": "Hello, color world!",
    "messageColor": "#0000FF",
    "colorOptions": [
        {
            "@type": "colorOption",
            "hexCode": "#FF0000",
            "label": "Red"
        },
        {
            "@type": "colorOption",
            "hexCode": "#00FF00",
            "label": "Green"
        },
        {
            "@type": "colorOption",
            "hexCode": "#0000FF",
            "label": "Blue"
        },
        {
            "@type": "colorOption",
            "hexCode": "#000000",
            "label": "Black"
        }
    ]

}
The following shows the code for the sample "Hello, World" cartridge handler with color configuration:
package com.endeca.sample.cartridges;

import com.endeca.infront.assembler.AbstractCartridgeHandler;
import com.endeca.infront.assembler.CartridgeHandlerException;
import com.endeca.infront.assembler.ContentItem;
import com.endeca.infront.assembler.BasicContentItem;
import com.endeca.infront.assembler.ContentItemInitializer;
import com.endeca.sample.cartridges.ColorConfig;
import java.util.ArrayList;
import java.util.Map;

public class ColorConfigHandler extends AbstractCartridgeHandler {

	private ContentItemInitializer mInitializer;
	private Map<String, String> mColorOptions;

  public void setContentItemInitializer(ContentItemInitializer initializer) {
    mInitializer = initializer;
  }

  public void setColorOptions(Map<String, String> colorOptions) {
  	 mColorOptions = colorOptions;
  }

  /**
   * Returns the merged configuration based on Spring defaults,
   * Experience Manager configuration, and request parameters
   */
  @Override
  public ContentItem initialize(ContentItem pContentItem) {
    // If any configuration from Experience Manager is empty, remove
    // that property so we can use the default value
    for (String key: pContentItem.keySet()) {
      if (((String)pContentItem.get(key)).isEmpty())
        pContentItem.remove(key);
    }
      return mInitializer == null ? new ColorConfig(pContentItem) :
        mInitializer.initialize(pContentItem);
    }

  /**
   * Returns the merged configuration and information about the color options
   * available to the site visitor.
   */
  @Override
  public ContentItem process(ContentItem pContentItem)
    throws CartridgeHandlerException {
    int numColors = mColorOptions.size();
    ArrayList<ContentItem> colors =
      new ArrayList<ContentItem>(numColors);
    if (mColorOptions != null && !mColorOptions.isEmpty()) {
      for (String key: mColorOptions.keySet()) {
        ContentItem color = new BasicContentItem("colorOption");
        color.put("label", key);
        color.put("hexCode", mColorOptions.get(key));
        colors.add(color);
      }
      pContentItem.put("colorOptions", colors);
    }
    return pContentItem;
  }
}
The following code implements a basic bean that enables us to specify a default value for the message color in the Spring configuration:
package com.endeca.sample.cartridges;

import com.endeca.infront.assembler.BasicContentItem;
import com.endeca.infront.assembler.ContentItem;

public class ColorConfig extends BasicContentItem {

	 public ColorConfig() {
		  super();
	 }

	 public ColorConfig(final String pType) {
		  super(pType);
	 }

 	public ColorConfig(ContentItem pContentItem) {
    super(pContentItem);
  }

  public String getMessageColor() {
    return getTypedProperty("messageColor");
  }

  public void setMessageColor(String color) {
    this.put("messageColor", color);
  }
}
In this example we update the "Hello, World" renderer to add a control for the site visitor to select a color for the message.
To add a drop-down for the site visitor to select a message color based on the options configured for this cartridge:
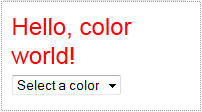
The following shows the code for the sample "Hello, World" renderer with color choice drop-down in JSP:
<%@page language="java" pageEncoding="UTF-8"
contentType="text/html;charset=UTF-8"%>

<%@include file="/WEB-INF/views/include.jsp"%>
<div style="border-style: dotted; border-width: 1px;
border-color: #999999; padding: 10px 10px">
  <div style="font-size: 150%;
    color: ${component.messageColor}">${component.message}
  </div>
  <div style="font-size: 80%; padding: 5px 0px">
    <select onchange="location = this.options[this.selectedIndex].value">
      <option value="">Select a color</option>
      <c:forEach var="colorOption" items="${component.colorOptions}">
        <c:url value="<%= request.getPathInfo() %>" var="colorAction">
          <c:param name="color" value="${colorOption.hexCode}" />
        </c:url>
        <option value="${colorAction}">${colorOption.label}</option>
      </c:forEach>
    </select>
  </div>
</div>We can validate that the cartridge handler applies the different sources of configuration properly by incrementally populating each source of the configuration.
To test the "Hello, World" cartridge:
In Experience Manager, remove any previously created instance of the Hello cartridge.
Insert a new instance of the cartridge on the default page and specify a message string, but do not select a color.
The message displays using the default color, orange.
Going back to Experience Manager, now select a message color for this instance of the cartridge.
The message displays using the color configured in Experience Manager.
Using the drop-down list on the cartridge, select another color.
The drop-down control adds a
colorparameter to the URL, which is parsed by theRequestParamMarshallerinto themessageColorproperty.
