Remove a PDU
Note - Refer to the service manuals of the equipment installed in the rack for the proper PDU replacement procedures, if applicable.
-
Shut down and power off the equipment installed in the rack.
Refer to the system and equipment documentation for the proper shut down and power off procedures.
- Open the rear door of the rack.
- Attach a wrist strap to your wrist and to an ESD grounding jack on the rack.
-
Switch off all of the PDU circuit breakers in the rack.
Press down on the Off (0) toggle switch to power off the PDU. These circuit breakers are at the rear of the rack cabinet. See Circuit Breaker Locations.
-
Disconnect
the PDU's main power lead cords from the AC power source.
See Disconnect the Main Input Power Cords From the Power Source.
- Disconnect any power jumper cords connected to the PDU from equipment in the rack.
- Cut any tie-wraps securing the PDU power input lead cords to the tie-down brackets.
-
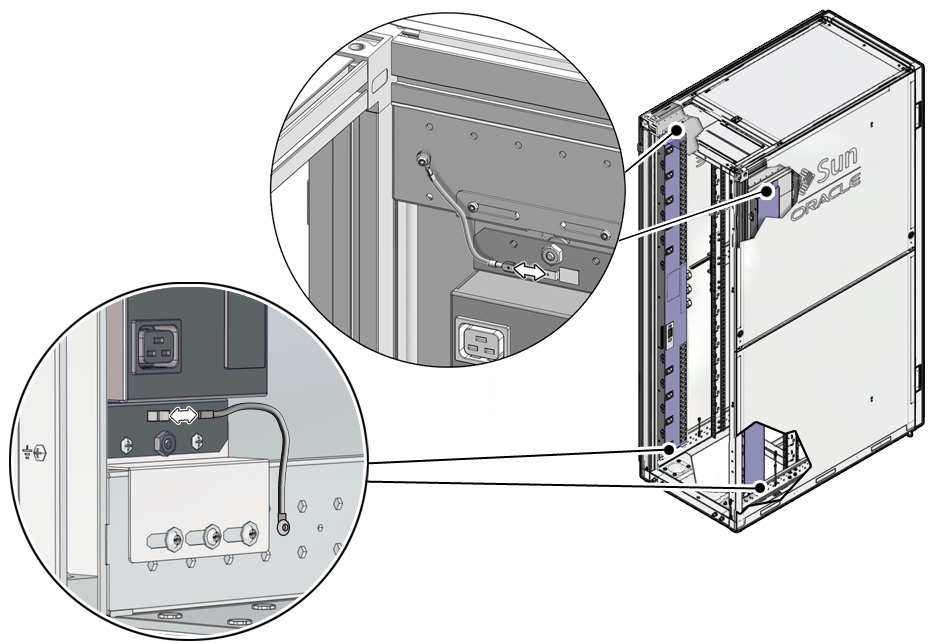
Disconnect the
grounding strap connecting the top of the PDU to the rack.

-
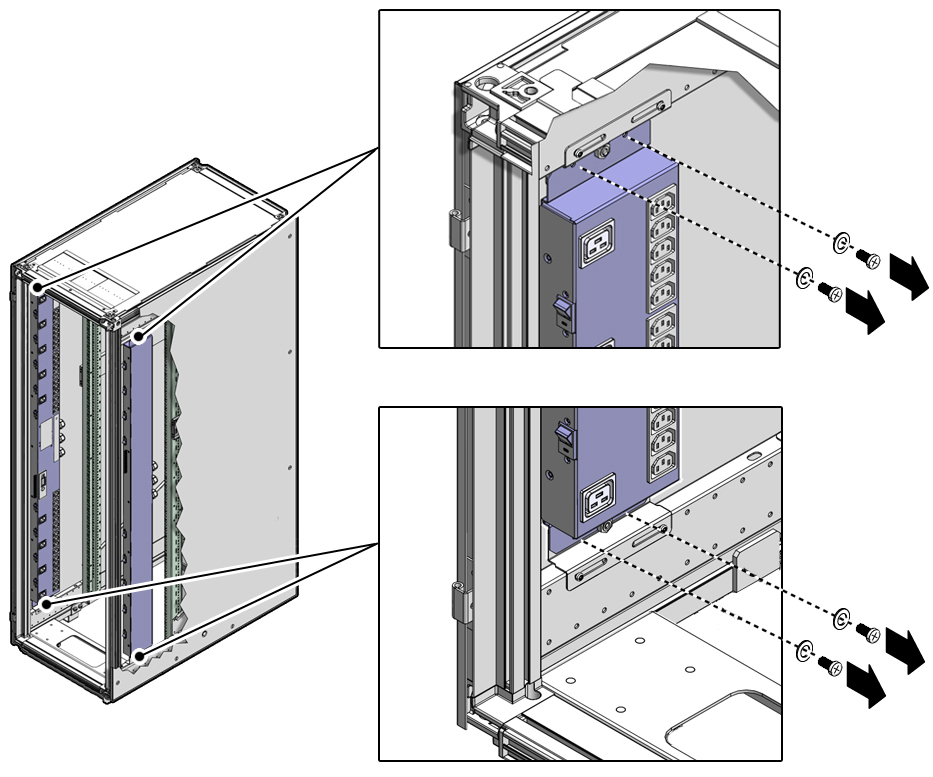
If the rack included a factory-installed PDU, use a T-25 wrench key to remove
the four M5 screws and washers securing the PDU to the mounting brackets.
These screws secured the PDU for shipping purposes. You might have already removed these screws when you installed the rack at the installation site.

- Carefully lift the PDU up and off the mounting brackets. Remove the PDU from the rack and place it on a clean work table.
-
Install a new PDU.
See Installing PDUs.