Configure RAID in Legacy Boot Mode
This procedure provides instructions for configuring server the storage drives as a bootable RAID volume when the server is in Legacy boot mode.
Note - Oracle System Assistant provides an easy to use interface and context-sensitive help. It is the preferred method for setting up the server and configuring server storage drives.
Use this procedure to access the LSI MegaRAID BIOS Configuration Utility when the server is set to Legacy Boot Mode and Oracle System Assistant is not installed on the server.
Before You Begin
-
For addtional instructions on configuring the system drives using the LSI MegaRAID BIOS Configuration Utility, refer to the 12 Gb SAS PCIe 8-port HBA user's guide at http://www.lsi.com/sep/Pages/oracle/index.aspx.
-
If you are local to the server, connect a VGA monitor and a USB keyboard and mouse to the front of the server, so you can respond to system prompts and navigate the utility. If you are remote to the server, use the Oracle ILOM Remote Console application.
-
Ensure that the server is in standby power mode (see Standby Power Mode).
-
To power on server, do one of the following:
-
From the local server:
Press and immediately release the front panel Power button.
-
From the Oracle ILOM web interface:
Click the server power Turn On button in the Actions section of the Summary screen.
-
From the Oracle ILOM CLI:
Type: start /System
The server powers on and BIOS boot messages appear.
-
From the local server:
-
Watch the screen for the following prompt:
Press Ctrl><R> for WebBIOS....
-
To access the LSI MegaRAID utility, press the
Ctrl+R.
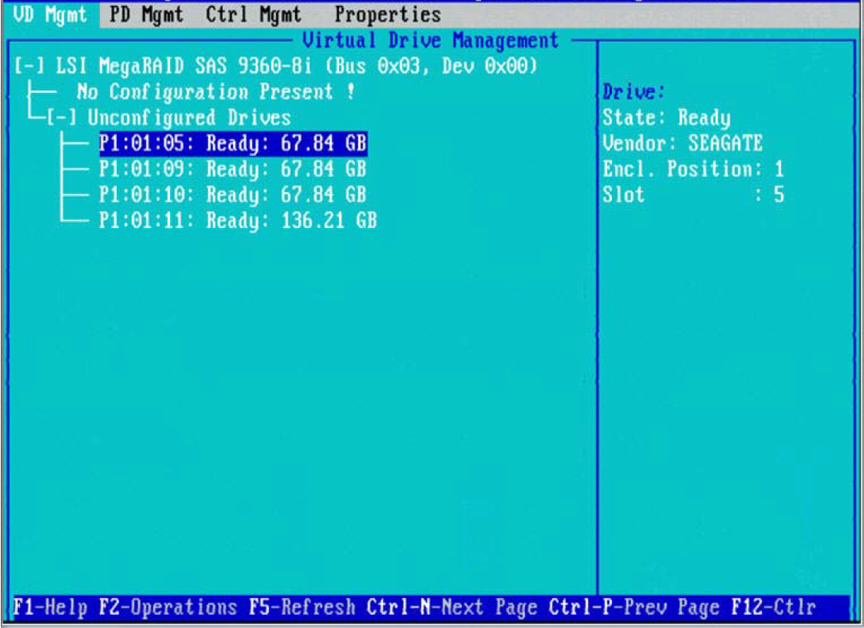
The virtual drive management (VD Mgmt) screen appears.

- Navigate to the controller and press the F2 key.
-
Press Enter.
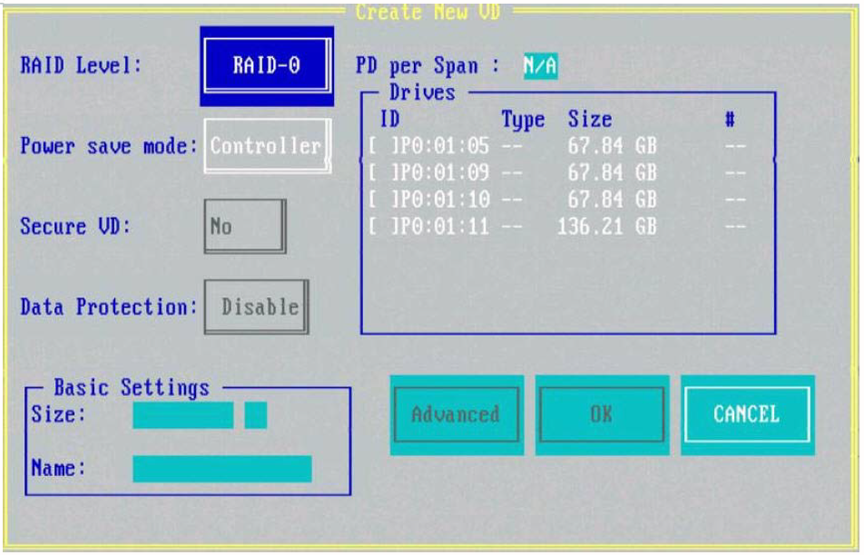
The Create New VD screen appears.

-
Set up the parameters for the virtual drive.
Use the Create New VD screen to:
-
Set the RAID level.
-
Set the Power save mode to Auto, Max, or Controller defined.
-
Use the Secure VD field to set data encryption.
-
Use the Data Protection field to use the data protection feature.
-
Arrange the sequence of physical drives in the Drive box.
-
Enter drive group size and group name in Basic Settings box.
-
-
Click OK.
The Create New VD screen appears again.
-
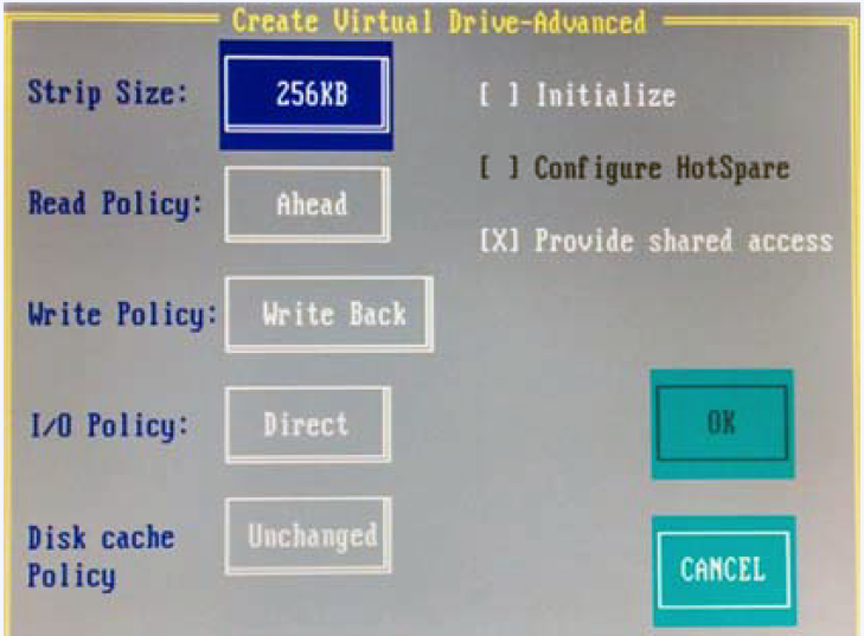
In the Create New VD screen, click Advanced.
The Create Virtual Drive - Advanced screen appears.

- Select the Initialize check box.
- To create and initialize the drive, click OK.
-
To make the virtual drive bootable, use the Ctrl-N key combination to
navigate to the Ctrl Mgmt menu tab.
The Controller Settings screen appears.
- Use the arrow keys to navigate to the Boot Device field and press Enter to get a list of bootable devices.
- Select the virtual drive.
- Click Apply.