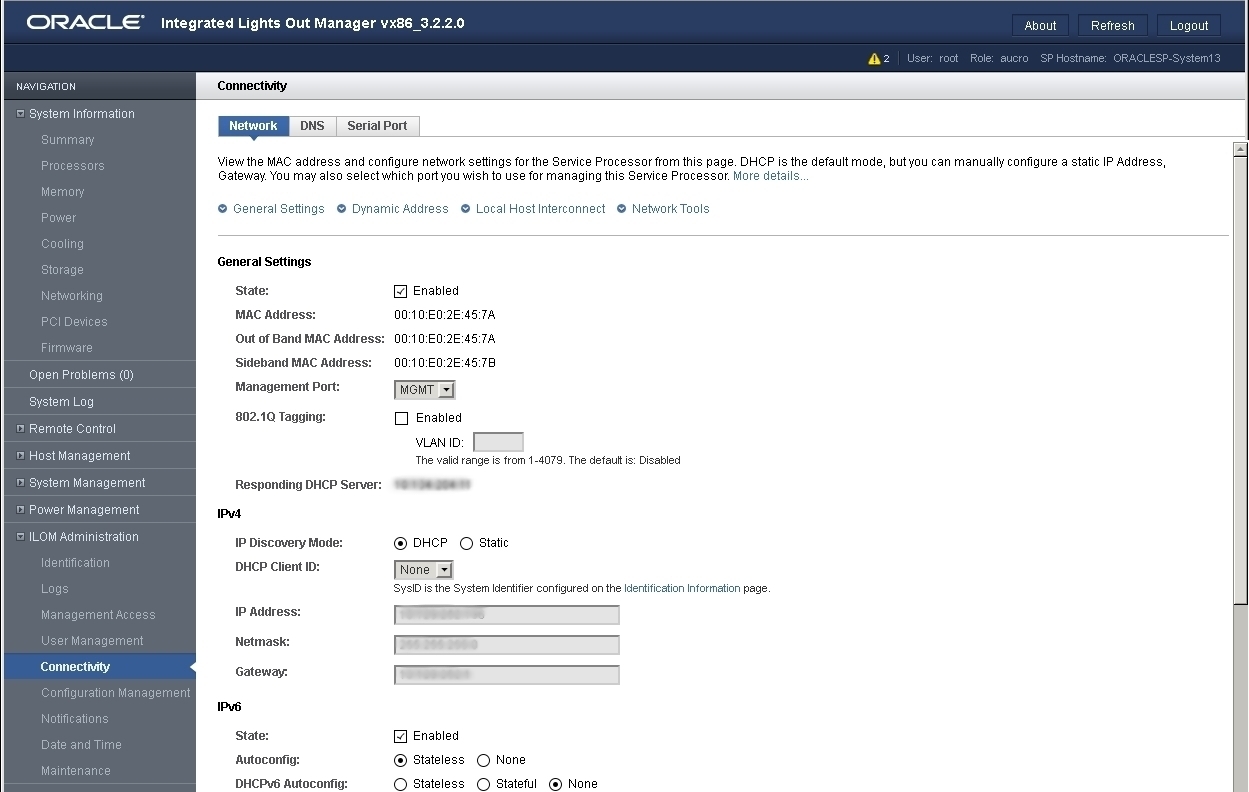
Modify Network Settings From the Oracle ILOM Web Interface
This procedure provides instructions for modifying Oracle ILOM network settings from the web interface.
Note - You can also change network settings using the BIOS Setup Utility. For instructions, refer to Access the BIOS Setup Utility in Oracle Server X5-4 Service Manual
-
Log in to the Oracle ILOM web interface.
Use the relevant steps in Log In to Oracle ILOM Using a Remote Ethernet Connection.
-
Select ILOM Administration > Connectivity from the navigation tree on the left.
The Network Settings page appears, and the settings configured on your device are shown.

-
Perform the network configuration instructions that apply to your network environment:
- IPv4: To allow the DHCP server on your network to assign network settings, ensure that the DHCP radio button is selected and click Save.
- IPv4: To assign network settings, select the Static radio button and fill in the IP Address, Netmask, and Gateway fields and click Save.
- IPv6: To configure an auto-configuration option, ensure that the Enabled check box next to the State property is selected. Then, select an auto-configuration value and click Save.
- IPv6: To set a static IPv6 address, ensure that the Enabled check box next to the State property is selected. Then, type the static address in the format ipv6_address/subnet mask length in bits in the Static IP Address field (for example: fec0:a:8:b7:214:4f ff:feca:5f7e/64) and click Save.
-
Test the IPv4 or IPv6 network configuration from Oracle ILOM using the Network Test Tools
(Ping and Ping 6).
For details, see Test IPv4 or IPv6 Network Configuration From the Oracle ILOM Web Interface.