You use the Publish Web Content action to add text or images to a Web site page. The action sends content to a slot, which is a page area such as a banner that is typically used to display content which changes independently from the rest of the page. You could use this action to display a promotional image to segments of your targeted audience as part of a multi-channel campaign, for example.
For a global campaign, the action publishes content to all your Web sites. If the campaign applies to a specific site, content is published to that site only. For more information, see Using ATG Outreach in a Multisite Environment. In addition, the content is published only if the triggering event occurs in the context of the site to which the campaign applies. For example, you could have a Publish Web Content action that is triggered by a Logs In event. If a user logs into Site A, but the campaign applies only to Site B, the Publish Web Content action is not triggered.
You can also use this action to remove content from a slot, which allows you to change text or images as a response to customer behavior during a campaign.
To create a new Publish Web Content action, complete the following steps:
Select Publish Web Content from the New Action list, and click Add New Action.
Name (required). Used by ATG Outreach only and not visible to customers. Defaults to New Publish Web Content. For reporting purposes, make sure the name of each action is unique within a campaign.
Description (optional).
Segments (required): One or more groups of customers that you want the action to apply to. You can specify an existing segment or create a new one. For information, see Adding Segments.
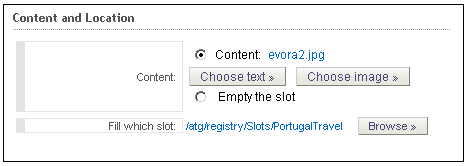
Use the Content and Location fields as follows:
To add content to a slot, select Content and then select Choose Text or Choose Images as appropriate. Then use the Fill Which Slot field to specify the slot to which you want to add the content. See Adding Text and Images below for more information.
To remove content from a slot, select Empty the Slot and then specify the slot.
The image below shows the Content and Location fields with some sample data:
Adding Text and Images
There are several important things to note about adding text and images to slots for use in a campaign. Slots are created and configured in the ATG Control Center (ACC), typically by a site developer. JSP code is then added to your Web site pages that includes an appropriate slot and renders its contents.
A slot can be configured to hold text or images, but not both. When you click Choose Text or Choose Image in the Publish Web Content action, make sure you are selecting the right option for the slot you intend to fill. You cannot add text to an image slot or images to a text slot.
Before you can select a slot in a campaign, it must exist as an asset in the ATG Content Administration versioning system. Otherwise, it does not appear in the Slot Picker. If the slot does not yet exist as an asset, start the ACC, specify the campaign you are creating as the current project, and add the slot to the campaign (see the ATG Content Administration Guide for Business Users). Then switch to the Business Control Center and verify that the slot has been added as an asset to the campaign by checking the campaign’s Assets tab. You should then be able to use the Slot Picker to add it to the campaign, as described in the procedures below.
Content for slots (text assets and image assets) is stored by ATG Outreach in a hierarchy of folders. The top-level or “root” folder must have the name “/” (a forward slash). You can create as many folders under this one as you need for organizational purposes, and you can give those folders any names you choose. By default, two folders are provided: textContent and imageContent.
For detailed information about slots, refer to the ATG Personalization Guide for Business Users.
Select Choose Text. Use the Text Content Picker to search for an existing text asset or create a new one. To search, enter the first few characters of the text asset’s name in the Keyword field in the Search tab and click Go. Leaving the Keyword field blank acts as a wildcard, causing ATG Outreach to search for all text assets (assets of type
media-internal-text).To create a new text asset, select Create New Text Content.
Enter a name for the text asset and (optionally) a description. The name is not visible to customers. You are not required to give the asset any file extension, but it is suggested that you use the extension
.txt, which enables you and other ATG Outreach users to identify the asset more easily.(Required) Click Edit Folder and select the folder where you want to store this asset. You can also create a new folder at this point. For information, refer to the ATG Content Administration Guide for Business Users.
In the Data field, use the editor to enter the text that you want to appear in the slot, including items such as links, as needed. The image below shows the text editor with some sample data:
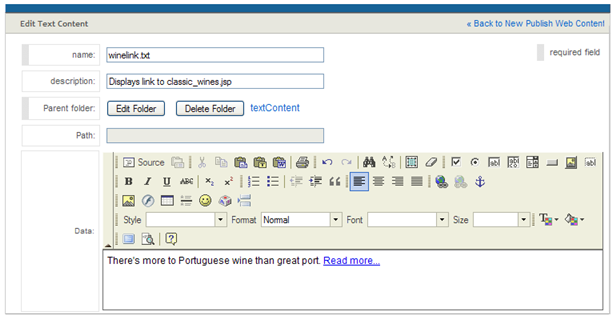
Click OK when you have finished adding text.
In the Fill Which Slot field, click Browse. Use the Slot Picker to locate the slot to which you want to add this content, making sure you specify a slot that was configured to hold text.
Like several other asset types, slots have the file extension
.properties. As noted at the beginning of this section, the slot must already exist as an asset in the ATG Content Administration versioning system. Slots are identified by the icon shown:
To browse all slots, use the Browse tab. Look in the
root/atg/registry/slotsfolder.To search for a slot, use the Search tab. Enter the first few characters from the segment’s name in the Keyword field in the Search tab and click Go. Leaving the Keyword field blank acts as a wildcard, causing ATG Outreach to search for all slots.
To add an image to an image slot:
Select Choose Image. The Binary Content Picker appears.
To search for an image file that already exists as an asset in the versioning system, enter the first few characters from the file’s name in the Keyword field and click Go. Leaving the Keyword field blank acts as a wildcard, causing ATG Outreach to search for all images (all assets of type
media-internal-binary).To add a new image file, click Create New Binary Content.
Enter a name for the image asset. Important: The name must be the same as the name and extension of the image file that you specify in the Data field (see below), minus any path information. For example, if the file is called
\food\sardines123.jpg, the name must besardines123.jpg. See the image at the end of this procedure for another example.The name is not visible to customers.
(Optional): Enter a description.
(Required) Click Edit Folder and select the folder where you want to store this asset. You can also create a new folder at this point. For information, refer to the ATG Content Administration Guide for Business Users.
In the Data field, specify the file you want to add as the image asset. Either type the path and file name or (recommended) use the Browse button to locate the image.
(Optional) Click the Upload button to load the image into the Business Control Center. You can then preview it in this page.
Click OK.
In the Fill Which Slot field, click Browse. Use the Slot Picker to locate the slot to which you want to add this content, making sure you specify a slot that was configured to hold images. See the previous procedure for instructions on using the Slot Picker.
The following image shows the binary content editor with some sample data:
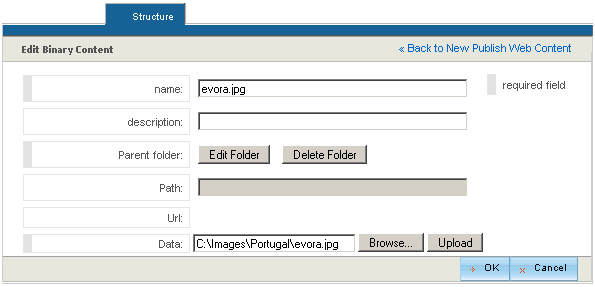
Note that the value in the URL field is displayed after you click OK. It is calculated by ATG Outreach from the file name and the path to the repository. The URL is then used by the page that displays the slot content.
