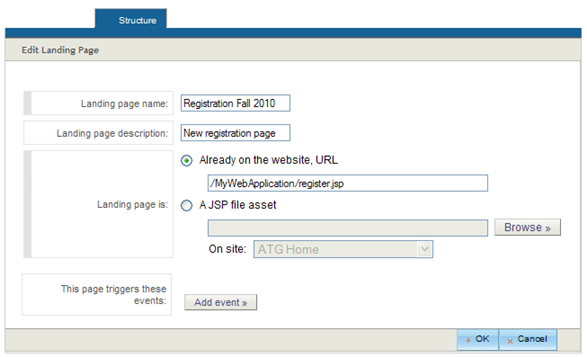
The landing page editor appears when you click Create New Landing Page in the dialog box described in the previous section. The image below shows the editor with some sample data:
To create a new landing page to add to an action, complete the following steps:
Enter a name and an optional description for the landing page. The name is used by the HTML Editor as the default name for the link that you add in the body of the e-mail message. Therefore, unless you change the text that appears for the link when you create the message, the name you enter here is visible to customers. The description is used only by the internal application.
Specify the page to add. You can add any page that has the extension
.html,.jhtml, or.jsp. There are several ways to specify the page, as described below.Option 1: To add a page that already exists on one of your sites, select Already On the Website, URL, and enter the context root of the Web application that represents the site, followed by the path and name of the page. In most cases you can determine an application’s context root by looking at the
<context-root>property in itsapplication.xmlfile. The file for the Quincy Funds demo application, for example, is located as follows:<ATG10dir\DSSJ2EEDemo\j2ee-apps\QuincyFunds\META-INF\application.xml.Example :
/QuincyFunds/en/login.jspFor pages on Web sites that are registered in Site Administration, you can also specify a URL that uses a virtual context root. To determine the value, find the Site Base URL property in Site Administration. Then add the path and name of the page to complete the URL. For example, the Site Base URL property value for the ATG Store demo site is
/crs/storeus. The URL for the ATG Store login page is as follows:/crs/storeus/myaccount/login.jspFor more information on the correct path to enter, see your application administrator. For information about Site Administration, refer to the ATG Multisite Administration Guide.
Option 2: To add a URL as the landing page, select Already On the Website, URL, and enter the URL (for example
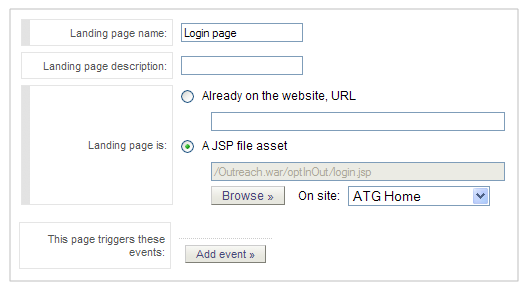
http://www.example.com). Make sure you include the fullhttp://protocol.Option 3: To add the current version of a page that exists in the ATG Content Administration versioning system, select A JSP File Asset and then use the Browse button to locate the page from the JavaServer Page Picker.
Option 4: To add an entirely new page, select A JSP File Asset, click Browse, and then click Create New JavaServer Page. Complete the fields that define the new page. For instructions, refer to the ATG Content Administration Guide for Business Users. Note: when the campaign is deployed, the new page is deployed as both a file asset and a
landingPagerepository item. For more information, see Understanding Landing Page Deployment.In a multisite environment, you deploy the same pages to all your Web sites. The pages contain code that determines how to display appropriate content for each site. For options 3 and 4 above, if you are creating a campaign that applies to all your Web sites (a global campaign), you must also specify the site whose instance of the page will be used as the landing page. Use the On Site option to select the Web site. If the site you want does not appear in the list, make sure it has been registered in the Site Administration utility and deployed. See Using ATG Outreach in a Multisite Environment in this guide, or refer to the ATG Multisite Administration Guide.
If you want to set up an event that is triggered when a customer visits this landing page, click Add Event. See Adding Events to a Landing Page for more information.
When you have finished adding the landing page, click OK.
