Go to main content
Oracle® ZFS Storage ZS5-ES Service Manual, Release OS8.6.x

Exit Print View

Updated: March 2017


Identify and Remove the Failed DIMM

Before You Begin

Use the Maintenance > Hardware screen of the BUI, or maintenance hardware CLI context, to identify the faulted memory module.

  1. Prepare the controller for service.
    1. Power off the controller, and disconnect the power cords from the power supplies.

      See Powering Off the Controller

    2. Extend the controller to the maintenance position.

      See Extend the Controller to the Maintenance Position.

    3. Attach an antistatic wrist strap to your wrist and then to a metal area on the chassis.

      See Take Antistatic Measures.

    4. Remove the controller top cover.

      See Remove the Controller Top Cover.

  2. Identify and note the location of the failed DDR4 DIMM by pressing the Fault Remind button on the motherboard (see Using the Controller Fault Remind Button).

    Failed DDR4 DIMMs are identified with a corresponding amber LED on the motherboard.

    • If the DIMM fault LED is off, the DIMM is operating properly.

    • If the DIMM fault LED is on (amber), then the DIMM has failed and should be replaced.
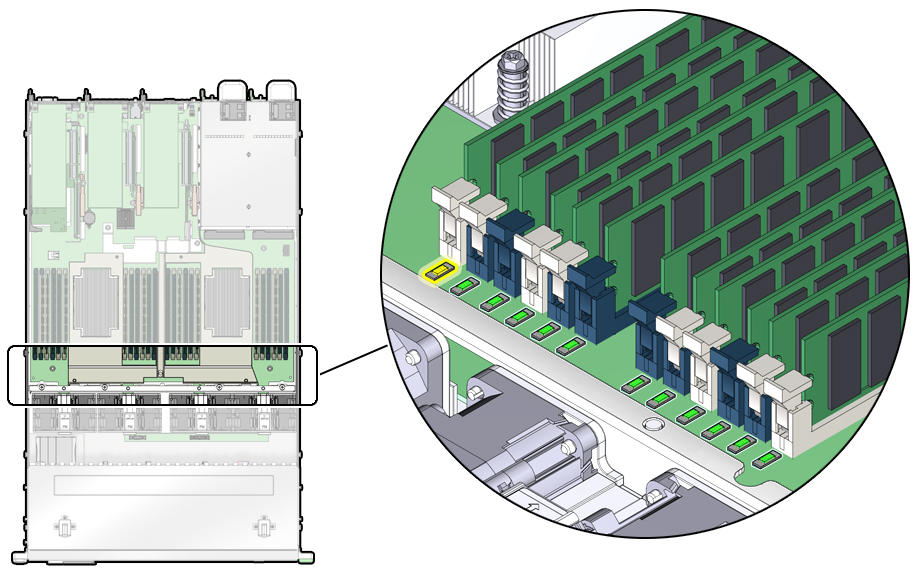

    image:Figure showing the location of the DIMM fault LEDs.
  3. To remove the failed DIMM do the following:
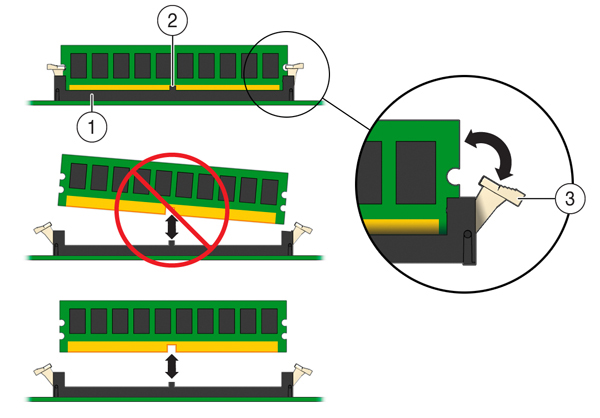
    1. Rotate both DIMM socket ejectors outward as far as they will go (see the following figure).

      The DIMM is partially ejected from the socket.


      image:Figure showing how to remove a DIMM.
      Legend
      1
      DIMM connector socket
      2
      DIMM connector key
      3
      DIMM connector key
    2. Carefully lift the DIMM straight up to remove it from the socket.
  4. Replace each failed DIMM with either another DIMM of the same rank size (quad rank, dual rank, or single rank) or leave the socket empty.

    For DIMM replacement instructions, see Install a DIMM.
Related Information