Go to main content

Oracle® Server X6-2L Service Manual

Exit Print View

Updated: January 2021


Remove the DVD Drive

  1. Remove media from the drive.
  2. Prepare the server for service.
    1. Power off the server and disconnect the power cords from the server power supplies.

      See Powering Down the Server.

    2. Extend the server into the maintenance position.

      See Extend the Server to the Maintenance Position.

    3. Attach an antistatic wrist strap.

      See Electrostatic Discharge Safety.

    4. Remove the disk cage cover.

      See Remove the Disk Cage Cover From the Server.

  3. If necessary, remove fan modules 2 and 3 from the chassis.

    See Remove a Fan Module.

  4. Reach into the server directly behind the DVD drive, and disconnect the power and DVD data connectors from rear of the DVD drive.
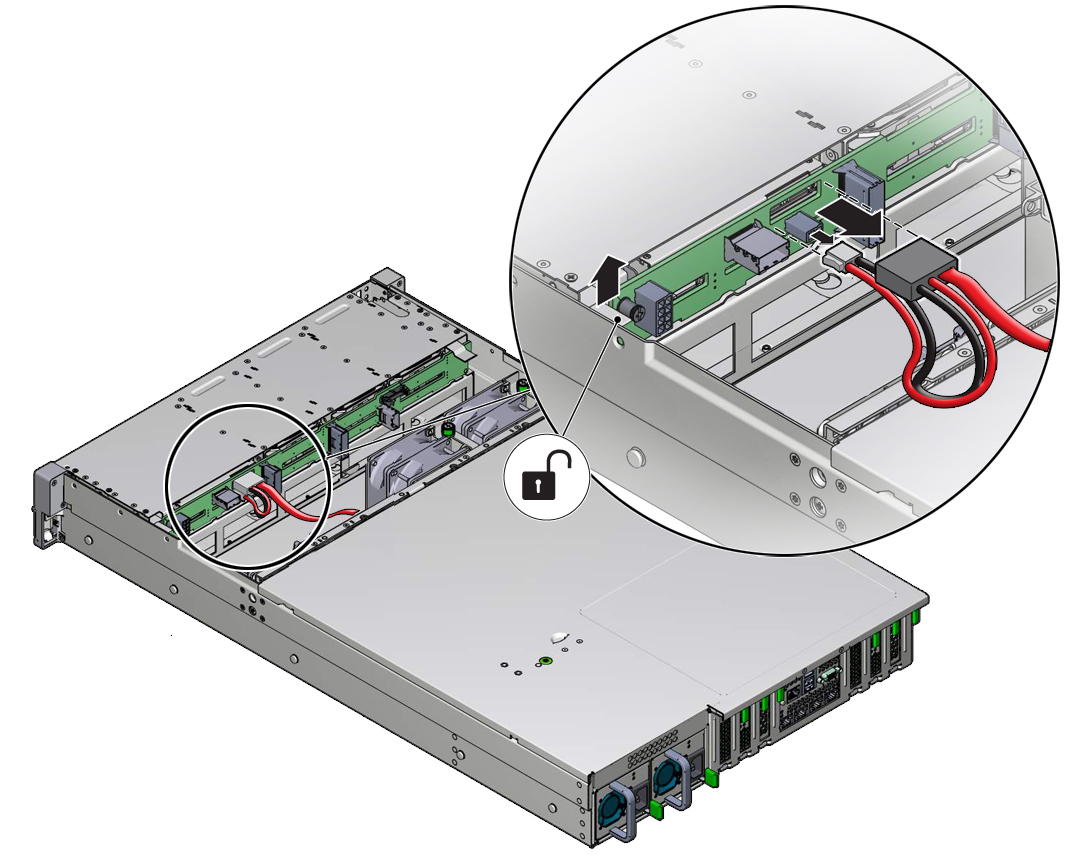
    image:Figure showing the DVD drive cables being disconnected.
  5. Lift up on the release tab on the rear of the DVD drive to disengage the drive from chassis.
  6. Gently push the DVD forward and out of the front of the chassis.
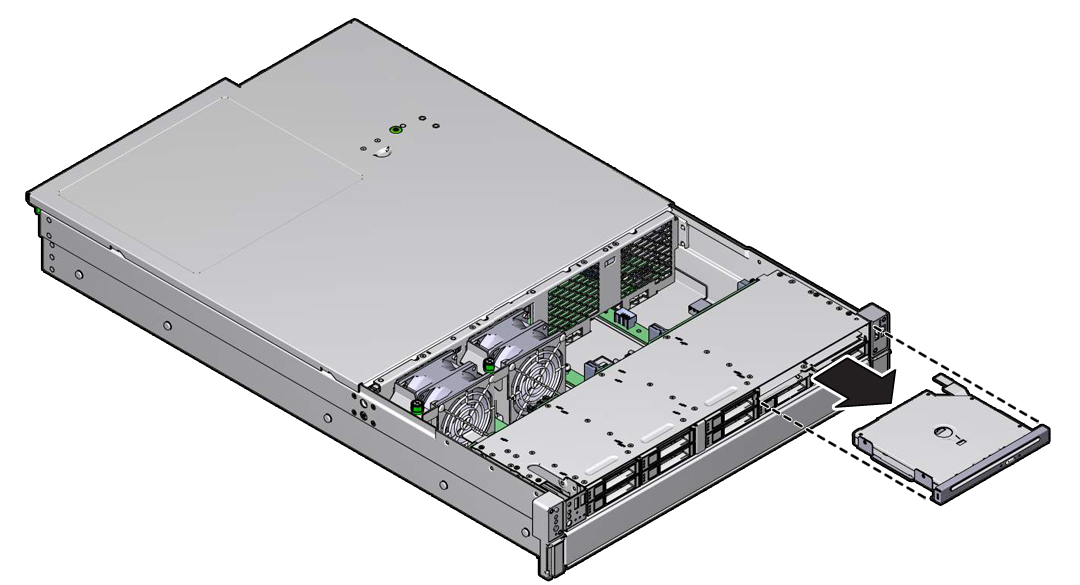
    image:Figure showing a DVD drive being removed from the chassis.
  7. Standing in front of the chassis, grasp the DVD drive with both hands, and continue to pull the DVD drive from the chassis until it clears the front of the server.
  8. Place the DVD drive on an antistatic mat.

Related Information