Restore Oracle System Assistant Software
If the Oracle System Assistant software has been overwritten, erased, or corrupted, you can download the image file that is available from the My Oracle Support web site to restore Oracle System Assistant to the USB device.
Use this procedure to restore the Oracle System Assistant software.
-
Download the Oracle System Assistant image file from the My Oracle Support web
site.
Download the image that is specific to your server. The package name for the update image for the server is: system_name and SW version -- Oracle System Assistant
For information about accessing My Oracle Support and downloading this image, see Download Firmware and Software From My Oracle Support.
-
To make the update image available to the server, do one of the
following:
-
Use the image file to burn a physical DVD image.
Install the DVD in a DVD drive attached to the server.
- Make the update image file available to the server as an ISO image using the Oracle ILOM Remote System Console Plus application.
-
Use the image file to burn a physical DVD image.
-
Access the BIOS Setup Utility.
For instructions, see Accessing the BIOS Setup Utility.
- Navigate to the Boot menu.
-
In the Boot menu, specify the Oracle System Assistant installation media as
the boot device:
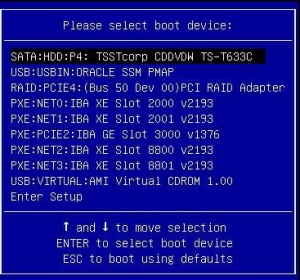
- If you chose to burn a recovery DVD and have placed the DVD into an attached DVD drive, select SATA:HDD:P4:TSSTcorp CDDVDW TS-T633C as shown in the Please Select Boot Device menu, and then press Enter.
- If you chose to use the Oracle ILOM Remote System Console Plus application to make the recovery image available to the server as a redirected DVD or as an ISO image, select USB:VIRTUAL:AMI Virtual CDROM 1.00 as shown in the Please Select Boot Device menu, and then press Enter.

Note - The items listed in the Please Select Boot Device menu might differ, depending on whether the system was booted in Legacy BIOS Boot Mode or UEFI Boot Mode.A message appears, and a prompt asks whether you want to continue the recovery process.
-
Type yes to confirm that you want to proceed, and then
press Enter.
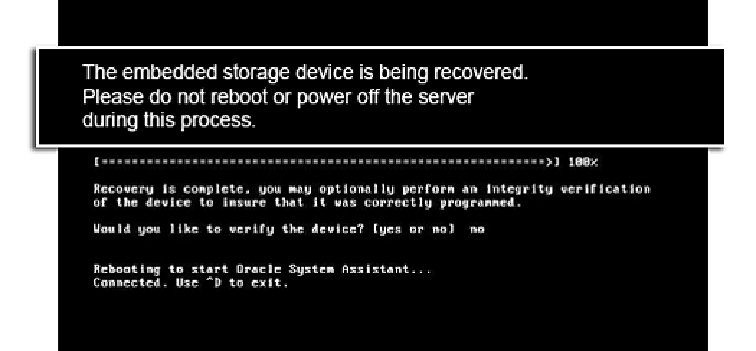
The following message appears, indicating the progress of the recovery process. Do not interrupt the recovery process.

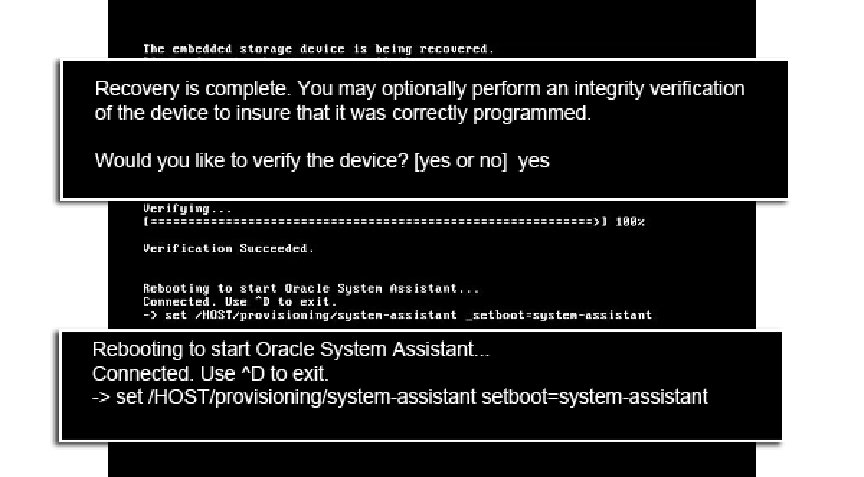
When the recovery process is finished, you have the option to verify the integrity of the files on the USB drive.

-
At the verification prompt, do one of the following:
-
To skip verification of the USB drive, type no, and
then press Enter.
The server boots to Oracle System Assistant.
-
To verify the USB drive, type yes, and then press
Enter.
The verification process starts. When the process is finished, the server boots to Oracle System Assistant.
-
To skip verification of the USB drive, type no, and
then press Enter.