Modify iSCSI Virtual Drive Properties in UEFI Boot Mode (BIOS)
Use this procedure to configure iSCSI virtual drives using the iSCSI BIOS Setup Utility screens on systems configured to use UEFI Boot Mode.
iSCSI virtual drives are used primarily to run supported operating systems that reside on an external server and that function as the local server host operating system.
iSCSI virtual drives must be configured in the UEFI BIOS Setup Utility iSCSI screens.
Before you begin, ensure that the following prerequisites are met:
-
You are familiar with iSCSI theory of operation and with iSCSI server setup procedures.
-
You have verified that iSCSI targets can be mounted on a client. Review the operating system documentation for more information.
-
You have access to an external iSCSI server running on a supported operating system.
-
The server is in UEFI Boot Mode, not Legacy BIOS Boot Mode. See Select UEFI Boot Mode or Legacy BIOS Boot Mode (BIOS).
-
Access the BIOS Setup Utility.
For instructions, see Accessing the BIOS Setup Utility.
- Navigate to the Advanced menu.
- Select iSCSI Configuration.
-
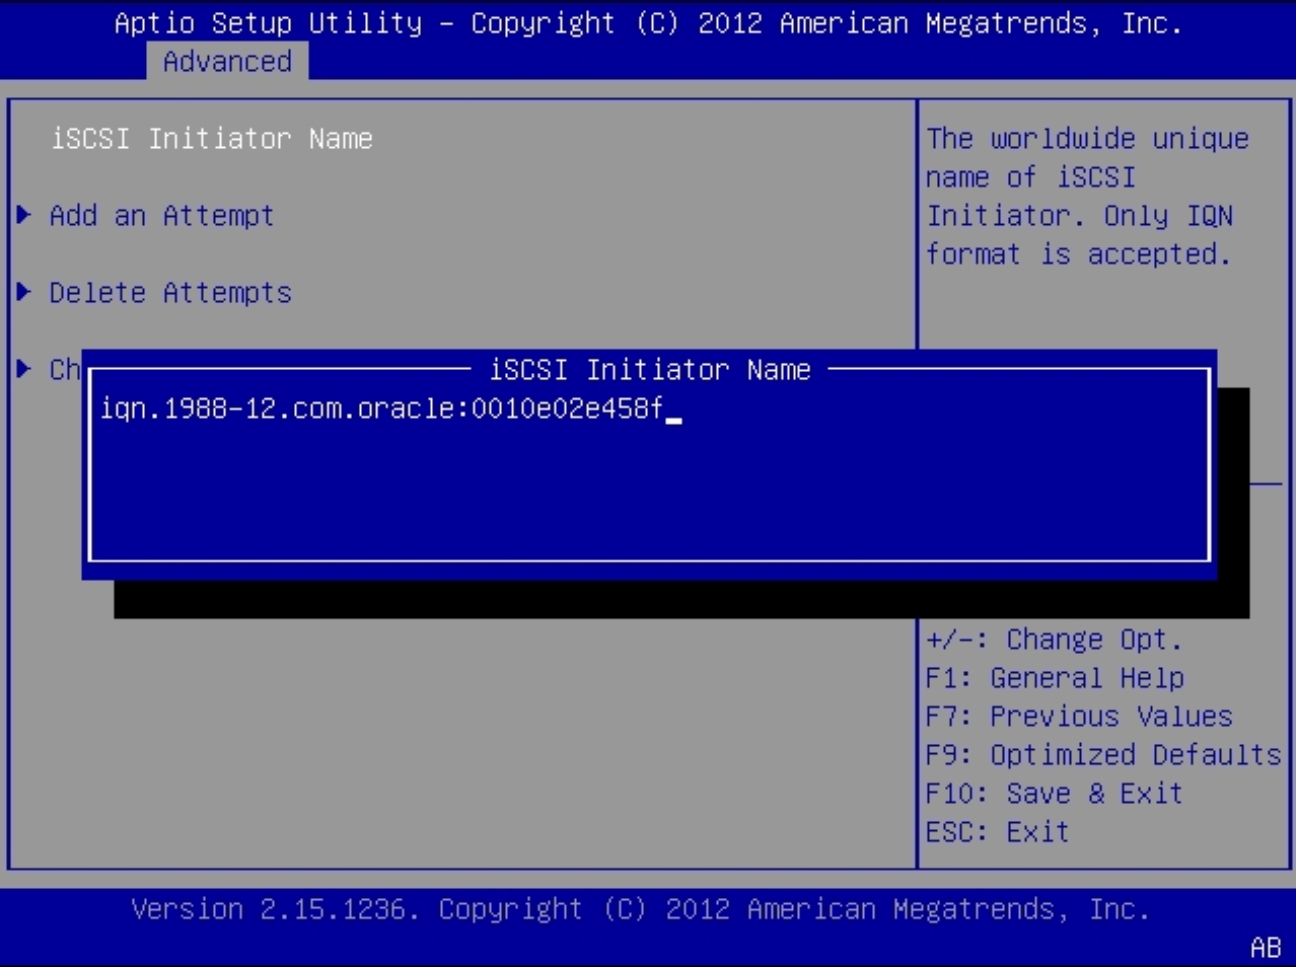
Select iSCSI Initiator Name, and then specify the iSCSI initiator name in
iSCSI Qualified Name (iqn) format, for example
iqn.1988-12.com.oracle:0010e02e458f.

- Select Add an Attempt.
-
To connect to an iSCSI virtual drive, select the network adapter MAC
address configured in the iSCSI server, for example
0010e02e458f.
The Port Configuration screen appears.

-
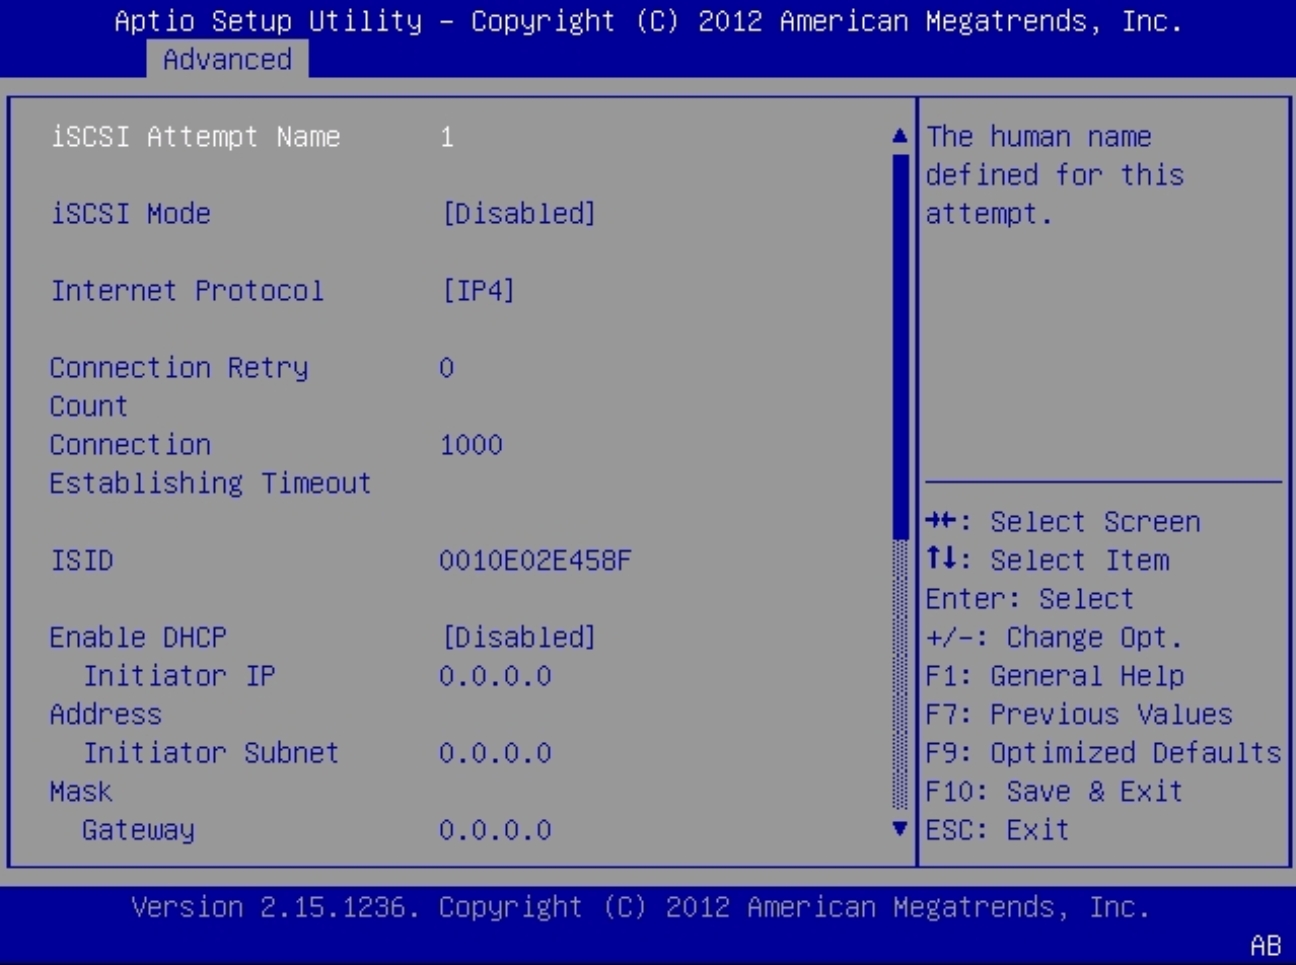
In the Port Configuration screen, perform the following steps:
- Set the iSCSI Mode property to Enabled.
- Set the Internet Protocol property to IPv4.
- Set the Connection Retry Count property to 1.
- Set the Enable DHCP property to Enabled or Disabled to specify an addressing method for the iSCSI initiator.
-
If you set the Enable DHCP property to Disabled, specify the
Initiator IP Address, Initiator Subnet Mask, and Gateway.
Note - Use the same subnet. - Set the Get Target Info Via DHCP property to Enabled or Disabled to specify an addressing method for the iSCSI target.
-
If you set the Get Target Info Via DHCP property to Disabled,
specify the Target IP Address, Target Port, and Boot LUN.
Note - When iSCSI is enabled on a network port, PXE is disabled for that port. - Specify the Target Name in iSCSI Qualified Name (iqn) format, for example iqn.1988-12.com.oracle:X5-2-target.
-
Set the Authentication Type property to CHAP or None.
CHAP refers to Challenge-Handshake Authentication Protocol.
- Select Save Changes.
-
Press the F10 function key to save your changes and exit the BIOS Setup
Utility.
The server reboots.
Note - The newly-configured iSCSI drive does not appear in the BIOS boot list until after you install an operating system.