(Optional) Install the Server Into the Rack
Before You Begin
 | Caution - Physical or component damage. The server is heavy and cannot be safely installed in the rack by a single person. Use multiple personnel and a mechanical lift to install the server in the rack. |
When preparing the server for operation, use these optional steps to install the server in the rack.
- Push the slide-rails into the slide-rail assemblies into the rack as far as possible.
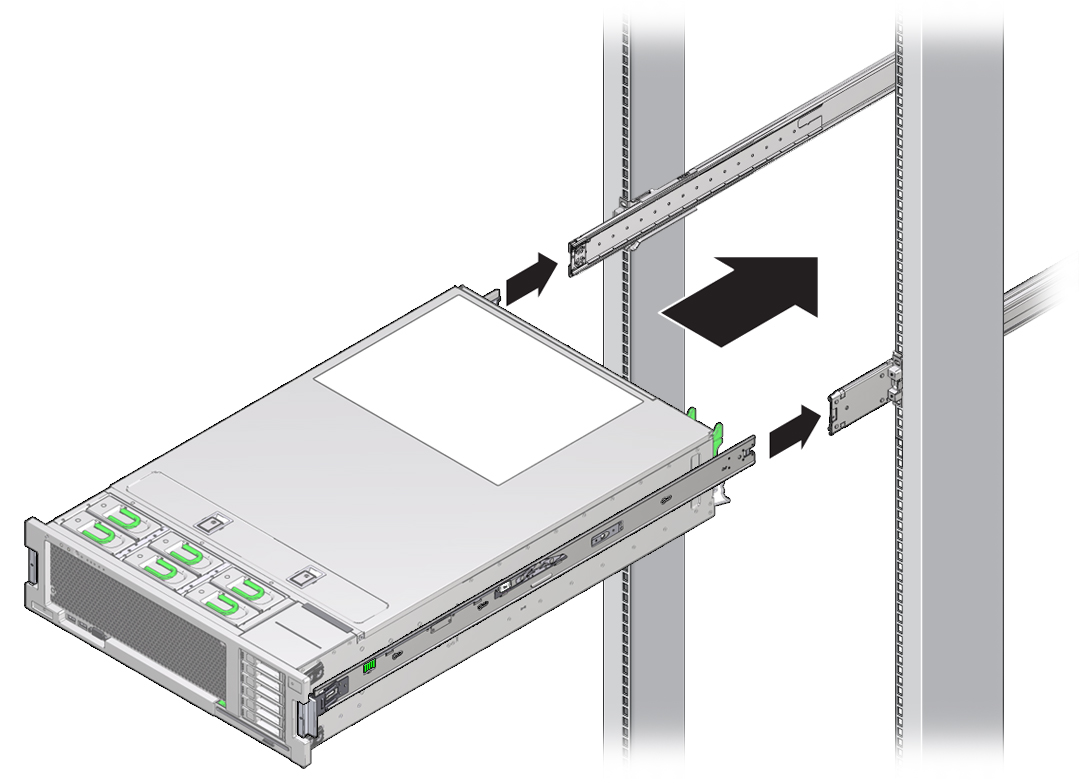
- Raise the server so that the ends of the mounting brackets are aligned with the slide-rail assemblies that are mounted in the rack.
-
Ensure that both the top and bottom mounting lips of the mounting brackets are aligned with
the slide-rails.

Caution - Physical or component damage. The server might fall if the mounting brackets are not inserted properly into the slide rails. Ensure that the mounting lips are properly aligned and the insert the brackets into the slide rails properly.
-
Insert the mounting brackets into the slide-rails and push the server into the rack until the
mounting brackets encounter the slide-rail stops (approximately 12 inches, or 30 cm) and the server
rails lock the server into the maintenance position.
The server cannot be slid past the slide rail stops. If correctly installed, the server should slide easily. If the server does not slide easily, it might not be inserted properly.

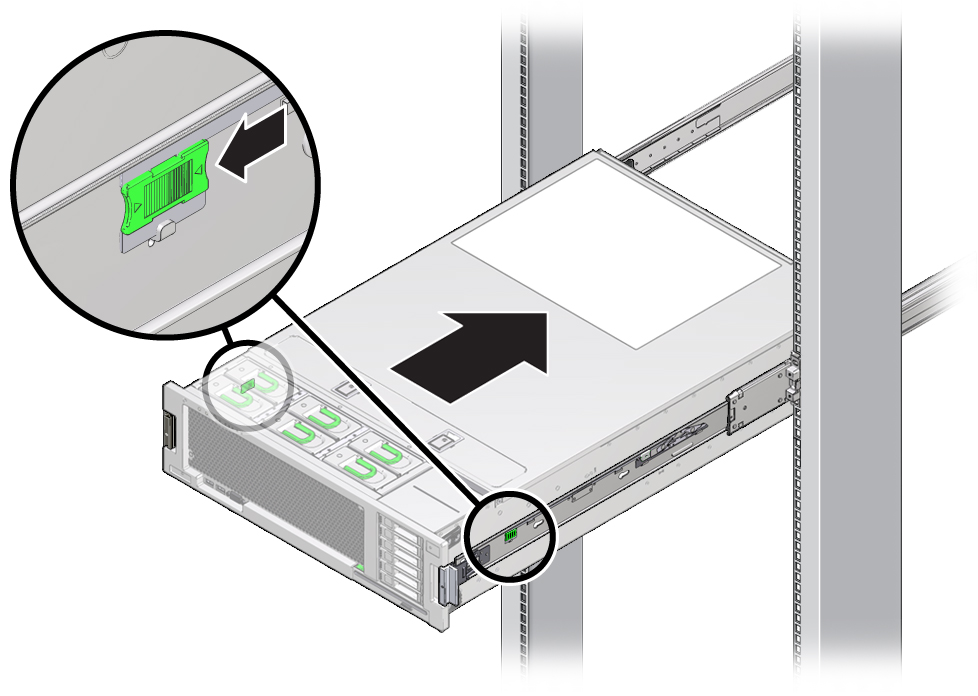
-
To unlock the server and slide it into the rack, simultaneously pull and hold the green
slide-rail release buttons on each mounting bracket and push the server into the rack until it locks
into place flush with the front of the rack.
The locking is accompanied by an audible click.

- Verify that the server is securely mounted in the rack and that the slide-rail locks are engaged with the mounting brackets.
-
At the rear of the server, connect the AC power cables to the server power supplies.
When the power cables are connected to the server, the server powers on to standby power mode.
-
Connect any other cables to their connectors or ports on the back of the server.
If the cable management arm (CMA) is in the way, disconnect the left CMA release and swing the CMA open.
-
If necessary, reconnect the CMA. See (Optional) Install Cable Management Arm.
Swing the CMA closed and latch it to the left rack rail.
- Power on the server. See Power On the Server.