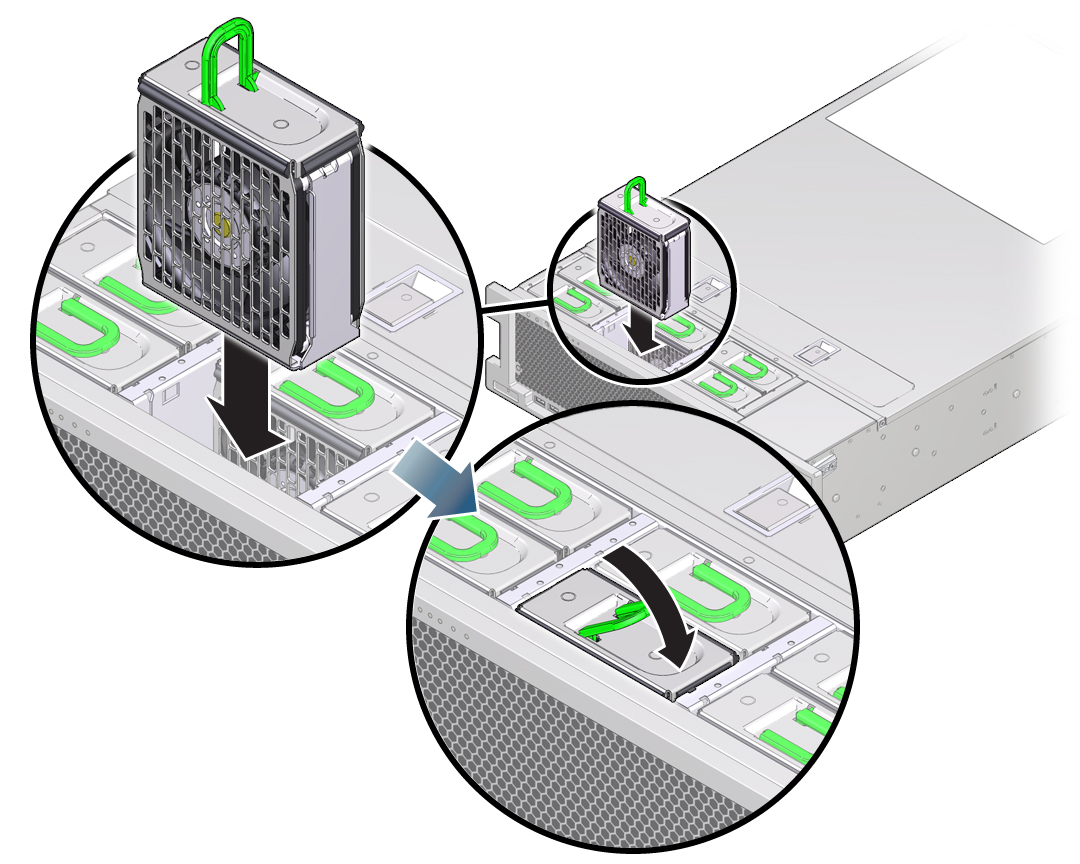
Install a Fan Module
This procedure describes how to install a fan module in the server.
Fan modules are hot-serviceable components. It is not necessary to power off the server or to remove the server cover to service a fan module. However, depending on server rack configuration, it might be necessary to partially extend the server from the rack to access the fan modules. Take care when partially extending the server from the rack during hot service. Ensure that the cables at the back of the server are not dislodged, particularly the power cables. You can also perform this procedure using cold service. Optional steps for partially extending the server from the rack are included in this procedure.
Tip - To view a video of replacing a fan module, see http://docs.oracle.com/cd/E38212_01/videos/E58906/fanreplace.html.
Before You Begin
-
For serviceability considerations, see Component Serviceability.
-
For fan module designation information, see Component Designations.
-
For instructions on removing a fan module, see Remove a Fan Module.
-
If you are installing a replacement fan module for one that has failed, check the indicator of
the failed fan slot to ensure the fault indicator is no longer lit.
This is necessary to ensure the indicator status is cleared before you insert the new fan. See Fan Module Reference for fan module indicator locations.
-
Orient the fan module so the connector on the bottom of the module is aligned with the
connector on the inside of the slot and all keying and labeling are correctly positioned.
The fan modules are keyed to ensure that they are installed in the correct orientation.

- Slide the fan module into the slot until is stops.
- Press downward on the top of the fan module at the Press Here to Latch label until the fan module is fully seated.
- Verify that the green OK indicator is lit.
-
Verify that the Top Fan indicator and the Service Action Required indicator on the server
front panel are not lit.
See Server Front Panel Features and Server Back Panel Features for locations of system indicators.
-
If necessary, return the server to the normal rack position.
- Ensure the cables are free from binding and pinching.
- Slide the server into the rack until it locks into place.
- If necessary, close the CMA.
- If you performed a cold-service procedure, power on the server.