The example in Creating a Scenario: Basic Steps showed how to create a scenario from scratch. However, you can also use a template as a quick way to create a scenario.
To create a scenario from a template:
In the ATG Control Center, select Scenarios > Scenarios.
Select File > New Scenario. The Use Scenario Template? dialog box appears. Click Yes and then click Next.
The Choose Scenario Template dialog box appears.
Select the template you want to use. See Creating Templates for Scenarios for more information.
Click Next. The Choose Scenario Name dialog box appears.
Specify a name for the scenario you are about to create. Also specify the folder in which you want to save it.
Click Finish.
The system displays the Define New Scenario dialog box, which contains fields that correspond to the elements in the template. Each field shows a placeholder value that represents an element you can change each time you use this template. Templates usually contain other elements that do not change; these do not appear here.
The dialog box that corresponds to the Quincy Funds
QFScheduledMailingtemplate looks like this: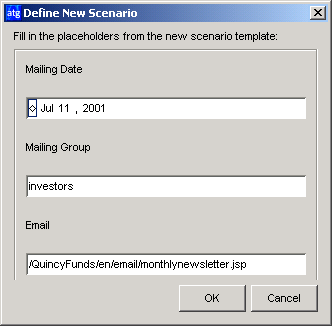
Note: Because you see only some of the elements in the template, it can be difficult to understand what the associated scenario does by looking at this dialog box. You can overcome this problem in several ways:
Use the Scenario Template editor to view the template and see what it does. However, you can do this only if your security access level allows you to create and edit templates.
Ask the person who created the template to print a copy of it for you (see Printing Scenarios).
Alternatively, just click OK here without changing any values. The scenario appears in the Scenario Editor with all the elements set to their default values. You can then review the scenario to see what it does, and edit the elements as you would edit any other scenario.
Edit the fields by replacing the placeholder values with the real values that you need. To edit the fields, click each placeholder and then select the value you want from the list that appears.
When you have finished editing, click OK. The completed scenario appears across the window.
