Remove a Fan Module
You do not have to power off the server to service the fan modules.
You should not begin this procedure unless you have a replacement fan and you are ready to install it right away.
 | Caution - When removing and replacing a fan module in the Oracle Server X7-2, you must complete the entire procedure within 20 seconds to maintain adequate cooling within the system. Remove and replace only one fan module at a time. Ensure that you have obtained the replacement fan module and that is it is ready for installation before starting the replacement procedure. Each fan module contains two fans, with two fan motors per fan. The four fan motors provide separate tachometer signals so that the fan module reports four tach signals to Oracle ILOM. Even if only one fan motor is faulted within the fan module, the Oracle ILOM service processor detects that four fan motors have failed to spin while the fan module is removed. If the fan module is not replaced within 20 seconds of removal, Oracle ILOM will take the protective action to shut down the system to prevent thermal damage to the system. |
- Extend the server to the maintenance position.
- To access the fan modules, remove the server top cover.
-
Identify the faulty fan module.
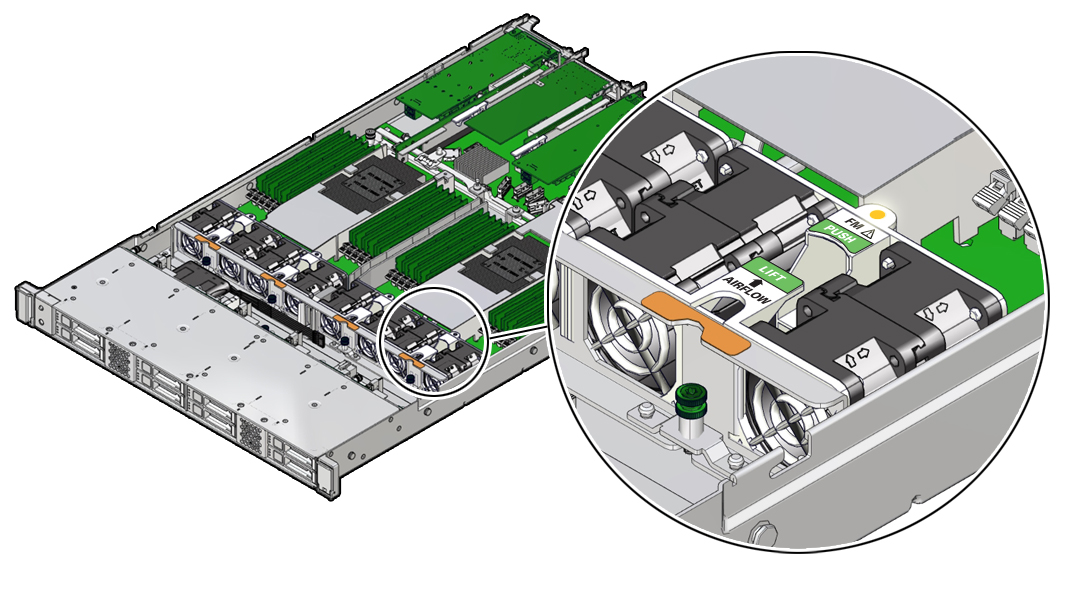
Each fan module has a fan status indicator (LED) that is located next to the module. If the LED is amber, the fan has failed. The location of the fan status LED is shown in the following figure.
 LED Color and State MeaningAmber – The fan module is faulty. The front Top Fan LED and the front and back panel Fault-Service Required LEDs are also lit if the system detects a fan module fault.
 -
Remove the faulty fan module.
- Using your thumb and forefinger, grasp the fan module in the finger recesses located in the plastic between the fans.
-
Lift the fan module straight up and out of the chassis.

Caution - When removing a fan module, do not rock it back and forth. Rocking a fan module can cause damage to the motherboard connectors.

-
Set the fan module aside.

Caution - Do not service any other components in the fan compartment unless the system is shut down and the power cords are removed.
-
Consider your next step:
-
If you removed the fan assembly as part of another procedure, return to that procedure.
-
Otherwise, continue to Install a Fan Module.
-