Remove the Temperature Sensor
-
Prepare the server for service.
- Power off the server and disconnect the power cords from the power supplies.
- Extend the server to the maintenance position.
- Attach an antistatic wrist strap to your wrist, and then to a metal area on the chassis.
- Remove the server top cover.
-
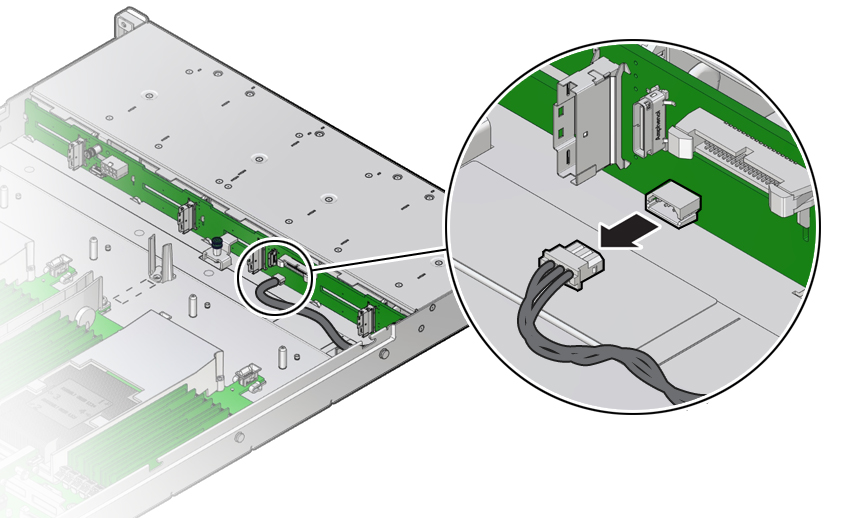
Disconnect the temperature sensor cable from the disk backplane.

-
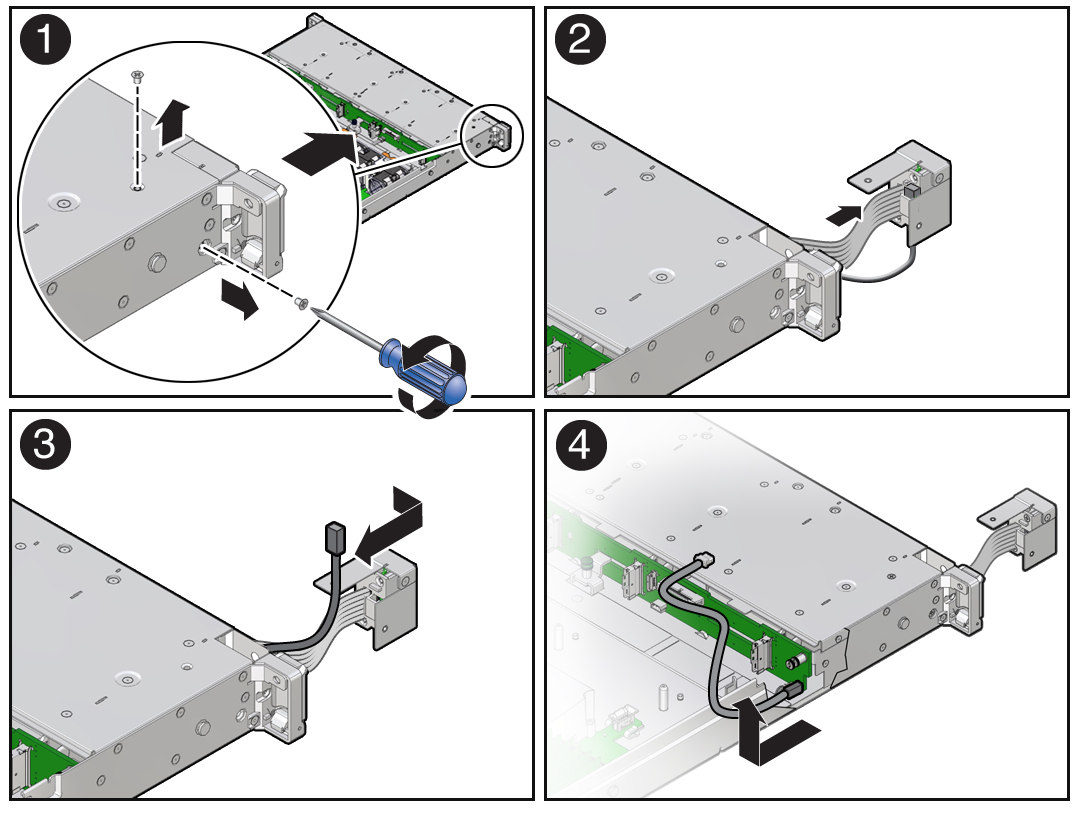
Using a Phillips screwdriver, remove the two screws that secure the front
indicator module (FIM) assembly to the server chassis [1].

- Carefully slide the FIM assembly toward the front of the server to remove it from the chassis [2].
- Remove the temperature sensor from the plastic housing by pulling the sensor from its seated location. Then remove the sensor cable by pulling it through the slit in the housing [2, 3].
- Remove the temperature sensor and cable by carefully pulling the sensor cable rearward and through the left-front chassis sidewall. Then lift the temperature sensor from the chassis [4].