Install a Filler Panel
I/O module filler panels have no active components. You can install a filler panel without first powering down the switch.
-
If you are replacing a filler panel or I/O module with a new filler panel,
remove the faulty component first, then return to of this task.
- To remove an filler panel, go to Remove an I/O Module, and then continue to the next step.
- To remove an I/O module, go to Remove a Filler Panel, and then continue to the next step.
-
Locate the I/O module slot where you will install the filler panel.
For the I/O module slot locations, see Rear Panel Components.
- Depress the top of the release lever, and lower the release lever to the fully open position.
-
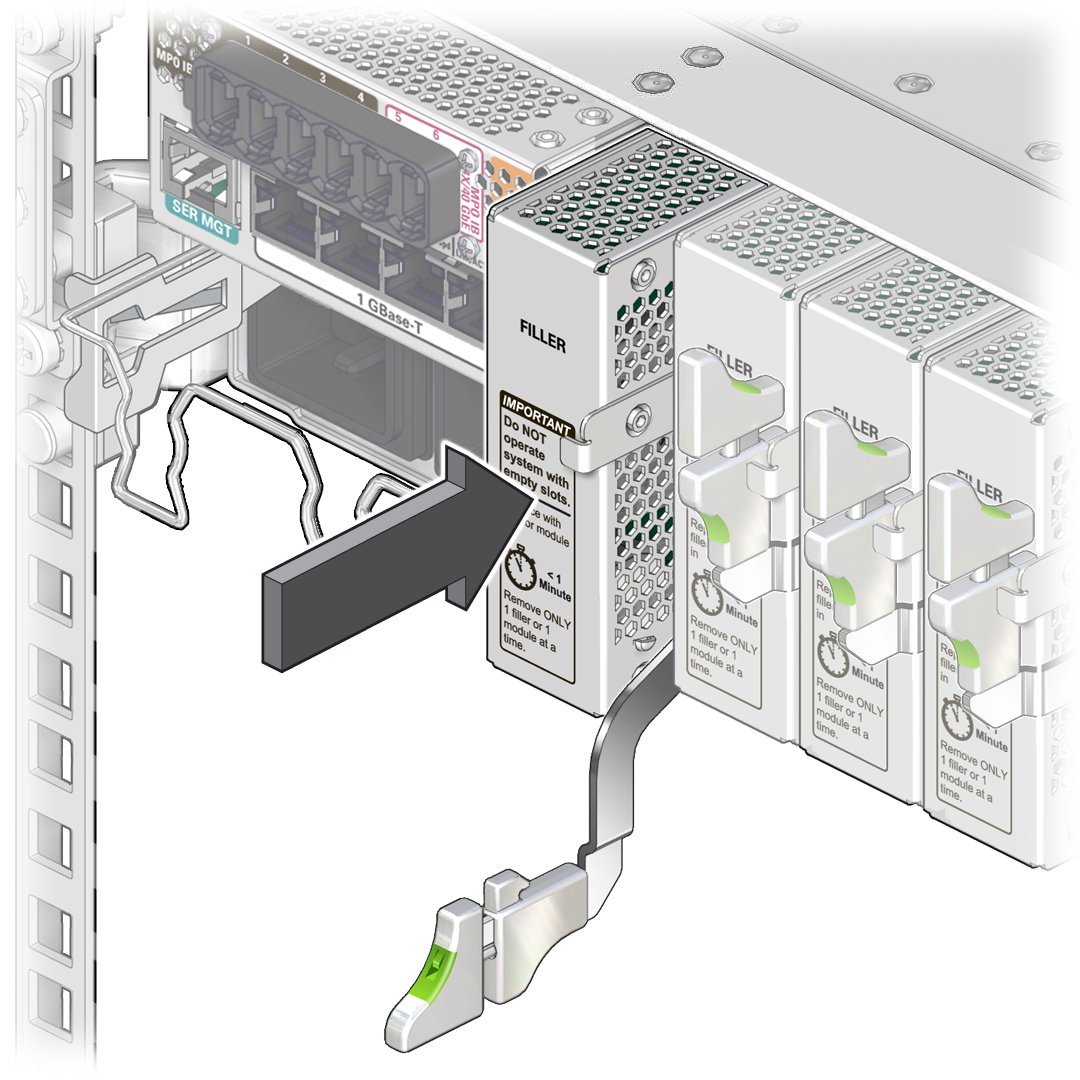
Align the filler panel to the slot where you are installing it.
The release lever should be to the lower right.
-
Slide the filler panel into the chassis.

-
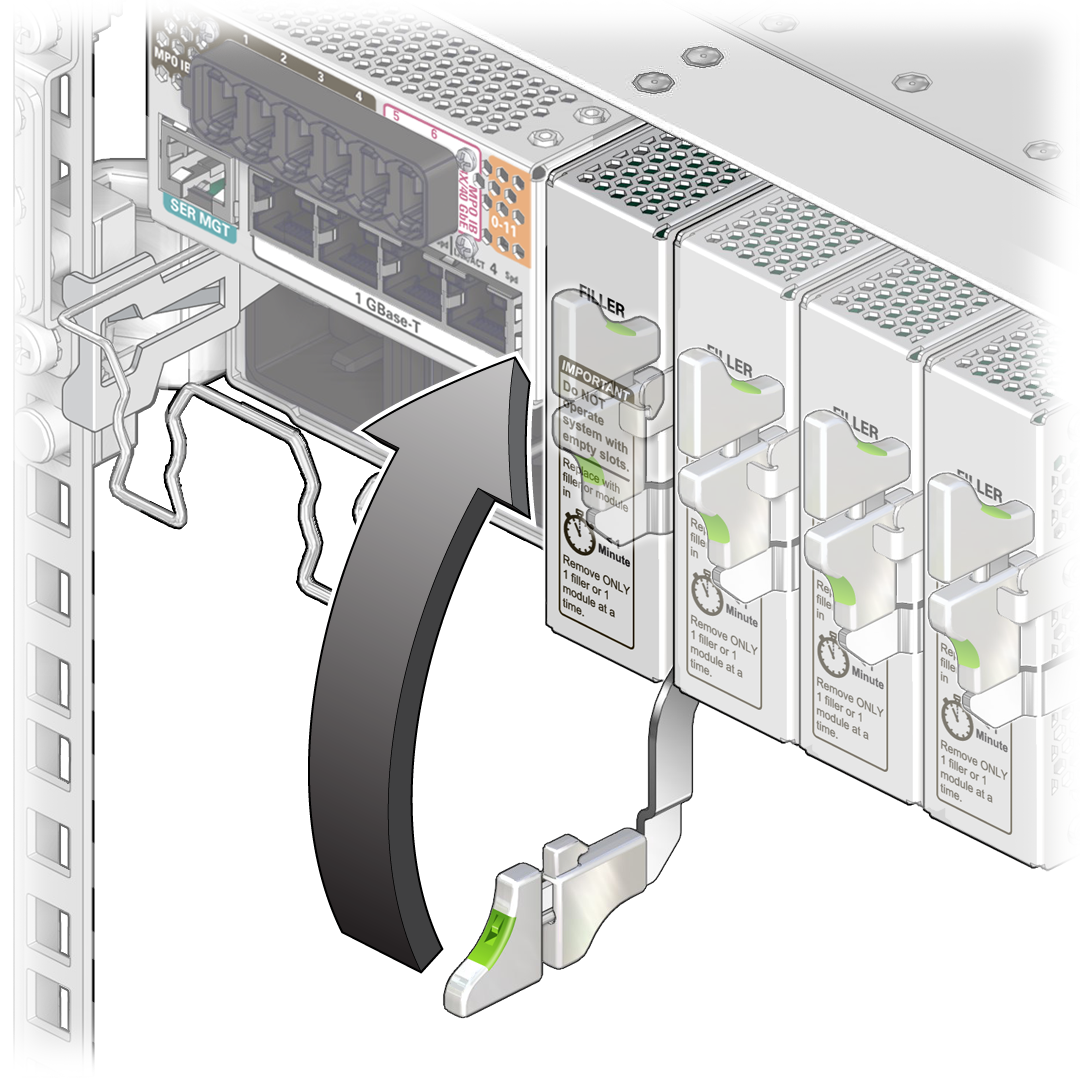
When the filler panel is almost completely seated in the slot and the release
lever begins to rise, press down slightly on the top of the filler panel to
ensure that the notch at the end of the release lever catches on to the slot's
groove and secures the filler panel.

-
Lift the release lever until the it locks the filler panel in the slot.
If you installed this filler panel as part of another service task, return to that task.