Install a Power Supply
Installing a power supply is a hot-swap operation. You do not need to power off the switch before installing the power supply.
- If you are replacing a power supply, remove the faulty or obsolete power supply first, then return to of this task.
- Squeeze the upper and lower halves of the release lever together, and pull the lever in an upward motion.
-
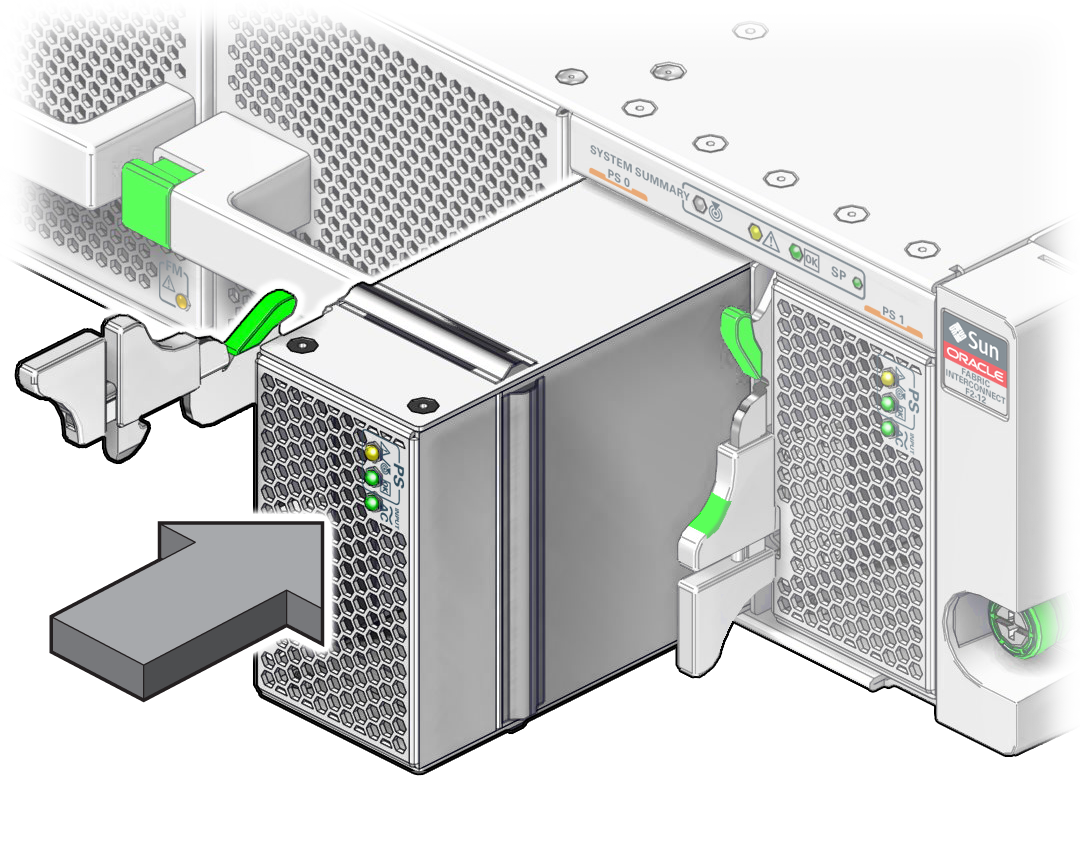
Align the power supply to the opening in the switch chassis with the release
lever on the left and the status LEDs in the upper right corner.

-
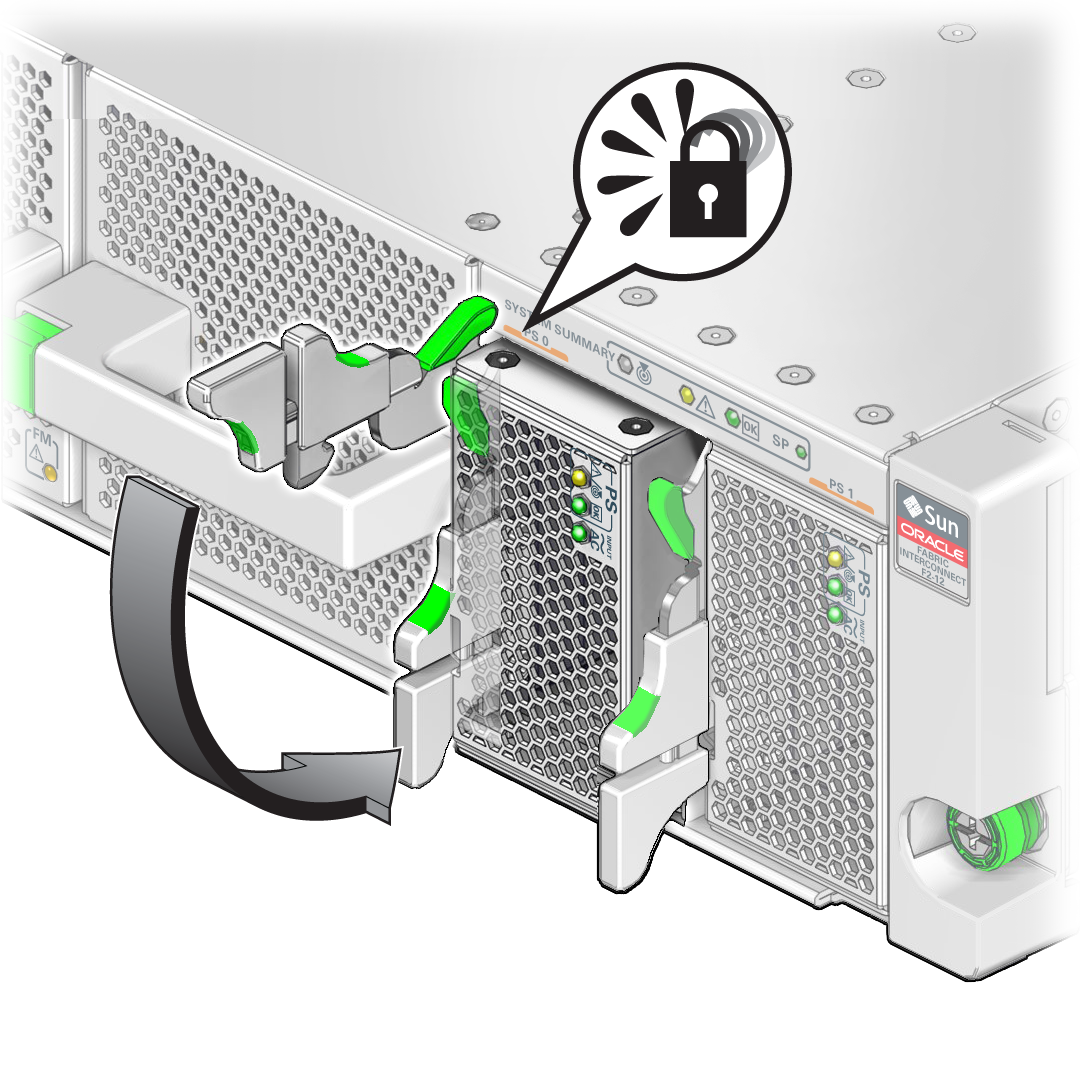
Slide the power supply into the chassis until the release lever begins to
lower, then close the release lever to secure the power supply in the slot.

-
Consider your next step:
- If you installed a power supply as part of another task, return to that task.
- If you installed a replacement power supply, continue to Verify a Power Supply.