Remove an I/O Module
While I/O modules are hot-swappable components, you must first prepare the I/O modules for server.
Note - This task provides generic instructions for removing an I/O module. Refer to the I/O module documentation for instructions specific to your I/O module.
- If you have not already prepared for service, do so now.
-
Prepare the I/O module for service.
See the Preparing I/O Modules for Service.
-
Label and remove any I/O cables from the I/O module.
For specific instructions on removing cables, refer to the I/O module documentation and see Servicing Data Cables.
-
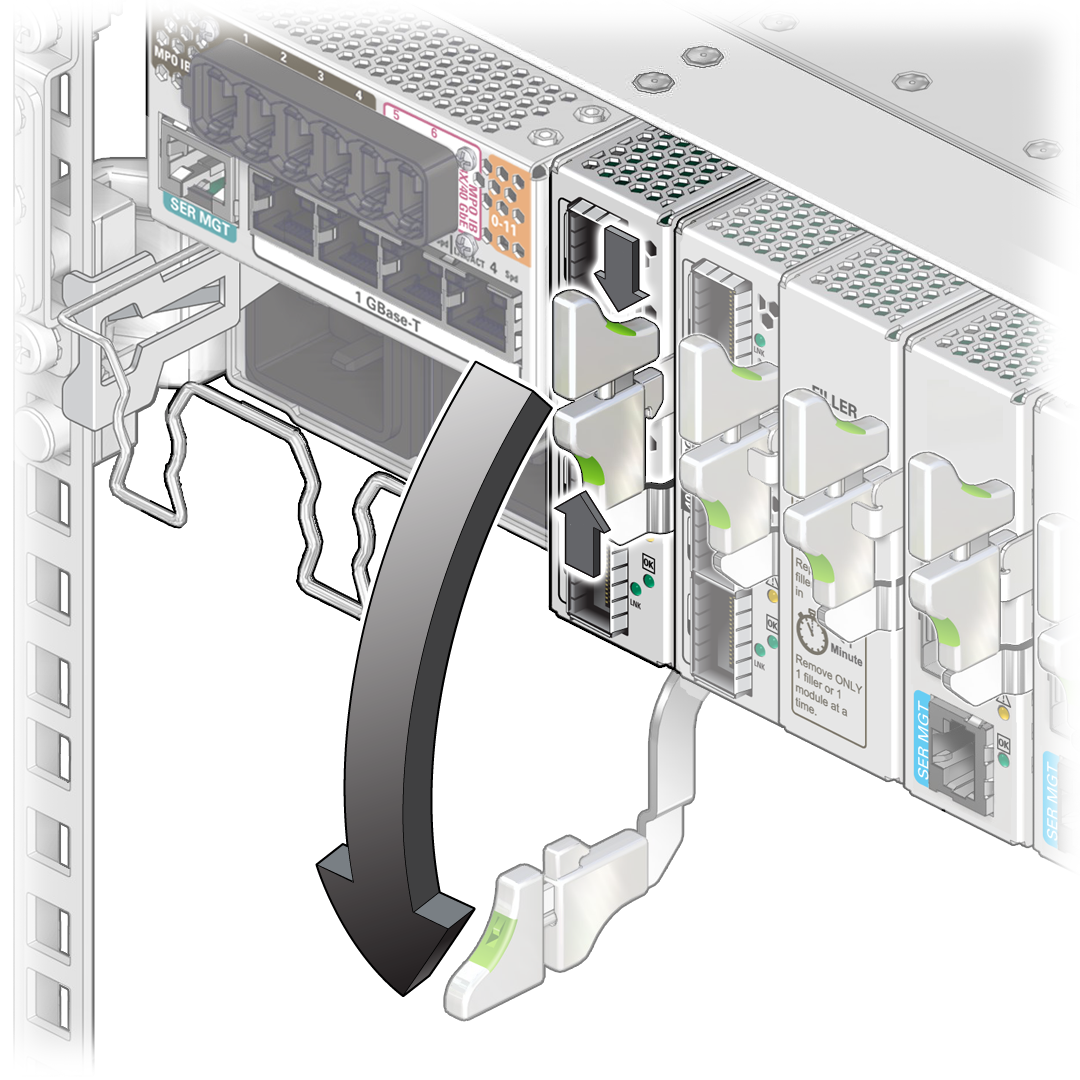
Squeeze the upper and lower halves of the release lever together, and pull the
lever in a downward motion.
Pulling the release lever downward unseats the I/O module from the slot.
Note - While the illustrations in this task show the Oracle F2 10 Gb and 40 Gb Ethernet module, all I/O modules are removed from the switch using this same procedure.
-
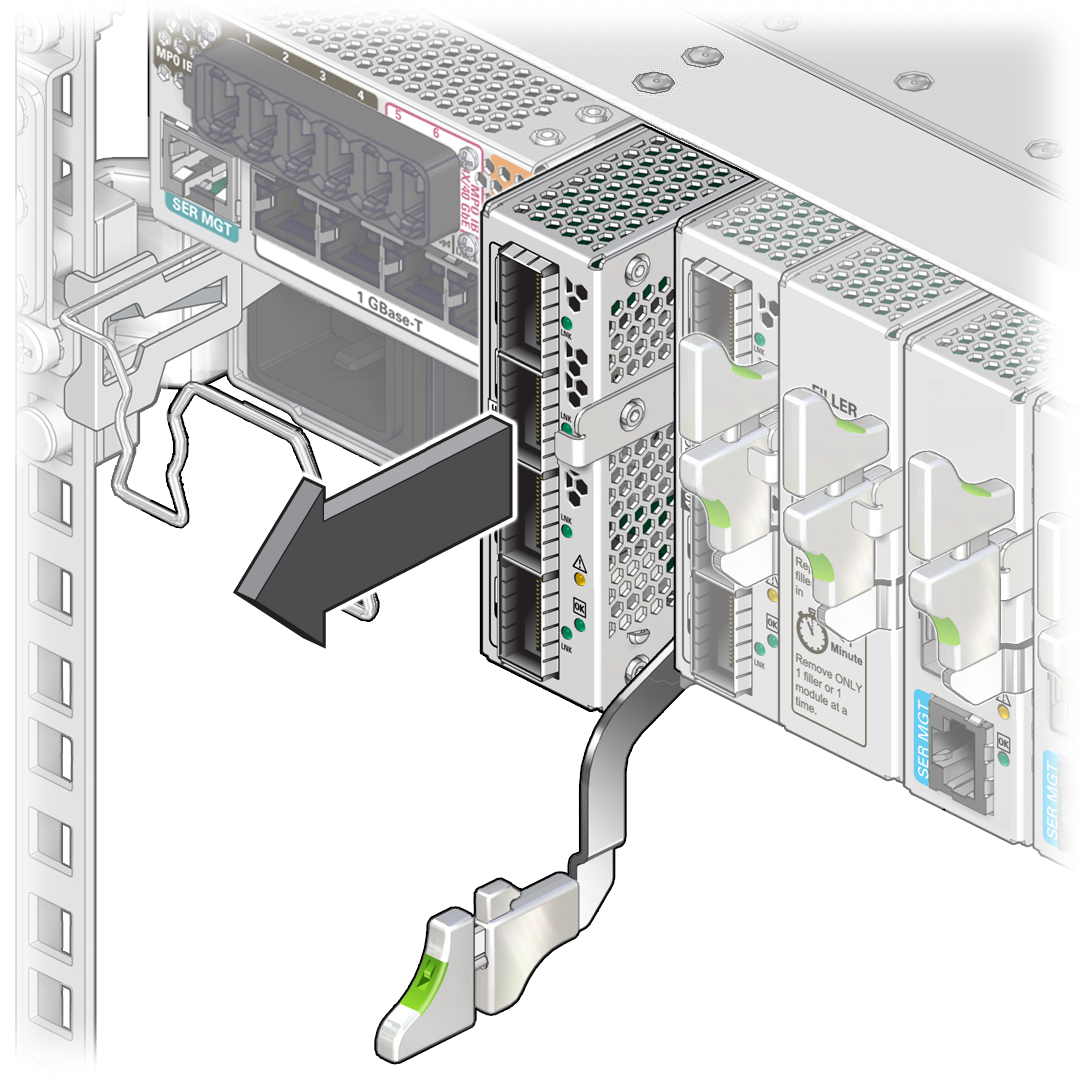
Use the release lever to pull the I/O module from the switch chassis.

-
Use your free hand to support the weight of the I/O module as you pull it free
of the chassis.
Set the I/O module aside on an ESD-safe mat or work surface.

Caution - To maintain proper airflow, replace the I/O module or install a filler panel in the empty slot within one minute of removing the I/O module.
-
Determine your next step:
- If you will be replacing the I/O module, or installing a new I/O module, continue to Install an I/O Module.
- If you removed this I/O module as part of another service task, return to that task.