Replacing a ZS3-2 HDD or SSD
HDDs and SSDs are hot-swappable and can be removed and installed while the storage controller is running without affecting other hardware capabilities. Use the following procedure to replace a ZS3-2 HDD or SSD. For information on disk compatibility, see the Oracle Systems Handbook.
Note - If you have more than one failed drive, replace only one drive at a time. Removing more than one drive in quick succession causes a hardware/pool fault. Also, do not perform a pool configuration operation while a disk firmware upgrade is occurring. To check if an upgrade is in progress, navigate to Maintenance > System in the BUI, or maintenance system updates in the CLI.
-
Identify the failed drive by going to the Maintenance > Hardware
section of the BUI and clicking the drive information icon
 . If you are physically at the system, the amber Service
Required indicator on the HDD or SSD should be illuminated.
-
If you are not physically at the system, turn on the locator indicator by
clicking the locator icon
 .
.
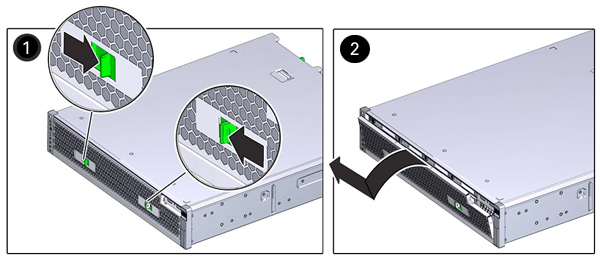
- At the front of the controller, pinch the air filter's left and right release levers inward (1).
-
Pivot the air filter forward and lift if out of the chassis (2).
-
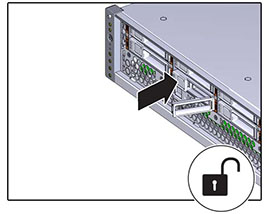
Press the release button of the failed drive, and pivot the release lever
open to the right.
-
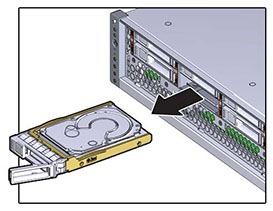
Grasp the release lever and pull the drive out of the drive slot.
-
After at least 30 seconds, navigate to the Hardware > Maintenance
screen, and click the right-arrow icon
 on the system controller to verify that the software
has detected that the drive is not present.
- Align the replacement drive with the drive slot.
-
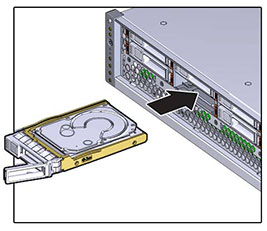
Press on the release button to slide the drive into the chassis until the
release lever moves slightly inward.
-
Press the release lever fully closed with a click, securing the drive into
the drive slot.
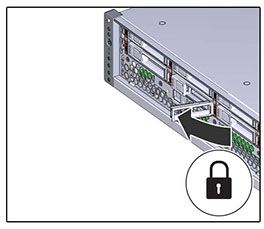
-
Go to the Maintenance > Hardware screen of the BUI. Click the
right-arrow icon
 for the controller and then click Disk to verify that
the online icon
  is green for the newly installed drive.
- If a fault does not self-clear, see Repairing Active Problems.