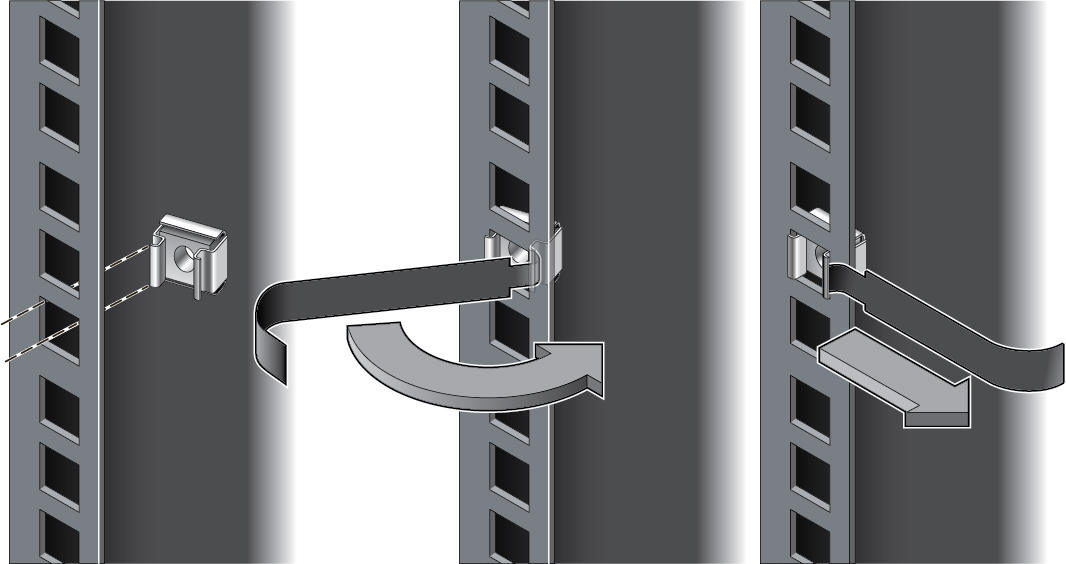
Install the Cage Nuts
- Identify the prerequisite and subsequent installation tasks that you must perform in conjunction with this task.
- Determine where you are installing the switch.
-
Mark this location on each rack post with masking tape.

Counting the number of rack units from the bottom of the rack to the mounting location assists you when marking the other rack posts.
-
Install eight cage nuts into the rack, two cage nuts for each rack post.
Note - Each RU mounting location on the rack post has three square holes. For installing the switch, there is no need for a cage nut in the center hole.- Orient the cage nut to the square hole with the flanges to the right and left.
-
Insert the outer flange into the square hole.

- Using the cage nut installation tool or flat-blade screwdriver as a guide, catch the inner flange and pry it into the square hole.
- Pull the cage nut installation tool or flat blade screwdriver from the flange.
- Repeat Step 1 to Step 4 for each cage nut.
- Install the rackmount hardware.