Install the Switch
- Identify the prerequisite and subsequent installation tasks that you must perform in conjunction with this task.
-
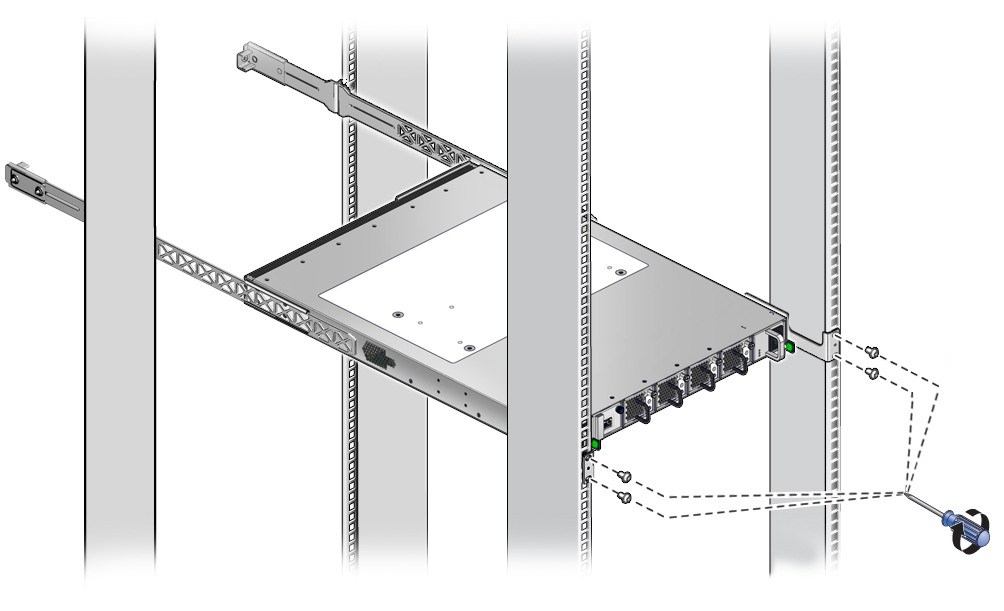
Carefully lift the switch and slide it into the rack, from the front
rearward.
Ensure that the ends of the long rails slide into the C-channel brackets at the rear of the switch chassis.

-
Using a No. 2 Philips screwdriver, hold the front of the switch chassis to the
front rack posts with two M6x12 screws at each side.
Note - Do not fully tighten the screws at this time.
-
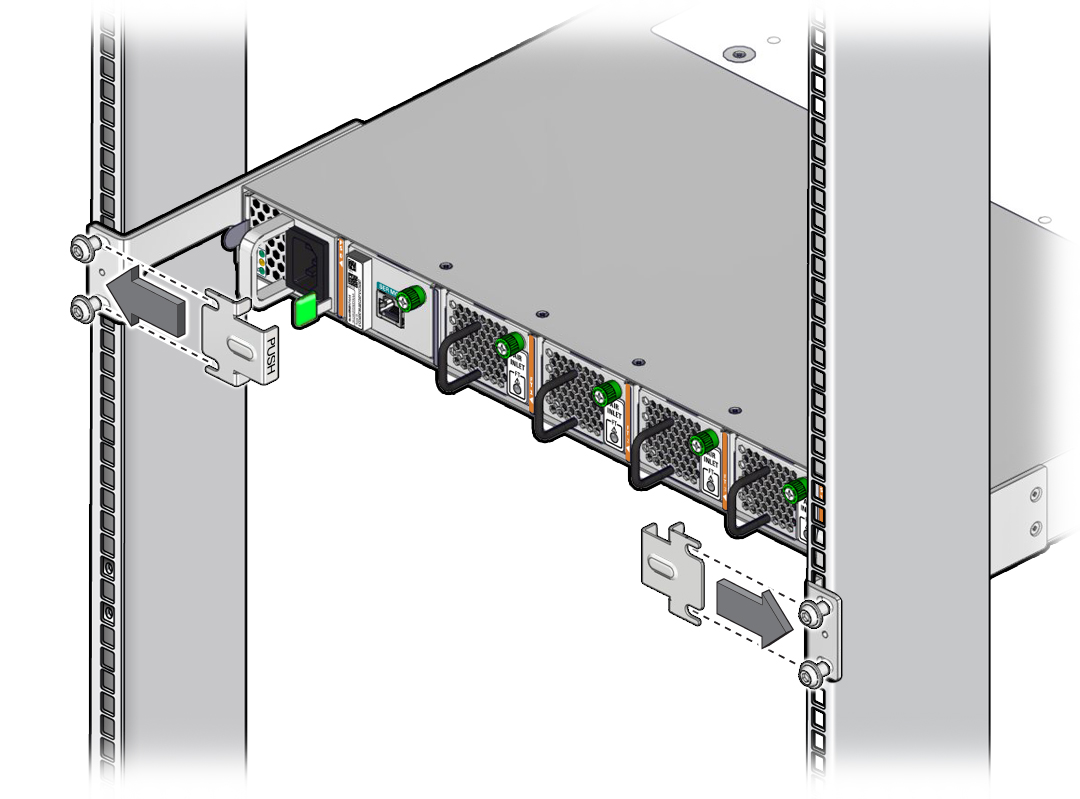
Slide the snap bracket under the loose screws with the tabs pointing into the
rack.

-
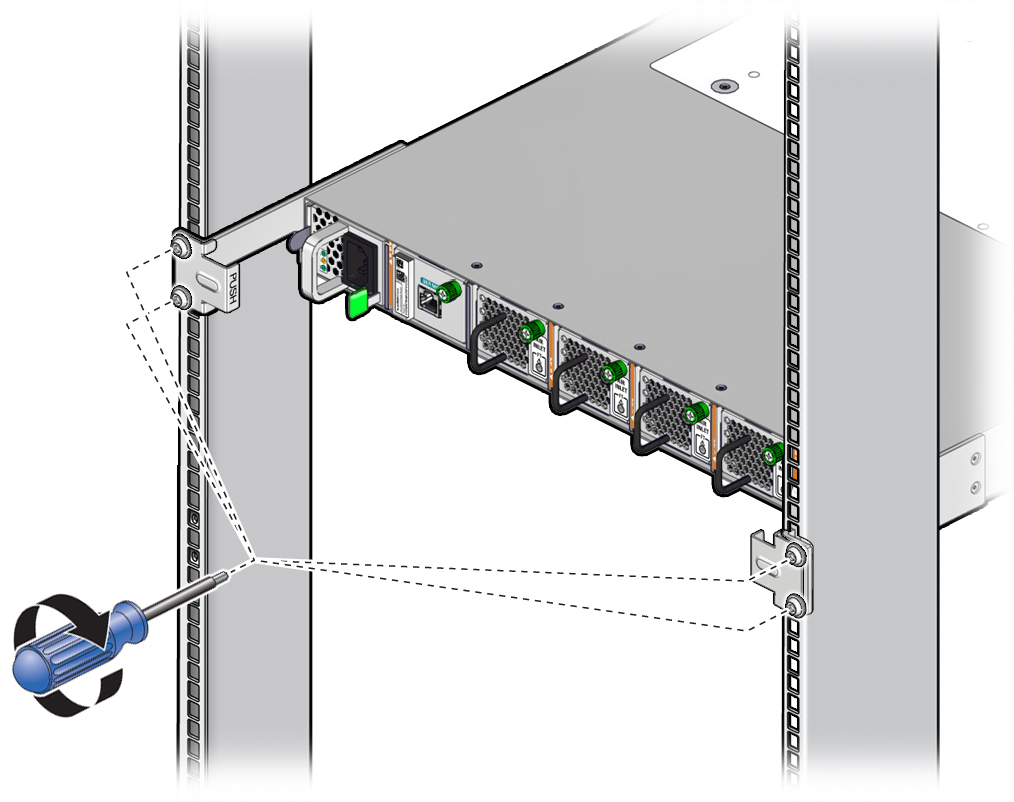
While pressing on the word PUSH embossed in the snap bracket, fully tighten
the screws.

- Repeat for the snap bracket on the other side.
-
Install the CMB.
See Install the CMB.