Install the Rail Kit
-
Starting at the bottom of the cabinet, locate the appropriate rack unit
(RU) height.
Storage shelves must be installed below the server nodes to prevent the rack from tipping.
-
Open the storage array rail kit box and find the cage nut packets included
with the kit, and confirm if your rack uses square or round holes.
The cage nut packets include a special template for either round or square hole racks for positioning the cage nuts.
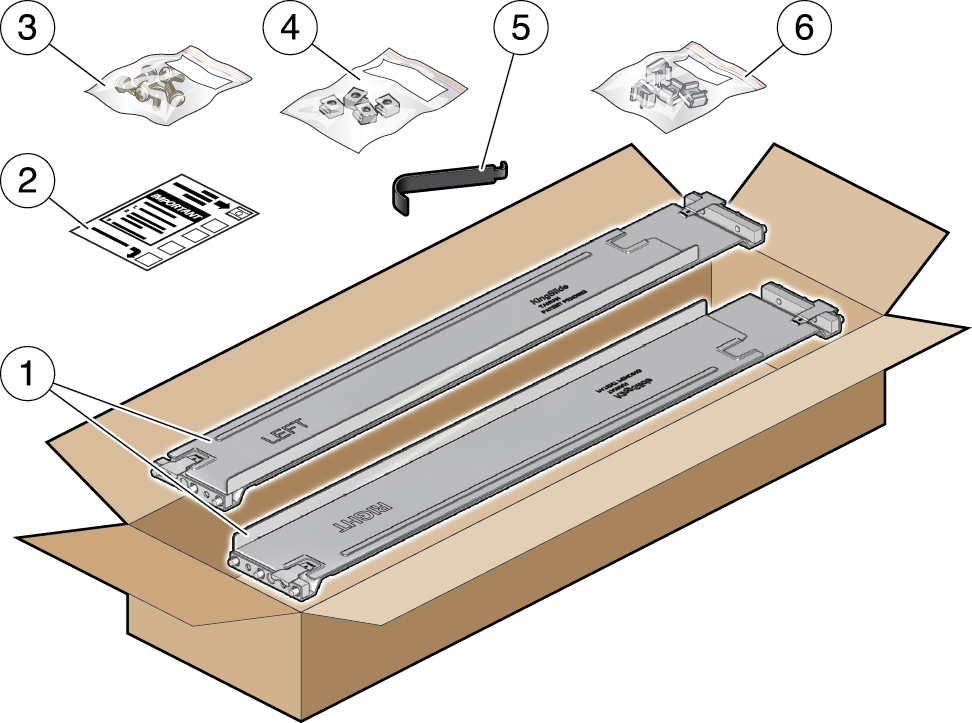
Note - The following steps show rail kit installation with a square hole rack. The same steps would apply for a round hole rack. No.Description1Two adjustable storage array rails2Hard copy document3Six rear 10-32 7mm shipping screws (2 are spares)4Four round 7mm 10-32 cage nuts per set (2 are spares). Only one set is required, either square or round.5Cage nut tool6Four square 9.5mm 10-32 cage nuts per set (2 are spares). Only one set is required, either square or round.
 -
Attach the storage array rails to the rack, as follows:
- Orient the rail so that the stamped label (LEFT or RIGHT) is facing the inside of the rack.
-
Adjust the rail length to fit the front and rear of the
rack.
Note - Mark which rack rail holes you will be using to ensure the storage array rails are installed evenly and correctly the first time. -
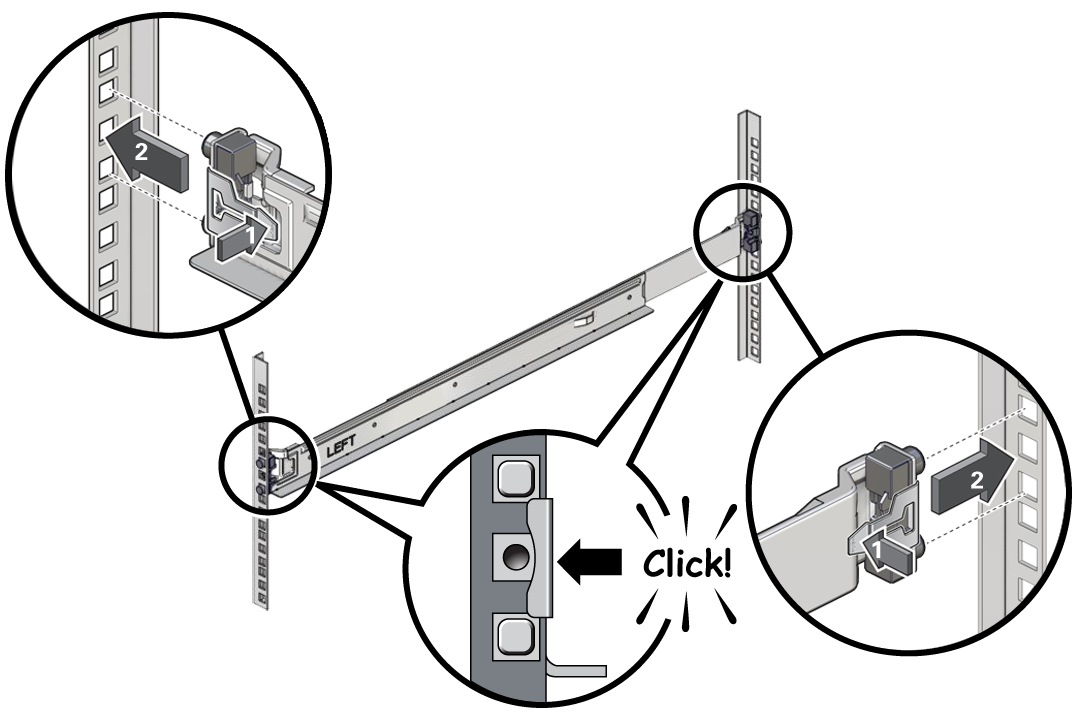
Hold open the rail clamp at each end of the rail by pressing the
clamp lever [1] and insert both ends of the rail into the
appropriate rack holes [2].

-
Close the rail clamps over the rails by releasing the clamp
lever.
You will hear an audible click as the clamps lock in place over the rack rails.
- Repeat Step 3.a through Step 3.d for the second rail.
-
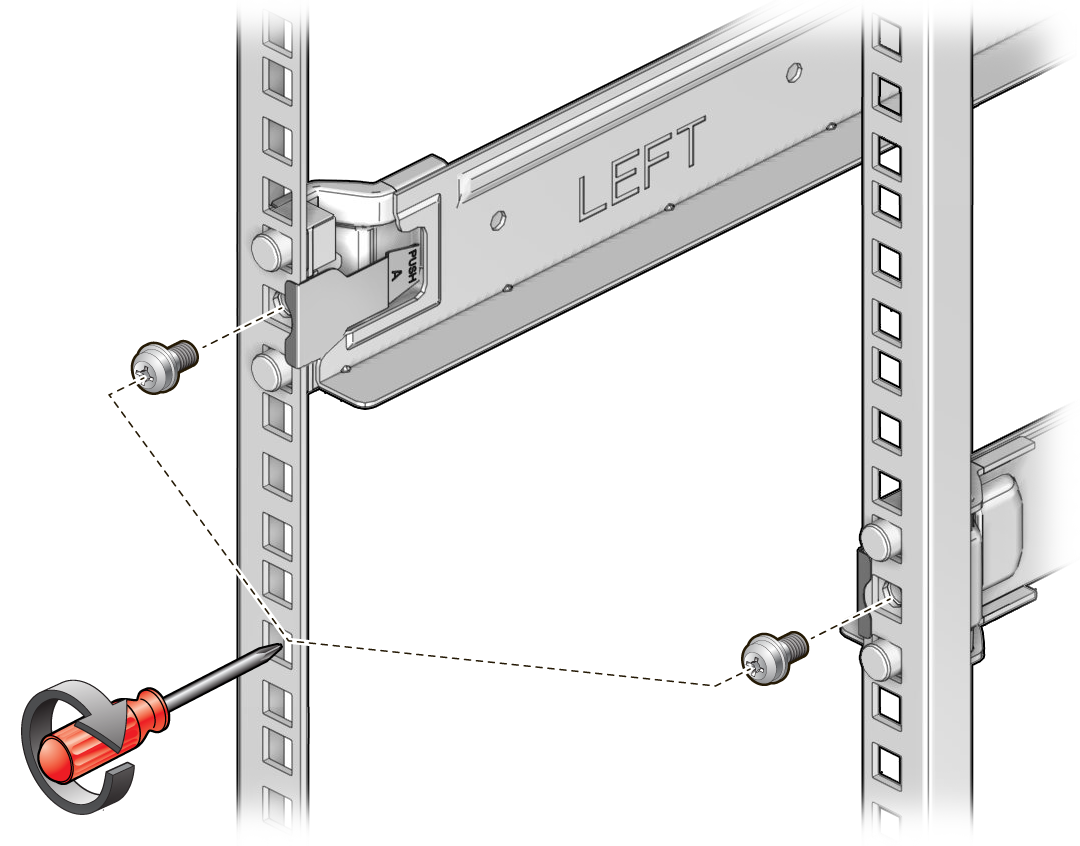
Install one screw through the rack and into the rear of each rail.

-
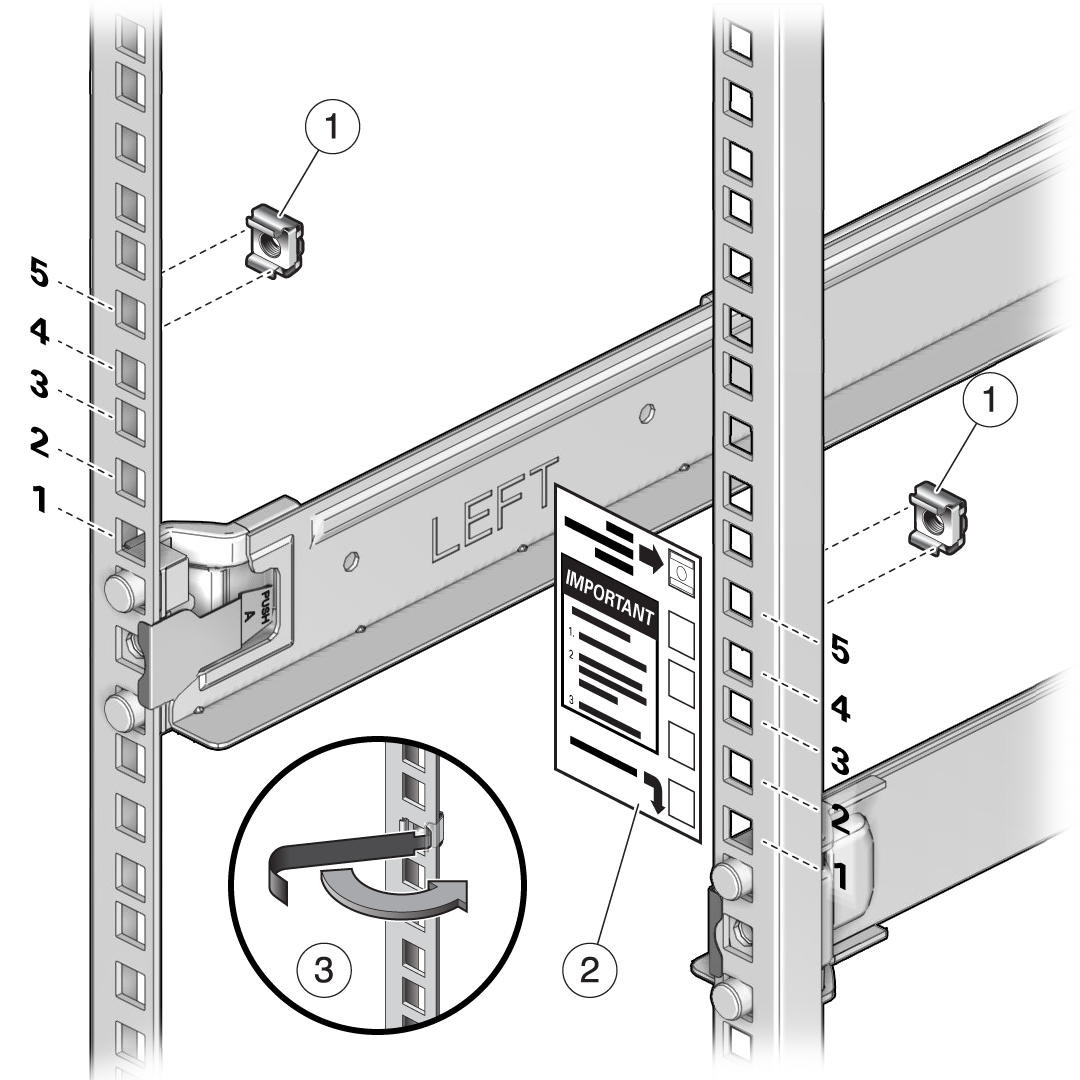
Install the front cage nuts.

Caution - Installing the storage array without the front cage nuts will cause the storage array to be unstable. You would then need to remove the storage array from the rack to install the cage nuts.
 No.Description1Cage nuts2Template3Cage nut tool
- Use the template to determine cage nut placement.
- Retrieve a cage nut and hook one lip of the nut into the appropriate rail hole.
- Insert the tip of the cage nut insertion tool through the rail hole [3] and hook the other lip of the cage nut. Pull the cage nut through the hole until the lip snaps into place.
- Repeat Step 5.a through Step 5.c for the second cage nut.
- Install the storage array in the rack.