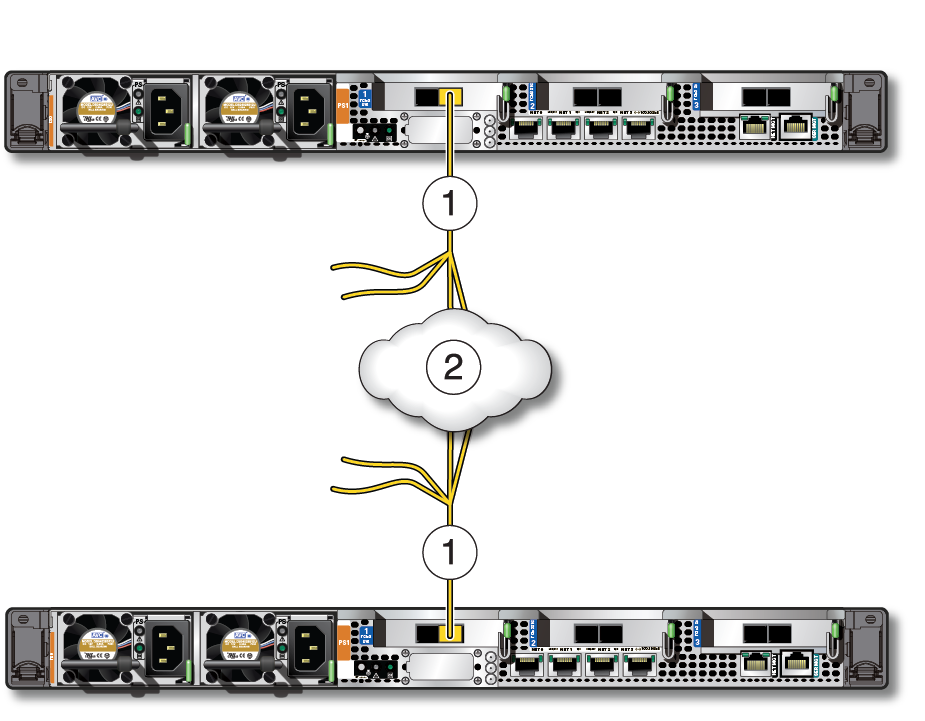
Connect to the 10GbE Client Access Network Through 10GbE NIC
-
Determine which type of cabling you will use to connect to the 10GbE
client access network through the 10GbE NIC.
-
QSFP to 4x SFP+ splitter cable — Copper cabling. Additional transceivers are not needed for this cable.
-
MPO to 4x LC duplex splitter cable — Fiber optic cabling. Additional transceivers are needed for this cable, both for the 10GbE NICs in the compute nodes and for the 10GbE switch. Order and install these transceivers before proceeding with these instructions.
Both cables have a single connector at one end and split into four connectors at the other end, though you will only use two of these four connectors.
-
- Locate the 10GbE NIC installed in PCIe slot 1 on compute node 1.
-
Connect the single-connector end of the cable to the P 0 port (the
rightmost port, or port A) in the 10GbE NIC.
The leftmost port (P 1, or port B) is inactive (unused).
-
On the four-connector end of the cable, connect the first two ends of the
cable (labeled A and B, or 1 and 2) to the 10GbE switches connected to the
client access network, leaving the other two ends of the cable (C and D, or
3 and 4) unconnected.
If you want to isolate network traffic on two ports, connect the other ends of the Ethernet cables to two different 10GbE switches to create two independent networks for client access.
-
Repeat Step 2 to Step 4 on compute node 2 to make the same connections for that compute
node to the 10GbE client access network.
 No.Description1Connections from 10GbE NIC on compute nodes 1 and 22Client access network through 10GbE switch
 - Connect the 10GbE private network.