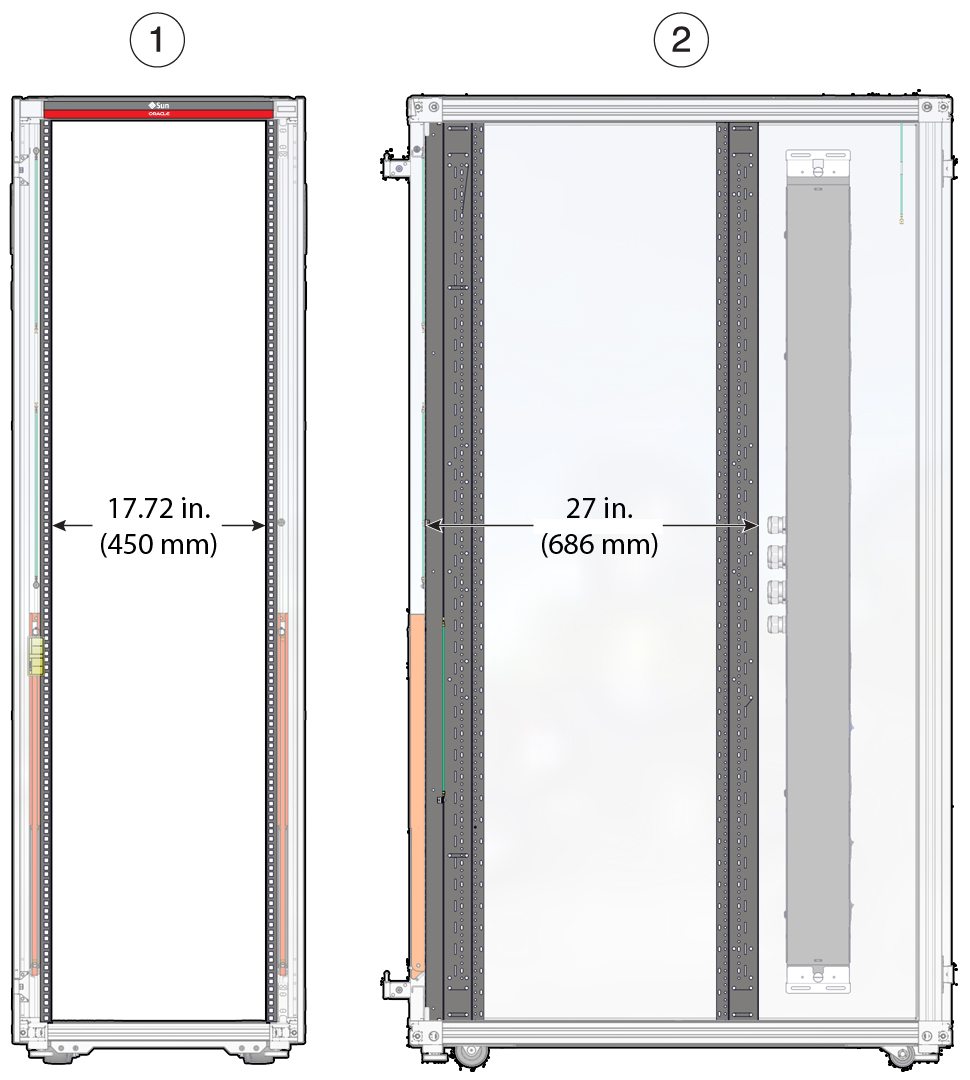
Prepare and Stabilize the Rack
 | Caution - To reduce the risk of personal injury, stabilize the rack by extending all anti-tilt devices before installing the server. |
Refer to the rack documentation for detailed instructions for the following steps.
-
Read the rack cautions and stabilize the rack.
See Rack Cautions.
- Open and remove the front and rear doors from the rack.
-
Ensure that the RETMA rails are installed in the proper location.
The width between the right and left RETMA rails must be 17.72 in. (450 mm), and the length from the front plane of the front RETMA rail and the rear plane of the rear RETMA rail must be 27 in. (686 mm).

Caution - If the RETMA rail depth is greater than 27 in. (686 mm), the server will not fully rest on the rear mounting bracket, and you will not be able to install the top rear braces. If the RETMA rail depth is less than 27 in. (686 mm), the server will be stopped by the rear mounting bracket during installation. In this case, you will be unable to secure the server to the rack using the front panel screws.

-
If there are leveling feet beneath the rack to prevent it from rolling, extend
these leveling feet fully downward to the floor.
For Oracle's Sun Rack II rack, see Lower the Leveling Feet (Sun Rack II) for instructions.
-
To prevent the rack from tipping during the installation, stabilize the rack
using all anti-tilt mechanisms provided.

Caution - The Sun Rack II anti-tilt legs can inhibit the installation of the server when installing the server into the lower quarter of the rack. Ensure that you have extended the rack's four leveling feet completely, and use a third person to support the rack while installing the server.
Note - The Oracle Rack Cabinet 1242 has an anti-tilt bar that extends from the bottom of the rack. It will not inhibit the installation of the stand-alone server. - Continue with the installation by unpacking the server from its shipping container.