Install the Fan Board
- Remove
the fan board.
See Remove the Fan Board.
- Unpack the replacement fan board and place it on an antistatic mat.
- Remove the fan board cable and power cables from the faulty fan board and plug the cables into the fan board on the replacement fan board.
- Reinstall the fan board.

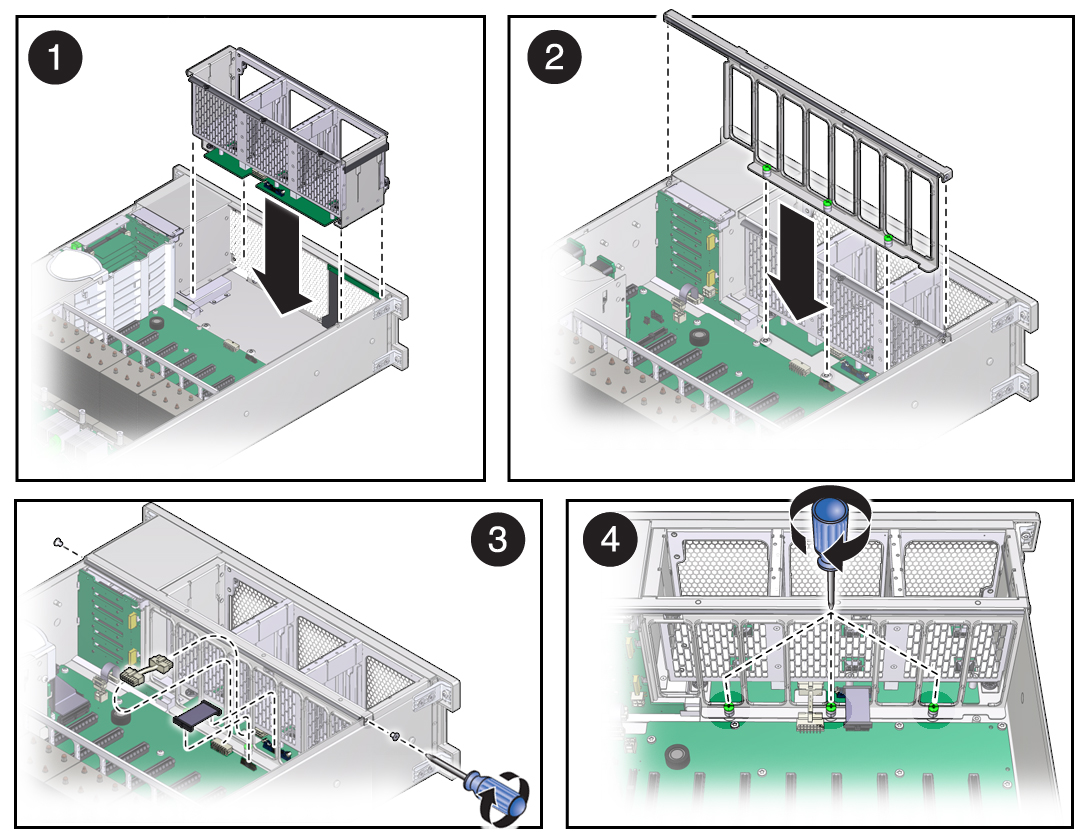
- Insert the fan board into the chassis, moving it down and toward the front (panel 1).
- Reposition the front memory riser guide, routing the fan board and power cable through the riser guide (panels 2 and 3).
- Plug the fan board cable and power cable into the connectors on the motherboard (panel 3).
- Secure the fan board by reinserting and tightening the two screws on each side of the outside of the chassis (panel 3).
- Tighten the three captive screws to hold the front memory riser guide in place (panel 4).
- Reinstall all fan modules.
See Remove a Fan Module.
- Reinstall all memory risers.
- Return the server to operation.
- Install the top cover.
- Return the server to the normal operating position.
- Reinstall the power cords to
the power supplies and power on the server.
See Returning the Server to Operation.
Note - Authorized service personnel might need to reprogram the product serial number on the fan board. This number is used for service entitlement and warranty coverage. The correct product serial number is located on a label on the front of the chassis.