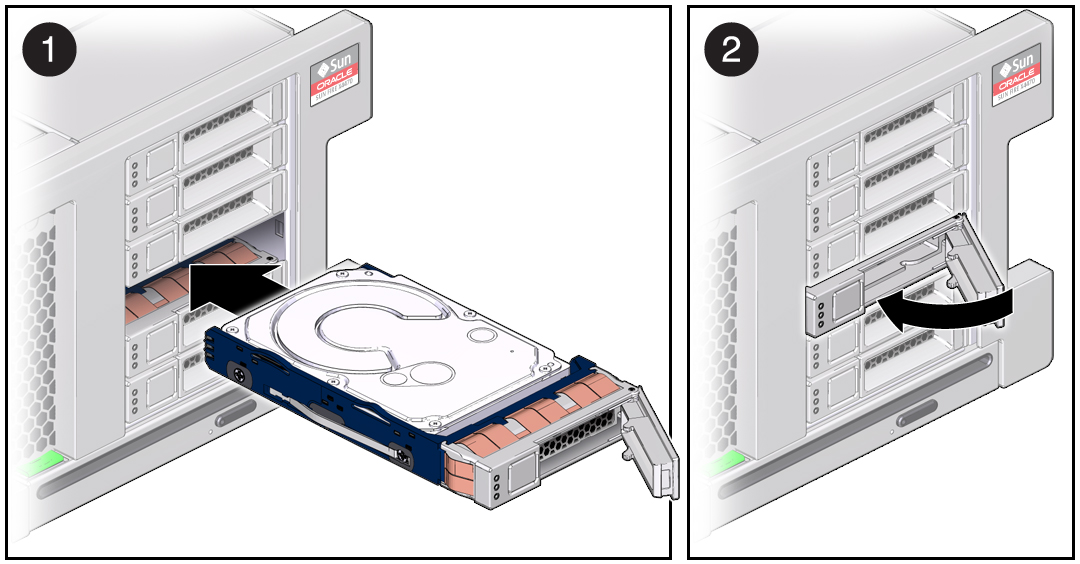
Install a Drive
Installing a drive into a server is a two-step process. You must first install the drive into the drive slot and then configure that drive to the server.
Note - If you removed an existing drive from a slot in the server, you must install the replacement drive in the same slot as the drive that was removed. Drives are physically addressed according to the slot in which they are installed.
- Remove a drive or a drive filler panel.
- Unpack the drive and place it on an antistatic mat.
- Fully open the release lever on the drive.
- Install the drive by completing
the following tasks.

- Return the drive to operation
by doing one of the following:
- If you cold-serviced the drive, restore power to the server. Complete the procedure described in Power On the Server (Oracle ILOM) or Power On the Server (Power Button).
- If you hot-serviced the drive,
configure it using the cfgadm -c configure command.
The following example shows the drive at c0::dsk/c1t1d0 being configured.
# cfgadm -c configure c0::dsk/c1t1d0
Replace c0:dsk/c1t1d0 with the drive name that applies to your situation.
- Verify the drive functionality.