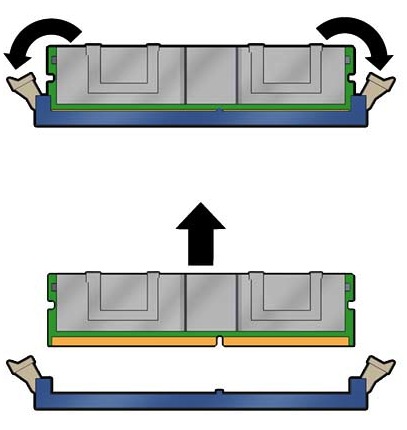
Remove a DIMM or DIMM Filler Panel
DIMMs are cold-service components that can be replaced after you remove the processor module from the server.
 | Caution - This procedure requires that you handle components that are sensitive to electrostatic discharge. This discharge can cause server components to fail. |
Before beginning this procedure, ensure that you are familiar with the cautions and safety instructions described in Safety Information.
 | Caution - Do not leave DIMM slots empty. All of the DIMM slots must have a DIMM. |
- Take
the necessary ESD precautions.
See Prevent ESD Damage.
- Remove the PM with the faulty DIMM.
- Locate the DIMMs that need to
be replaced.
See Determine Which DIMM Is Faulty (FMA) or Determine Which DIMM Is Faulty (LEDs).
- Push down on the ejector tabs
on each side of the DIMM until the DIMM is released.

Caution - DIMMs and heat sinks on the motherboard might be hot.

- Grasp the top corners of the faulty DIMM, and lift it out of its slot.
- Place the DIMM on an antistatic mat.
- Repeat Step 4 through Step 6 for any other DIMMs that you intend to remove.
- Determine your next step.
- If you are
replacing a faulty DIMM, see Install a DIMM.
All of the replacement DIMMs must be the same size and type. See DIMM Configuration.
- If you are upgrading the server, continue to remove all of the DIMM filler panels from the new
processor modules.
DIMM filler panels are not supported in running processor modules. After you have removed all of the DIMM filler panels, you can install the new DIMMs. See Install a DIMM.
- If you are
replacing a faulty DIMM, see Install a DIMM.