Remove a Processor Module or Processor Filler Module
The SPARC T5-8 server supports two configurations:
Fully-populated — four processor modules
Half-populated — two processor modules in PM0 and PM1, and two processor filler modules in PM2 and PM3
The removal steps are the same for both components. Processor modules and processor filler modules are cold-service components that can be replaced only after you power off the system. For the location of the modules, see Front Panel Components (Service).
 | Caution - This procedure requires that you handle components that are sensitive to electrostatic discharge. This discharge can cause server components to fail. |
- Remove all of the power from the system.
- Take the necessary ESD precautions.
See Prevent ESD Damage.
- Determine which module you need
to remove.
If you are replacing a faulty processor module or upgrading the memory, remove that specific processor module.
If you are upgrading the server to a fully-populated configuration, start by removing the processor filler module in slot 1.
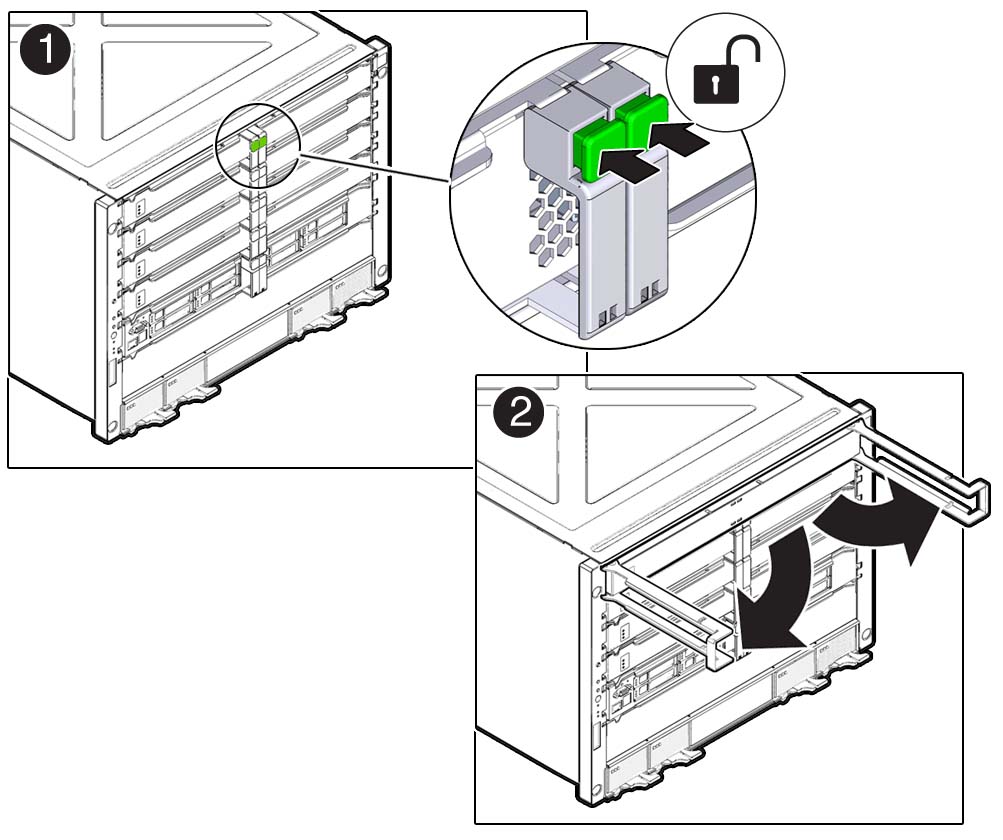
- Squeeze the release latches together
on the two extraction levers, and pull the extraction levers out
to disengage the processor module or processor filler module from
the server.

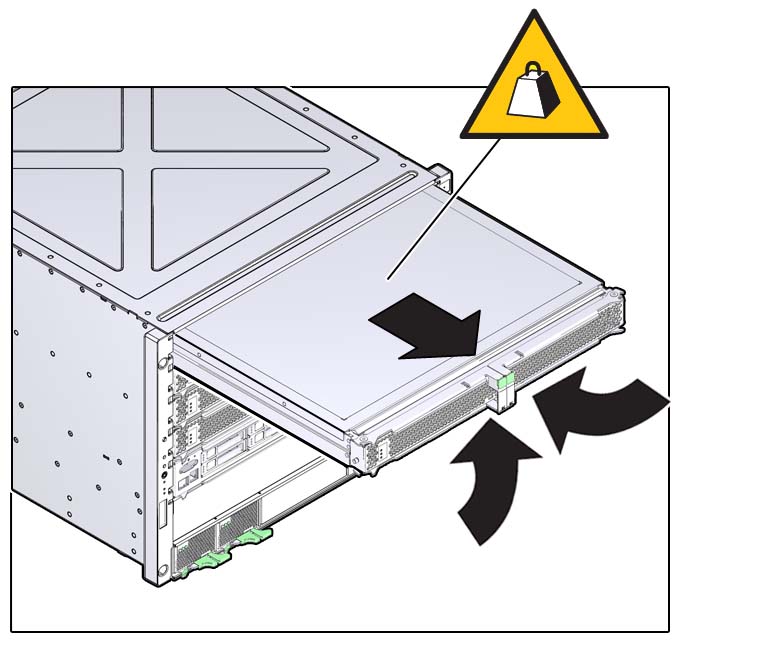
- Pull the processor module or
processor filler module halfway out of the server, and then close
the levers.
This will keep the levers from getting damaged when you remove the module from the server.


Caution - Do not touch the connectors at the rear of the module.
- Using two hands, completely remove the processor module or processor filler module, and place the module on an antistatic mat.
- Determine your next step:
- If you are replacing DIMMs in an existing processor module, go to Step 8.
- If you are upgrading the server to a fully-populated configuration, repeat Step 4 through Step 6 to remove the second processor filler module in slot 2, and then go to Server Upgrade Process.
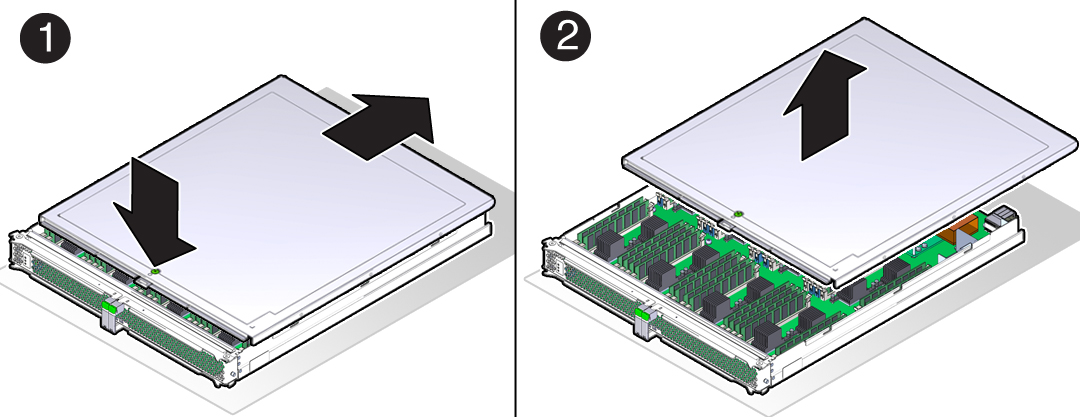
- Remove the cover:
- Determine your next step:
- If you are replacing DIMMs, see Servicing DIMMs.
- If you are installing new processor modules to upgrade the server, return to Server Upgrade Process.
- If you are replacing a faulty
processor module, follow these steps:
- Remove all of the DIMMs from the faulty processor module, and set them in a safe place.
- Install the DIMMs into the new
processor module.
See Install a DIMM.
- Install the processor module.
