Attach the Right Angle Bracket in a 27-Inch Sun/Oracle Rack
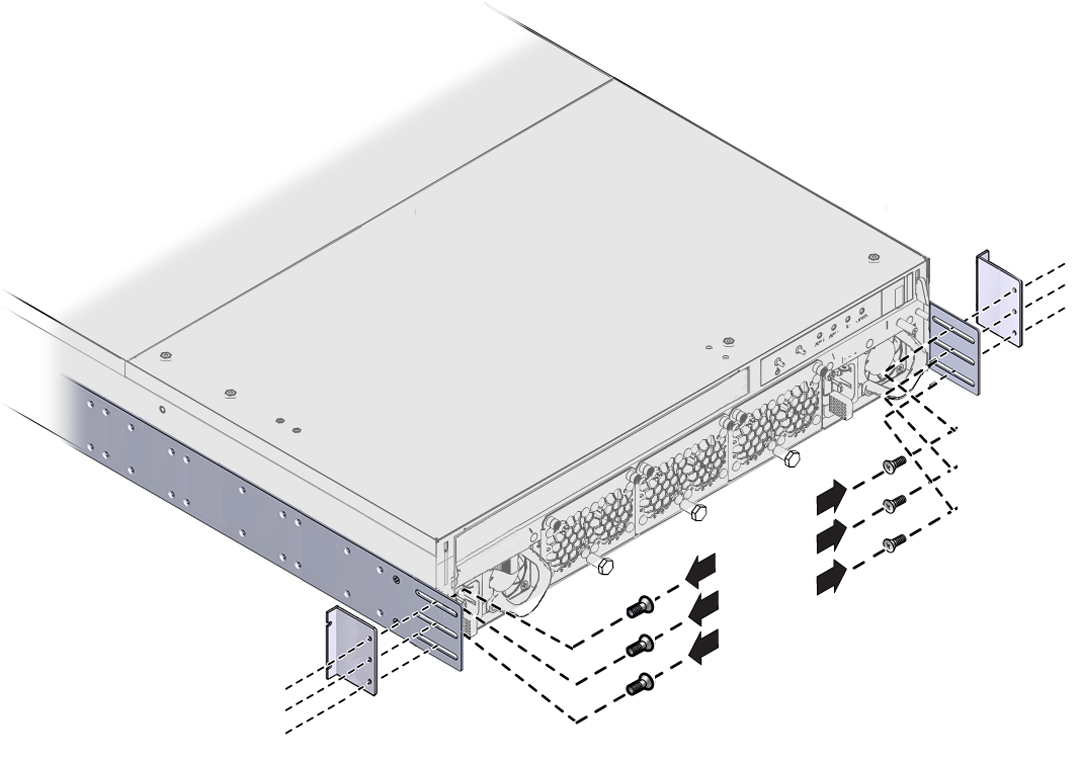
- Align the 27-inch angle bracket for the Oracle Fabric Interconnect F1-4 so that it is outside of the side panels.
- From inside the side panels,
insert the M3.5 flat-head screws through the slots in the side panel
and into the angle bracket's screw holes.
See Aligning the Angle Brackets and Inserting the Screws. Each angle bracket requires 3 screws.
Figure 28 Aligning the Angle Brackets and Inserting the Screws

- Make sure that screw holes in
the angle brackets lie flush against the slotted edge of the side
panels.
The slotted edge of the angle bracket will attach to the rack post.
Note - Leave the M3.5 screws loose enough to adjust the Oracle Fabric Interconnect's depth in the rack. While the screws are loose, you can slide the chassis along the slots in the mounting brackets until the chassis is flush with the rack, or whatever depth is your preference. - Insert the M6 pan-head rack screw
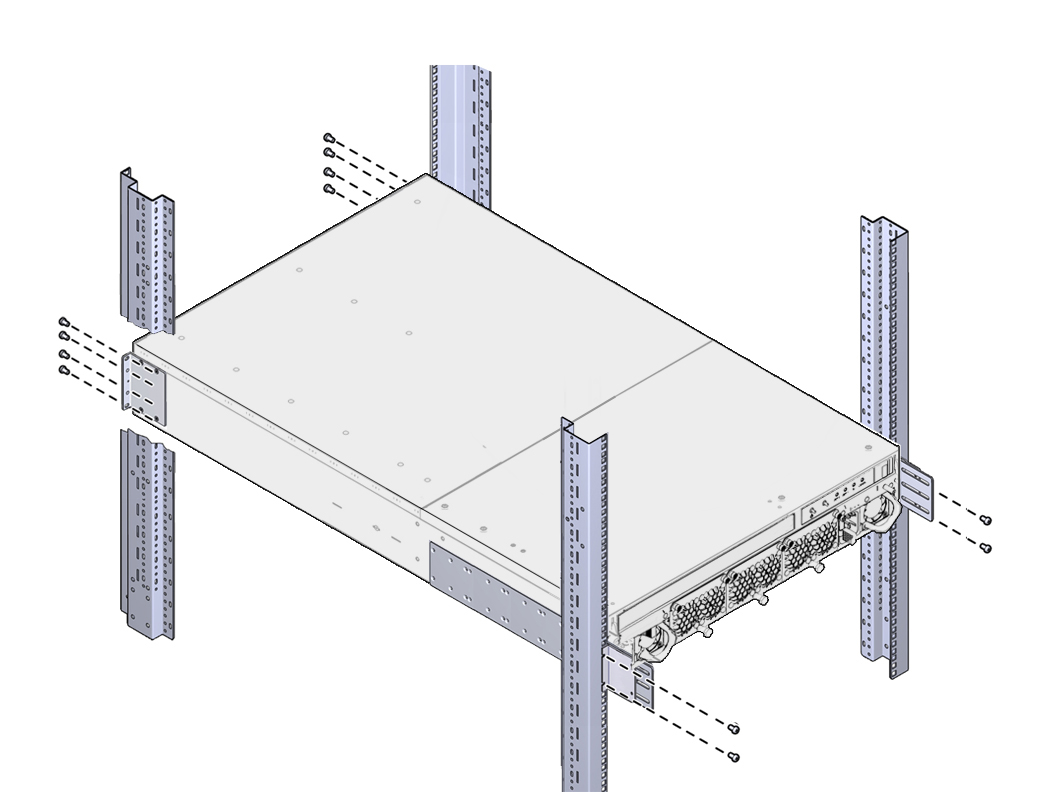
through the slotted edge of the angle bracket, and into the chassis.
The Sun/Oracle rack is untapped, so you should have already installed the M6 cage nuts into the rack. For the Sun/Oracle rack, use only the M6 screws to attach the chassis to the rack.
- Tighten the pan-head rack screws
to secure the chassis to the rack.
See Inserting Screws Through the Angle Brackets and Into the Rack Posts. Each point of the attachment through the angle bracket requires two screws to secure the chassis to the rack.
Figure 29 Inserting Screws Through the Angle Brackets and Into the Rack Posts

- With the chassis adjusted to
your preferred rack depth, tighten the M3.5 screws.

Caution - When the chassis is completely installed, check all screws to make sure they are tight. If any screws are loose, make sure you tighten them. All screws must be tightened for the chassis to be completely, and safely, installed.
- Install the Cable Management
Assembly (CMA) as documented in Installing the Cable Management Assembly.
The same CMA is supported for both the Oracle Fabric Interconnect F1-15 and Oracle Fabric Interconnect F1-4, so use the same procedure. Where illustrations show the Oracle Fabric Interconnect F1-15, you will substitute the Oracle Fabric Interconnect F1-4.
- Install the I/O modules as documented in Installing an I/O Module.
- Cable the Fabric Interconnect F1-4 as documented in Connecting the Fabric Interconnect to Other Equipment.
- When the Fabric Interconnect F1-4 is installed in the rack and cabled to the other equipment, you will plug in the power cords and anchor the power cables in place as documented in AC Power.