Connect Power for the Fabric Interconnect F1-4
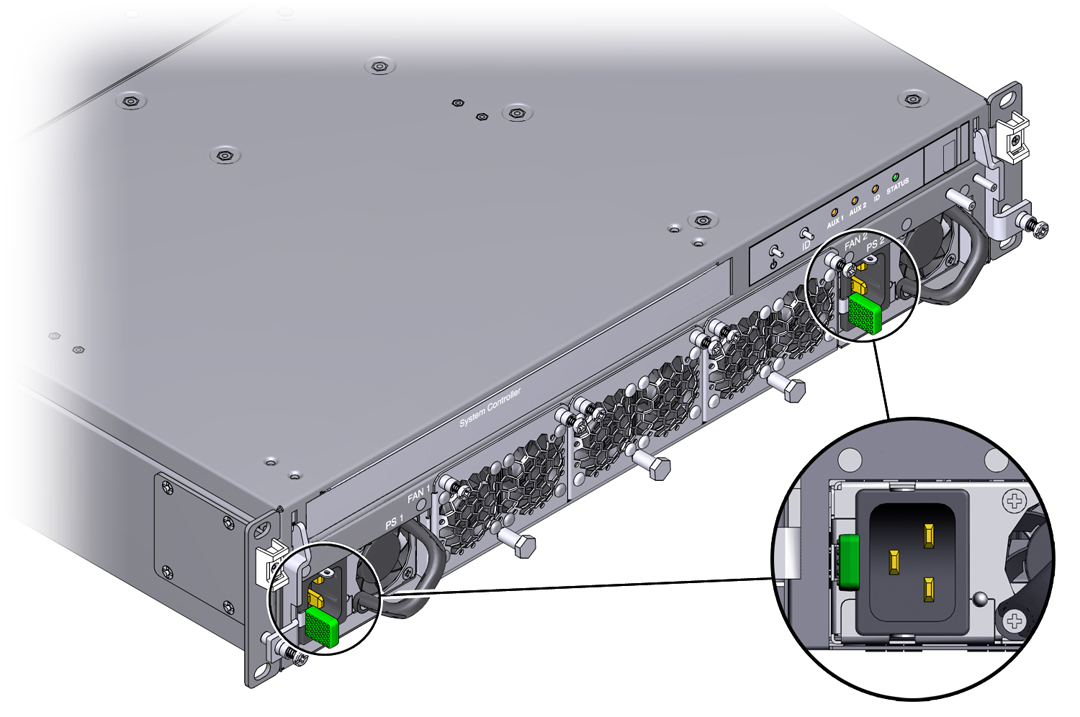
The Fabric Interconnect F1-4's power supplies and power plugs are located on the front of the chassis. See below.

- Get
the two cable tie wraps from the accessory kit. Notice that one
side is smooth and one side has teeth.
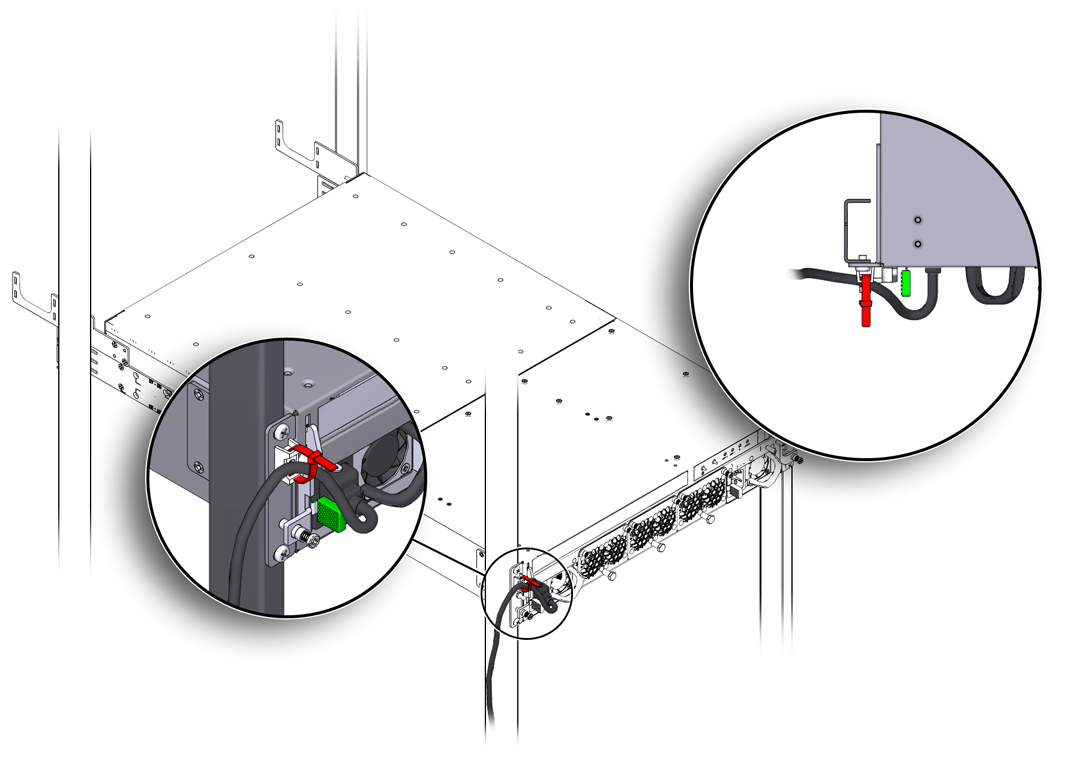
Note - You will find it helpful to orient the cable tie as follows: - the smooth side is facing the chassis and the ribbed side is facing you. - the release tab is at the top of the tie wrap. Orienting the cable tie this way facilitates locking and releasing the power cable (if needed) when the cable tie is in use. - Insert the cable tie through the top slot of the anchor first, then the bottom slot. Power Cord Anchor shows the location of the anchors. Make sure that the cable tie is threaded through both the top and bottom slots.
- Plug the power cord into the power socket on the Fabric Interconnect F1-4, but do not connect the power cord to facility power yet.
- Hold the power cable taut against
the anchor, and pull the tie wrap tight to hold the power cord in
place. There should be little or no slack in the cable tie due to
considerations with the power cords.
Note - If you have a ruler or tape measure, check the power cord's protrusion from the face of the Fabric Interconnect F1-4. Power cords cannot protrude more than 2 5/16” (60 mm) as documented in Power Cord Management.Figure 58 Fabric Interconnect F1-4 Power Cord Anchored

- When the power cord is in place and complies with the considerations in Power Cord Management, clip the tie wrap so that it has no more than 1” (2.54 cm) of excess length.
- Repeat Step 3 through Step 5 for the other power supply. When both power cords installed correctly, proceed to Step 7.
- Connect the dual power supplies to a facility AC power source. The Fabric Interconnect F1-4's power supplies do not have a power switch, so the Fabric Interconnect F1-4 will power up when the power cord is connected to facility power.
- When the Oracle Fabric Interconnect F1-4 has I/O modules and is cabled to facility power, network, storage, and server resources, you can power it on and perform initial configuration through the Oracle Configuration Wizard. See Performing Initial Configuration.
