Remove and Install a Fabric Interconnect F1-15 Front Panel Assembly
To remove a front panel assembly from Oracle Fabric Interconnect F1-15, follow this procedure:
- Power down the Fabric Interconnect.
-
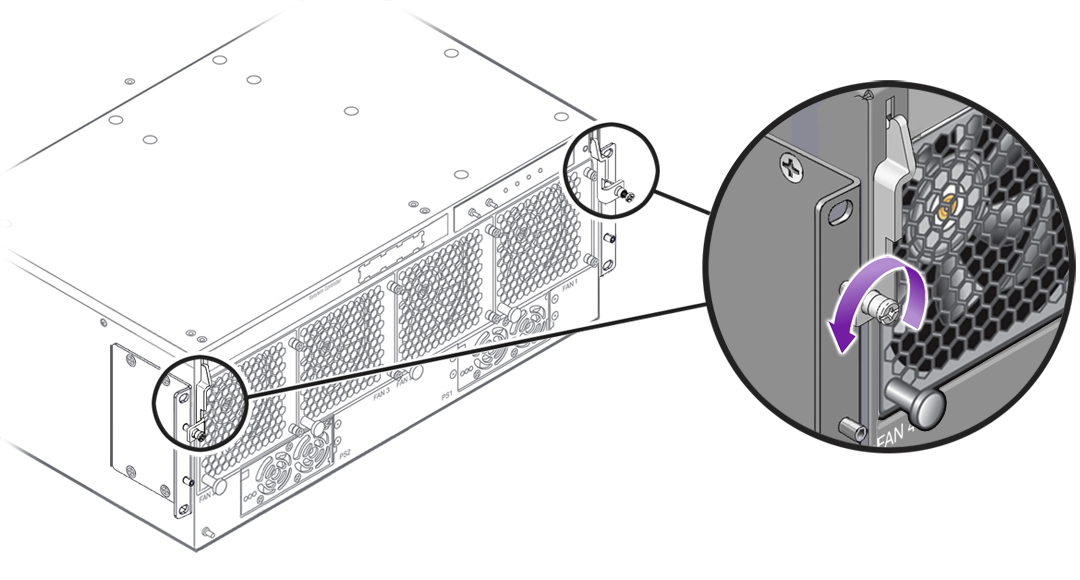
Using the screwdriver, release the two spring-loaded screws (1) securing
the release levers to the chassis. See Loosening the Fabric Interconnect F1-15 Front Panel Assembly Screws.
Figure 96 Loosening the Fabric Interconnect F1-15 Front Panel Assembly Screws

-
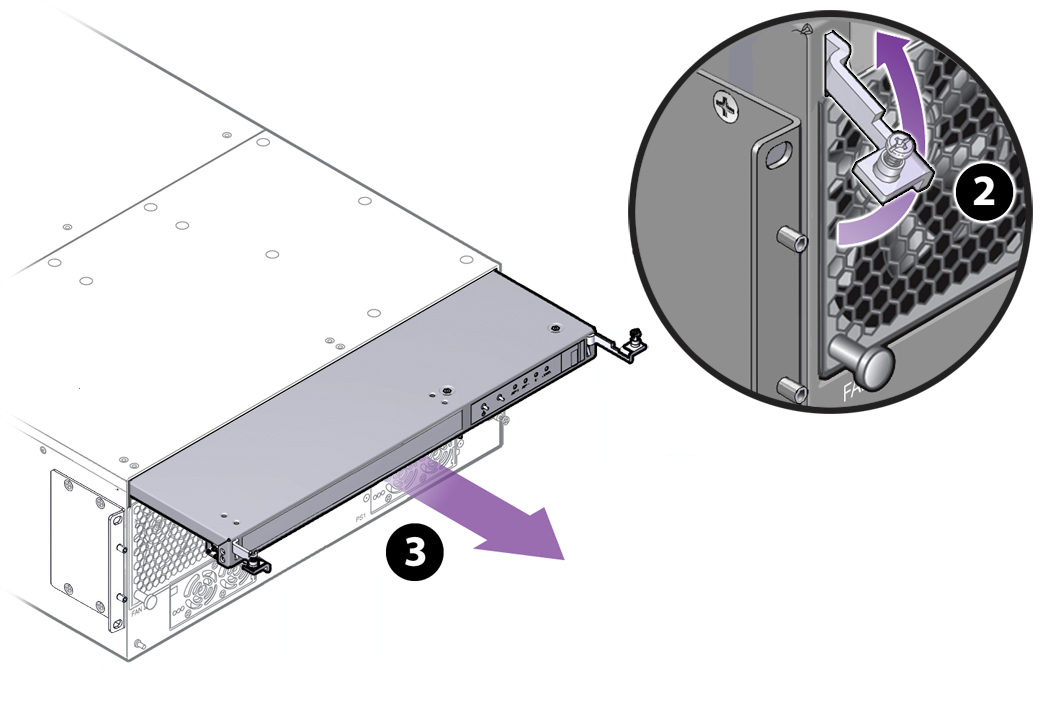
Simultaneously grasp both of the release levers and slowly raise them
until they are horizontal (2), then use the levers to carefully slide the
assembly out of the chassis (3). See Removing the Fabric Interconnect F1-15 Front Panel Assembly.
Figure 97 Removing the Fabric Interconnect F1-15 Front Panel Assembly
