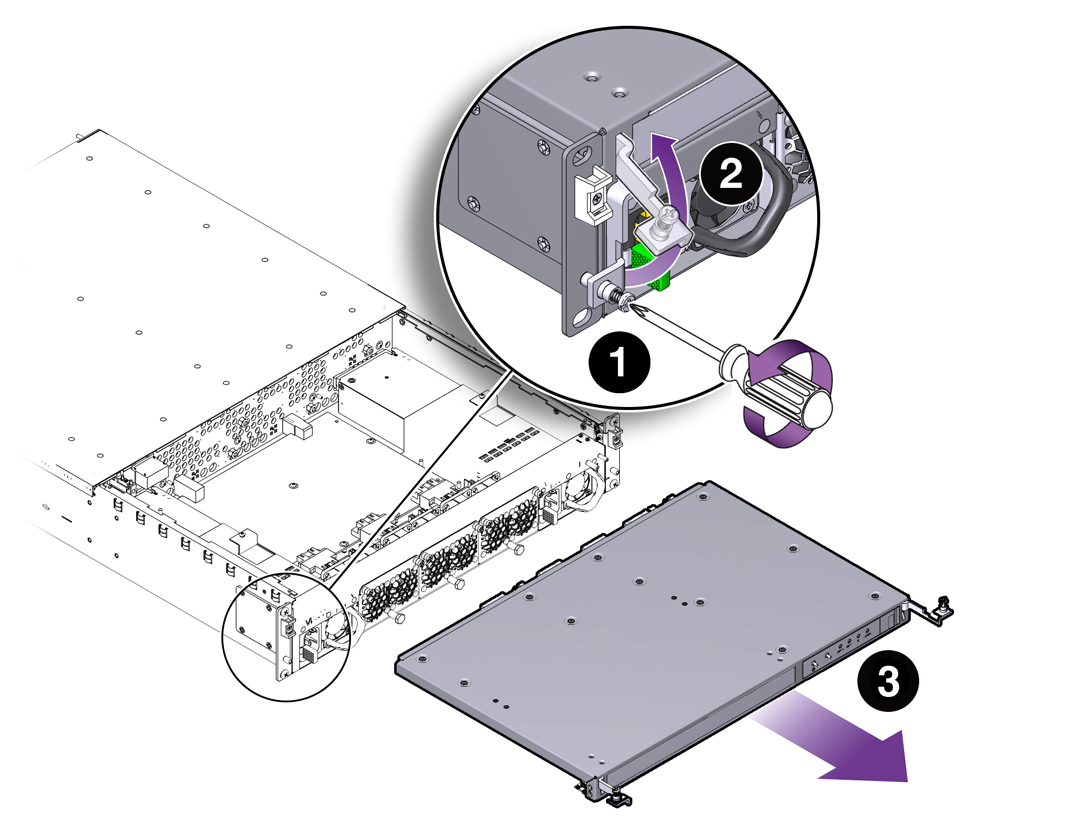
Remove a Fabric Interconnect F1-4 Front Panel Assembly
To remove a Fabric Interconnect F1-4 front panel assembly, you will need a #2 Phillips-head screwdriver.
To remove a Fabric Interconnect F1-4 front panel, follow this procedure:
- Power down the Fabric Interconnect.
-
Using the screwdriver, release the two spring-loaded screws (1) that
secure the release levers to the front mounting brackets. See Removing the Fabric Interconnect F1-4 Front Panel Assembly.
Figure 98 Removing the Fabric Interconnect F1-4 Front Panel Assembly

- When the screws are loose, gently lift the lever arms in a 90 degree upward arc (2) as shown in Removing the Fabric Interconnect F1-4 Front Panel Assembly. When both arms are lifted, you should feel the Front Panel disengage from the chassis.
- Holding the lever arms, apply even pressure to both handles and slide the Front Panel towards you (3) until it is completely removed from the Fabric Interconnect F1-4.