Install Fabric Interconnect F1-4 I/O Modules
-
Get the I/O module you will installing, and make sure that the I/O Module
is in the unlocked position. Modules can be inserted into the Fabric
Interconnect F1-4 only if they are in the unlocked position.
Make sure that the I/O Module is oriented so that the sheet metal side is facing down and the module's faceplate is facing you.
- Align the module with the slot.
-
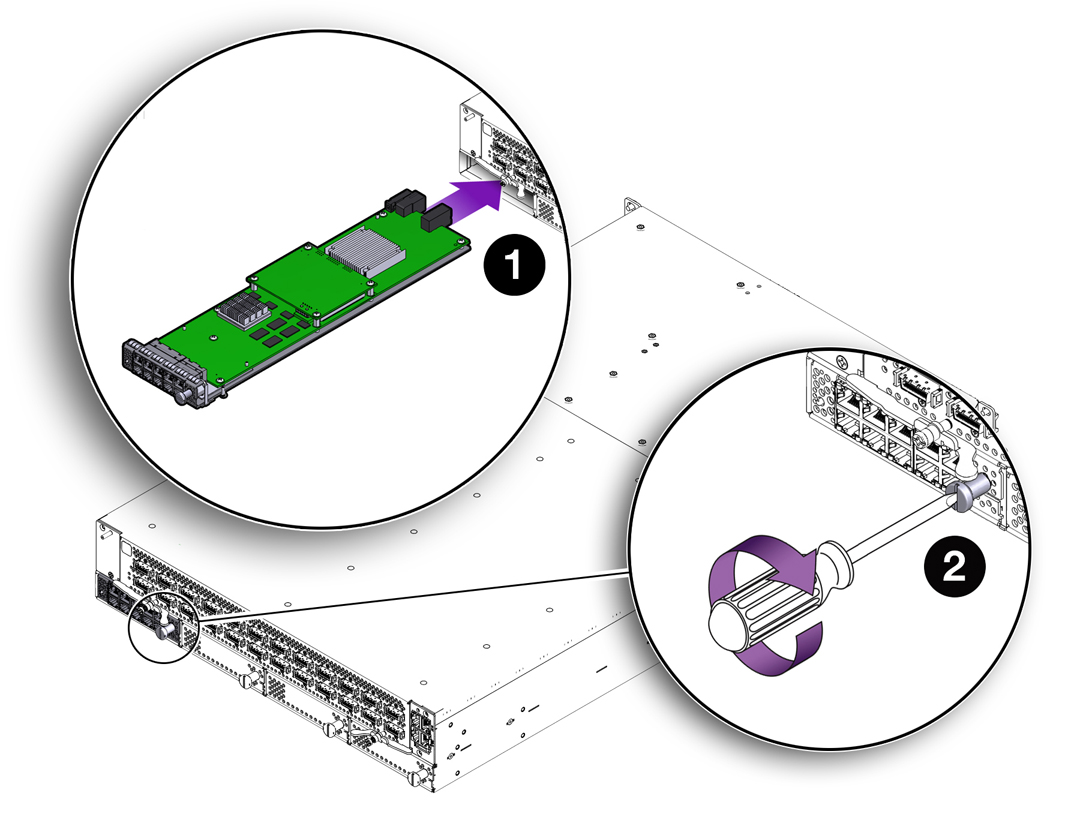
Holding the module level, gently insert the I/O module into the chassis
(1). See Installing a Fabric Interconnect F1-4 I/O Module.
Figure 94 Installing a Fabric Interconnect F1-4 I/O Module

When the I/O Module is almost completely inserted, you will feel some resistance, which is the I/O Module's connector meeting its midplane socket. Continue to apply gentle pressure until the connector is seated in the socket.
- When the module is completely inserted, it should lie flush with the face of the Fabric Interconnect F1-4.
- Using a slotted screwdriver, lock the I/O Module into the chassis by turning the lock 90 degrees clockwise (2) as shown in Installing a Fabric Interconnect F1-4 I/O Module.