Install a Power Supply
Note - If you are installing a power supply in a SPARC M8-8 server, ensure that you have installed the three shims along the side of the replacement power supply. For more information, see Install the Power Supply Shims (SPARC M8).
Caution - If you remove this component while the server is powered on, wait 30 seconds before installing the replacement component. Doing so ensures that Oracle ILOM has enough time to detect the new component, which is required for the software to power it on. |
 | Caution - The SPARC M8-8 server includes power supplies that are not compatible with the SPARC M7 servers. Never install a SPARC M8 power supply in a SPARC M7 server, and never install a SPARC M7 power supply in the SPARC M8-8 server. |
-
Install the power supply.

-
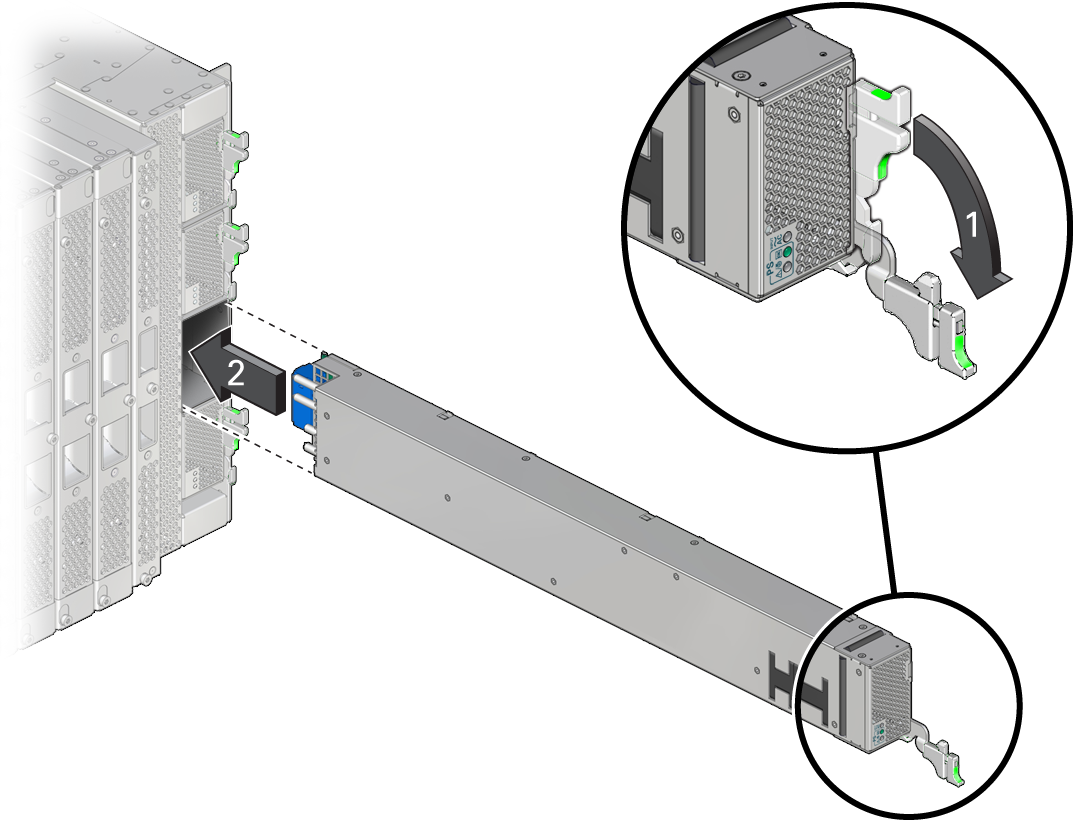
Open the latch on the replacement power supply.
Shown by the No. 1 arrow in the preceding illustration.
-
Align the power supply and slide it into the empty bay.
Shown by the No. 2 arrow in the preceding illustration.
-
Open the latch on the replacement power supply.
-
Secure the power supply in the chassis.

-
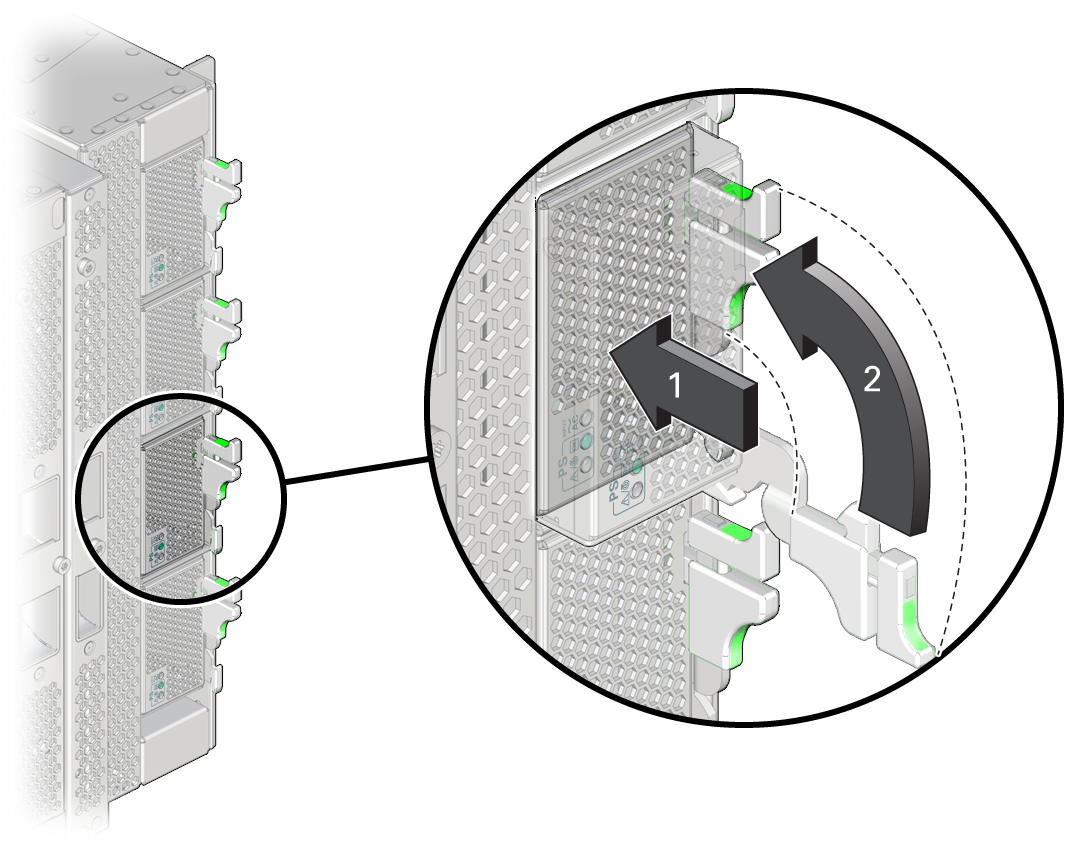
Press on the center of the power supply grill until the lowered latch
lever moves upward.
Shown by the No. 1 arrow in the preceding illustration.
-
Lift the lever up and press the lever against the power supply to
fully seat it in the server.
Shown by the No. 2 arrow in the preceding illustration.
-
Press on the center of the power supply grill until the lowered latch
lever moves upward.
- Verify that the fault has been cleared and the replaced component is operational.
- Return the replaced component to Oracle.