Remove a Power Supply
This procedure can be performed by a customer while the server is running.
 | Caution - This procedure requires that you handle components that are sensitive to electrostatic discharge. This discharge can cause server components to fail. When you unpack the replacement part, open the package on a grounded antistatic mat. Always use an antistatic wrist strap for hardware replacements. |
 | Caution - If a power supply fails and you do not have a replacement available, leave the failed power supply installed to ensure proper airflow in the server. |
- Determine which power supply requires service.
-
Locate the power supply that you want to remove.
See CMIOU Chassis Front Components and Switch Chassis Front Components (SPARC M7-16) for the locations of the power supplies in the server.
-
Take the necessary ESD precautions.
See Prevent ESD Damage.
-
Disengage the power supply from the server.

-
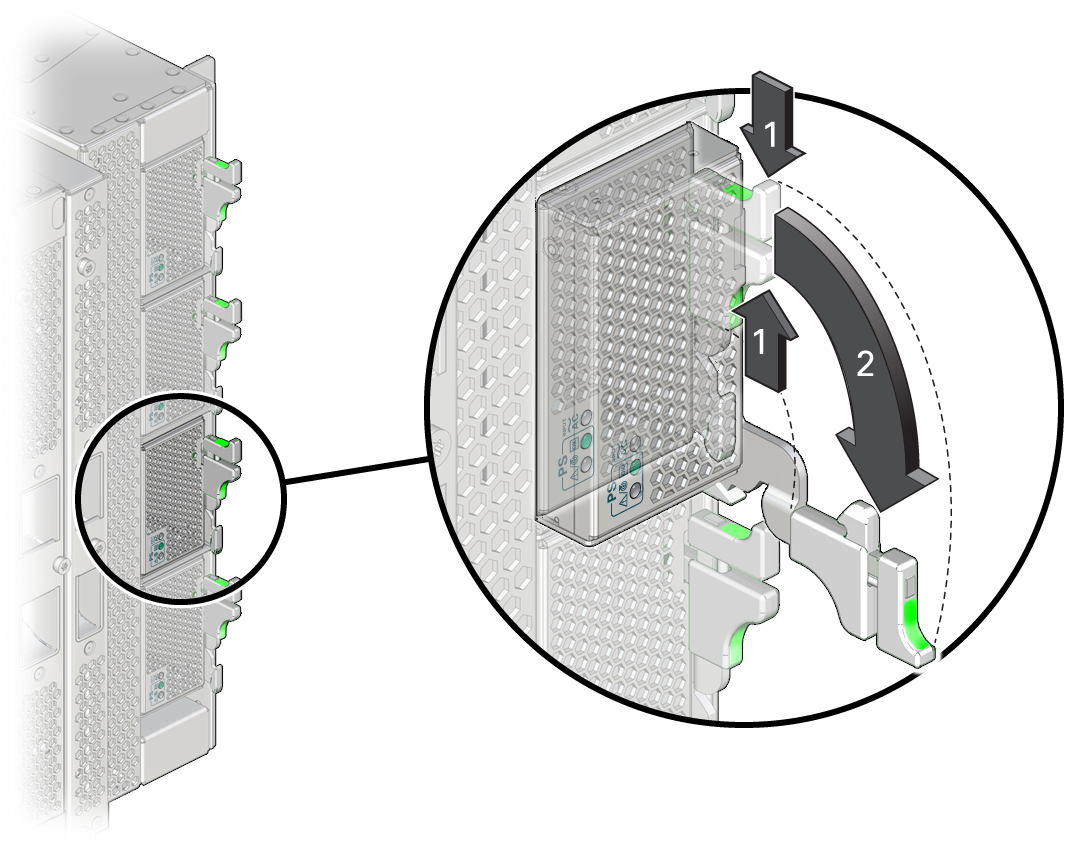
At the front of the server, squeeze the green release latch on the
power supply to be removed.
Shown by the No. 1 arrows in the preceding illustration.
-
Pull the extraction lever toward you to disengage the power supply.
Shown by the No. 2 arrow in the preceding illustration.
-
At the front of the server, squeeze the green release latch on the
power supply to be removed.
-
Remove the power supply from the server.

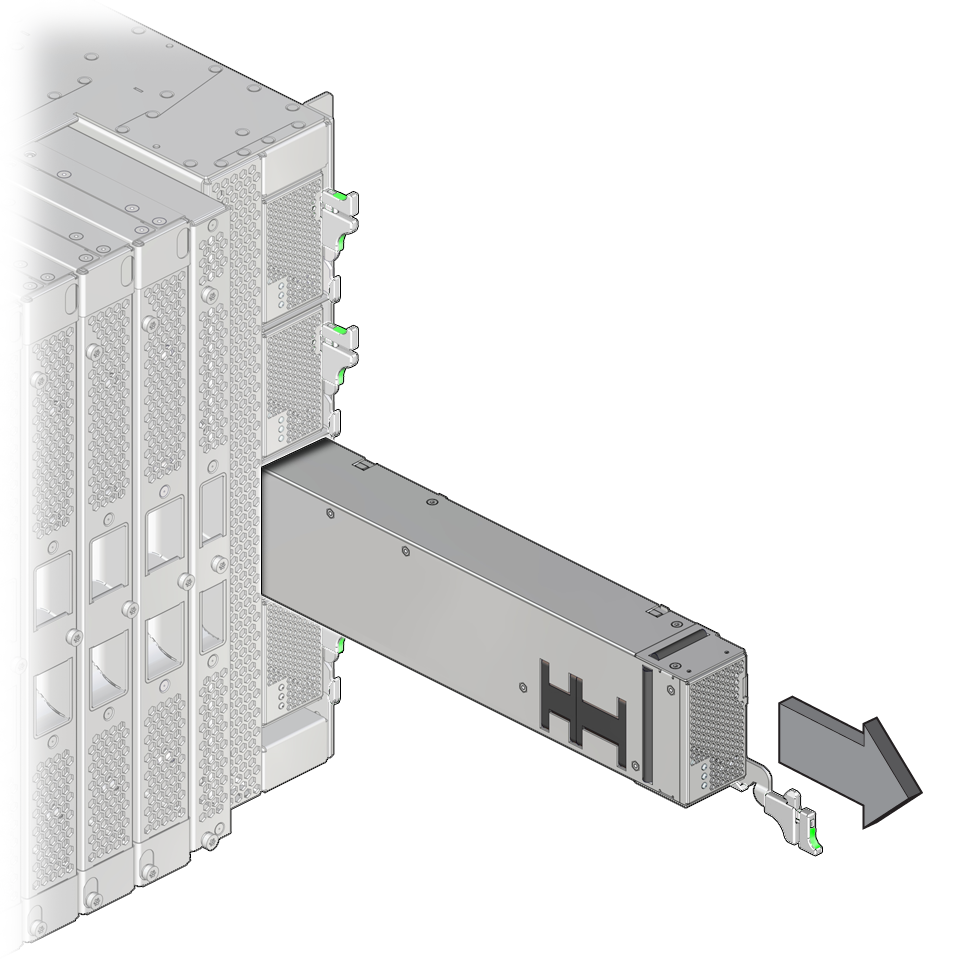
- Slide the power supply halfway out of the server.
-
Fold the extraction lever back toward the center of the power supply
until it latches into place.
This protects the lever from damage when you pull the power supply out.
- Carefully remove the power supply from the server.
-
Determine your next step:
- If you removed a SPARC M8 power supply from a SPARC M8-8 server, continue to: Remove the Power Supply Shims (SPARC M8).
- If you removed a SPARC M7 power supply from a SPARC M7 server, continue to: Install a Power Supply.