Install a Standard PDU
-
Lift up the PDU, and ensuring that the
circuit breakers are facing the rear of the rack, carefully set
the PDU's standoff bolts into the top and bottom bracket's keyhole slots.
See the figure in Prepare to Install a Standard PDU, panels 3 and 4).
The PDU is held in the rack by gravity, with the standoff bolts resting in the mounting brackets' keyhole slots.
Note - The circuit breakers must face the rear of the rack so that you can reset a breaker if one trips. -
(Optional)
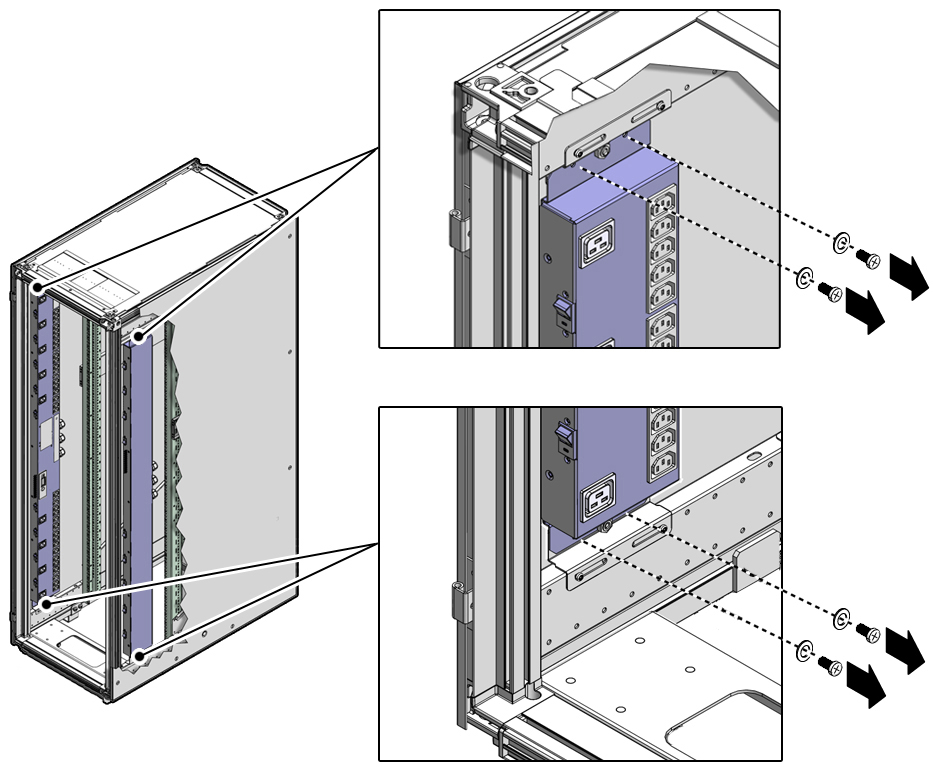
Use a T-25 Torx wrench and four M5 shipping screws and washers
to secure the PDU to the mounting brackets.
For extra durability, secure the PDU to the mounting brackets using the shipping screws and washers (two screws and washers per bracket). If you plan to ship the rack to another location, you must secure the PDU using these shipping screws.

-
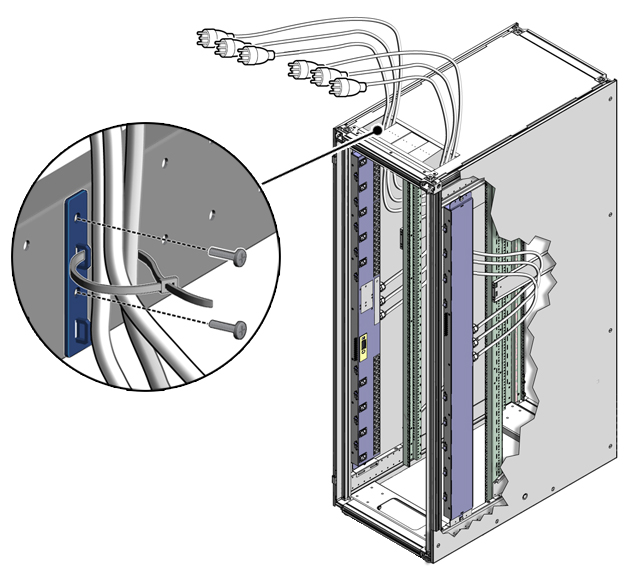
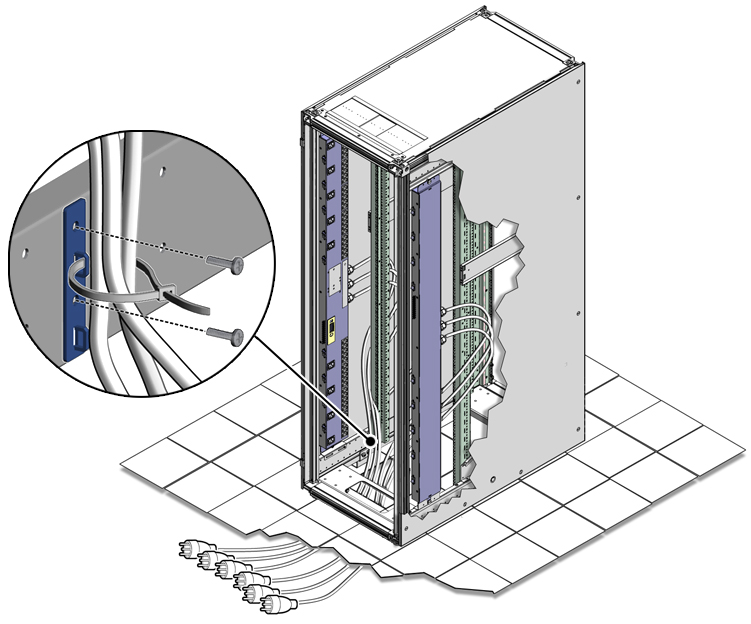
Route the power input lead cords between the rear RETMA rail and side
panel.
A PDU has one to three power input lead cords, which you must route between the side panel and the rear RETMA rail.
Route the power input lead cords either down through the bottom of the rack or up through the top of the rack, depending on where you plan to connect them to the main power source.
If you are routing the cables through the bottom of the rack, refer to the Sun Rack II User's Guide for the dimensions of the floor cutout.

Caution - Never twist, kink, or tightly bend a power input lead.
Routing standard PDU cables up through the top of the rack.

Routing standard PDU cables through the bottom of the rack.


Caution - If you route power input lead cords through the top cable window, do not rest the cables on the plastic sliding doors.
-
Use a T-30 Torx wrench to secure
cable routing brackets to the rack frame using two M6 screws per
bracket.
Install these brackets near where the power input leads exit the rack (see the figures in Step 3).
- Using tie-wraps, secure the PDU input lead cables to the cable routing brackets.
-
Determine your next steps.
-
If you are installing a second PDU into the rack, follow Step 1 through Step 5 to install the second PDU.
-
If you are installing a compact PDU, go to Install a Compact PDU.
-
If you are done installing PDUs and want to power on the rack, go to Connect the PDU to the AC Power Source.
-
