Remove an SP or SPP
This procedure can be performed by a customer while the server is running. The procedure is the same whether you are removing an SP or an SPP.
Note - Only remove an SP or SPP when you have verified that the blue Ready to Remove LED on the SP or SPP is lit.
 | Caution - This procedure requires that you handle components that are sensitive to electrostatic discharge. This discharge can cause server components to fail. When you unpack the replacement part, open the package on a grounded antistatic mat. Always use an antistatic wrist strap for hardware replacements. |
-
Determine your first step:
- If you cannot access the SP, go to Step 2.
-
If you can access the SP, back up the configuration information as
shown here and then go to Step 2.
-> cd /SP/config
-> dump -destination uri target
where:
-
uri is tftp, ftp, sftp, scp, http,and https
-
target is the remote location where you want to store the configuration information
For example:
-> dump -destination tftp://129.99.99.99/pathname
-
Take the necessary ESD precautions.
See Prevent ESD Damage.
-
Locate the lit blue Ready to Remove LED.
The component is in the rear of the server. See SP General Status LEDs.
-
If you are replacing a faulty SP, relocate any existing NET MGT and SER MGT
port plugs.
Remove any port plugs that are installed in the NET MGT and SER MGT ports and install them in the same ports on the replacement SP or SPP.
-
Label and disconnect the cables attached to the NET MGT and SER MGT
ports.
See CMIOU Chassis Rear Components, Switch Chassis Rear Components (SPARC M7-16), and SER MGT and NET MGT Port Locations and Numbering.
-
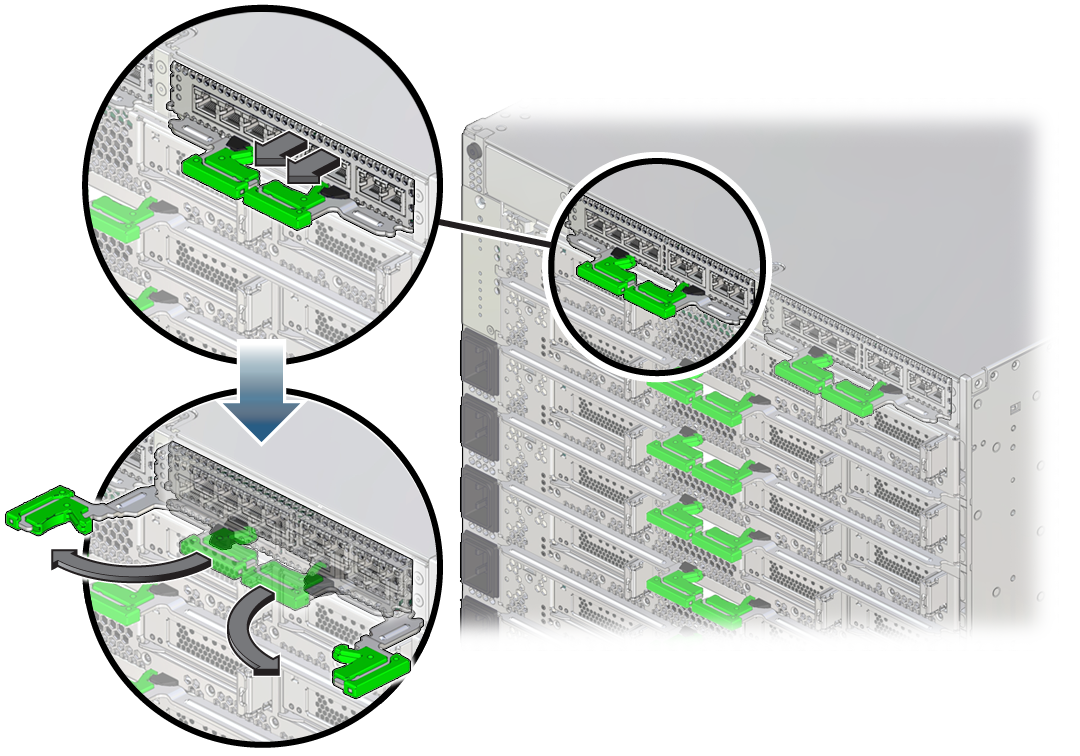
Pinch the ejector latches and open the ejector arms.

-
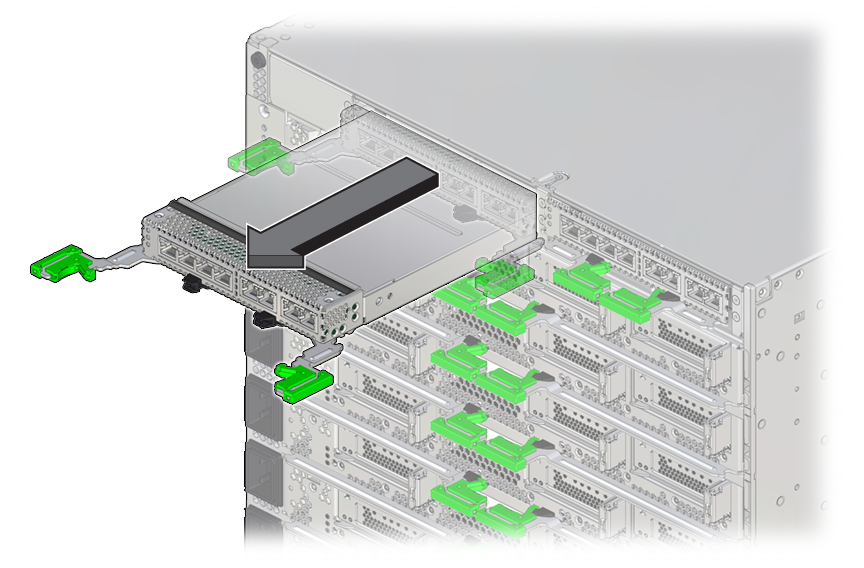
Pull the SP halfway out of the SP tray.
8 (one PDomain)The SPs and SPPs are tightly secured in their bays. Pull firmly on the ejector latches to free the SP or SPP from the bay.

-
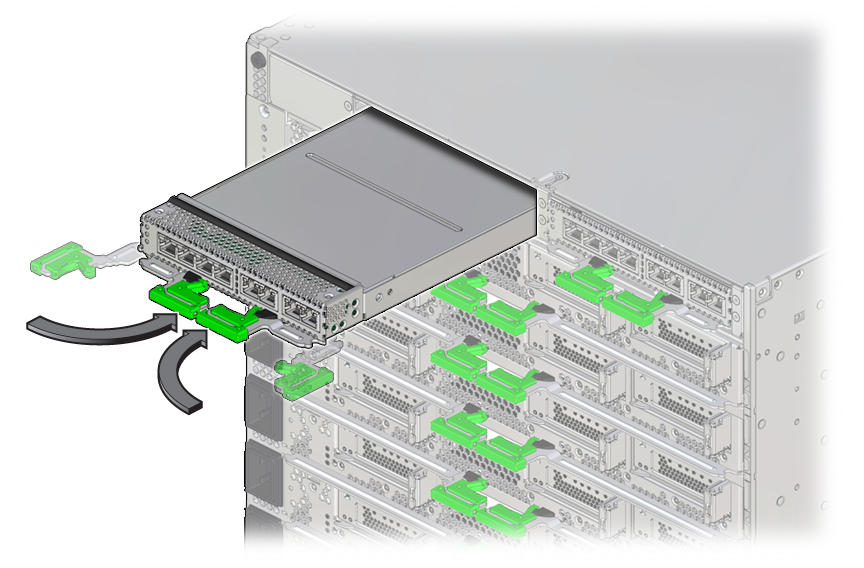
Close the ejector arms.
This protects the arms from damage when you pull the component out.

- Carefully remove the component from the SP tray, using two hands, and avoid bumping the rear connectors.
- Place the SP on a grounded antistatic mat.
-
Set the /System/DCUs failover property back to
auto.
On an SP, type:
-> set /System/DCUs failover=auto
-
Determine your next step:
-
To replace the battery, see Servicing Batteries.
-
To install an SP, see Install an SP or SPP.
-