Remove a PDU
This procedure can be performed only by qualified service personnel after powering off the server.
 | Caution - This procedure requires that you handle components that are sensitive to electrostatic discharge. This discharge can cause server components to fail. When you unpack the replacement PDU, open the package on a grounded antistatic mat. Always use an antistatic wrist strap for hardware replacements. |
- Ensure that you have prepared the faulty PDU for removal.
- Shut down and power off any ancillary equipment installed in the rack.
-
From the rear of the server, switch off all of the PDU circuit breakers in the
rack in the following sequence.
Press down on each of the Off (0) toggle switch to power off the PDU. These circuit breakers are at the rear of the rack cabinet.
-
For SPARC M8-8 or SPARC M7-8 server, right PDU (PDU-B):
-
If one SPARC M8-8 or SPARC M7-8 server is installed: R8, R7, R6
-
If two SPARC M8-8 or SPARC M7-8 servers are installed: R8, R7, R6; R5, R4, R3
-
If three SPARC M8-8 or SPARC M7-8 servers are installed: R8, R7, R6; R5, R4, R3; R2, R1, R0
-
-
For SPARC M8-8 or SPARC M7-8 server, left PDU (PDU-A):
-
If one SPARC M8-8 or SPARC M7-8 is installed: L2, L1, L0
-
If two SPARC M8-8 or SPARC M7-8 servers are installed: L2, L1, L0; L5, L4, L3
-
If three SPARC M8-8 or SPARC M7-8 servers are installed: L2, L1, L0; L5, L4, L3; L8, L7,L6
-
-
For SPARC M7-16 servers, right PDU (PDU-B):
-
R4, R5
-
R0, R1, R2
-
R6, R7, R8
-
-
For SPARC M7-16 servers, left PDU (PDU-A):
-
L5, L4
-
L8, L7, L6
-
L2, L1, L0
-
where R indicates the right PDU from the rear of the server, L indicates the left PDU from the rear of the server, and the number represents the PDU group number.
Note - In configurations where additional equipment is installed in the rack, and you do not want to power down the additional equipment, remove power by unplugging the AC input power cords at the SPARC M8-8 or SPARC M7-8 AC inlets. First, unplug the power cords at the even numbered AC inlets 0, 2, 4. Next, unplug the power cords at the odd numbered AC inlets 1, 3, 5.
Caution - Because standby power is always present in the server, you must switch off the circuit breakers on the PDUs before servicing any component that requires the server to be powered off.
-
-
Switch off the facility circuit breakers to the PDU.

Caution - Verity that you are only de-energizing power to the faulty PDU.
-
Disconnect any power jumper cords connected to the faulty PDU from equipment
in the rack.
Note where these jumper cords were attached to the PDU. You will need to reinstall the jumper cords in the same locations on the new PDU.
- Cut any tie-wraps securing the faulty PDU power input lead cords to the tie-down brackets.
-
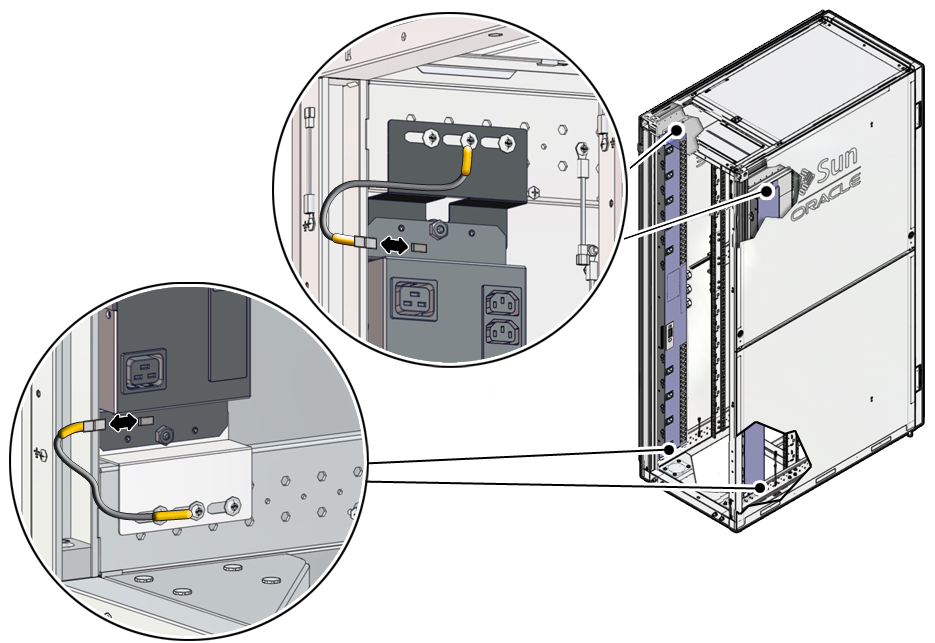
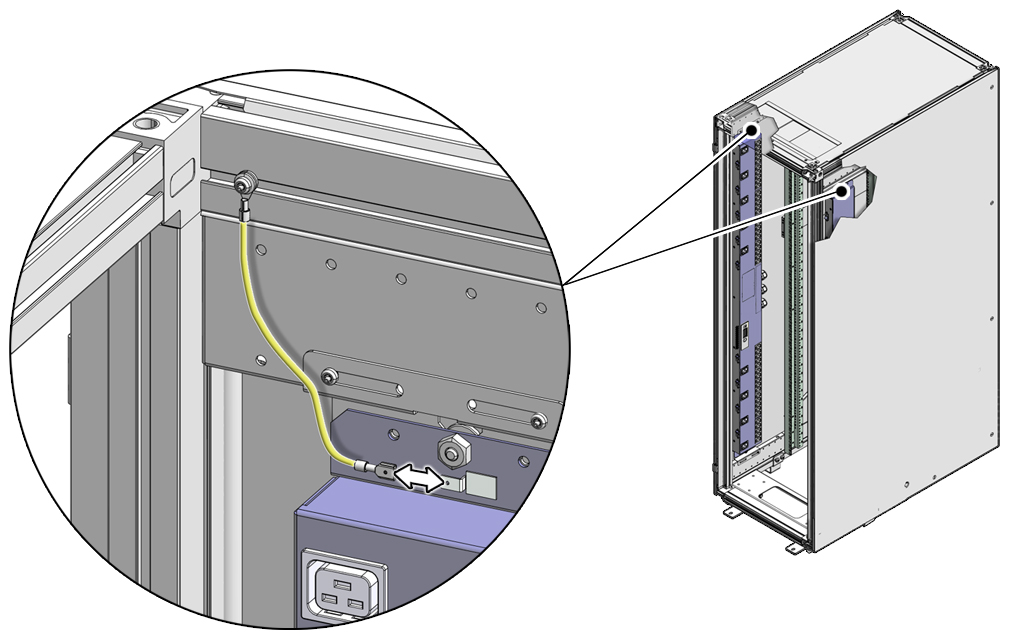
Disconnect the grounding straps connected to the faulty PDU.
The PDU grounding straps are connected in different locations in a Sun Rack II and an Oracle Rack Cabinet 1242.
-
On an Oracle Rack Cabinet 1242, disconnect the two grounding straps
connected at the top and the bottom of the PDU.

-
On a Sun Rack II, disconnect the grounding strap connecting the top of
the faulty PDU to the rack.

-
On an Oracle Rack Cabinet 1242, disconnect the two grounding straps
connected at the top and the bottom of the PDU.
-
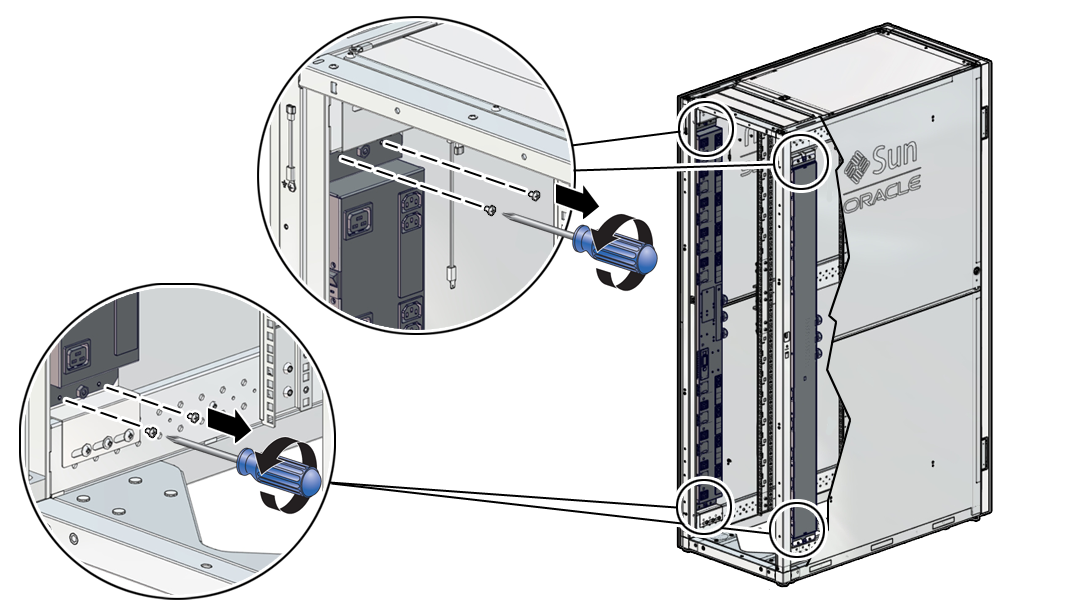
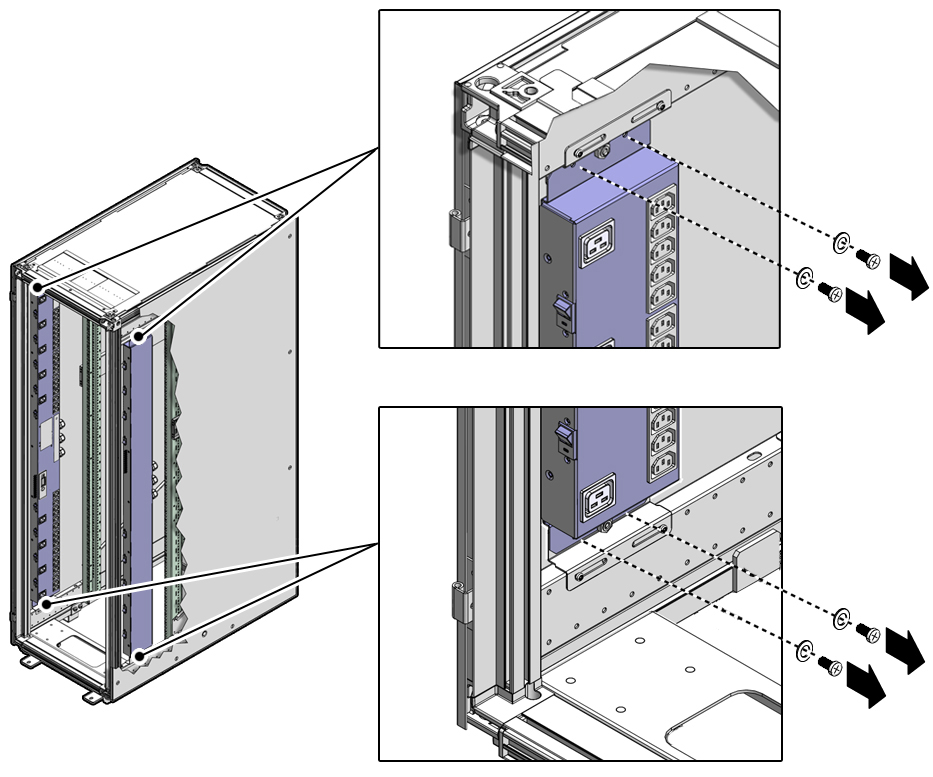
Remove the screws and washers securing the PDU to the mounting
brackets.
-
On an Oracle Rack Cabinet 1242, use a T25 wrench key to remove the
four M5 screws securing the faulty PDU to the mounting brackets.

-
On a Sun Rack II, use a T25 wrench key to remove the four M5 screws
and washers securing the faulty PDU to the mounting brackets.
These screws secure the PDUs for shipping purposes. You might have already removed these screws when you installed the rack at the installation site.

-
On an Oracle Rack Cabinet 1242, use a T25 wrench key to remove the
four M5 screws securing the faulty PDU to the mounting brackets.
-
Carefully lift the faulty PDU up and off the mounting brackets.
Remove the PDU from the rack and place it on a clean work table.