Install the Power Supply Shims (SPARC M8)
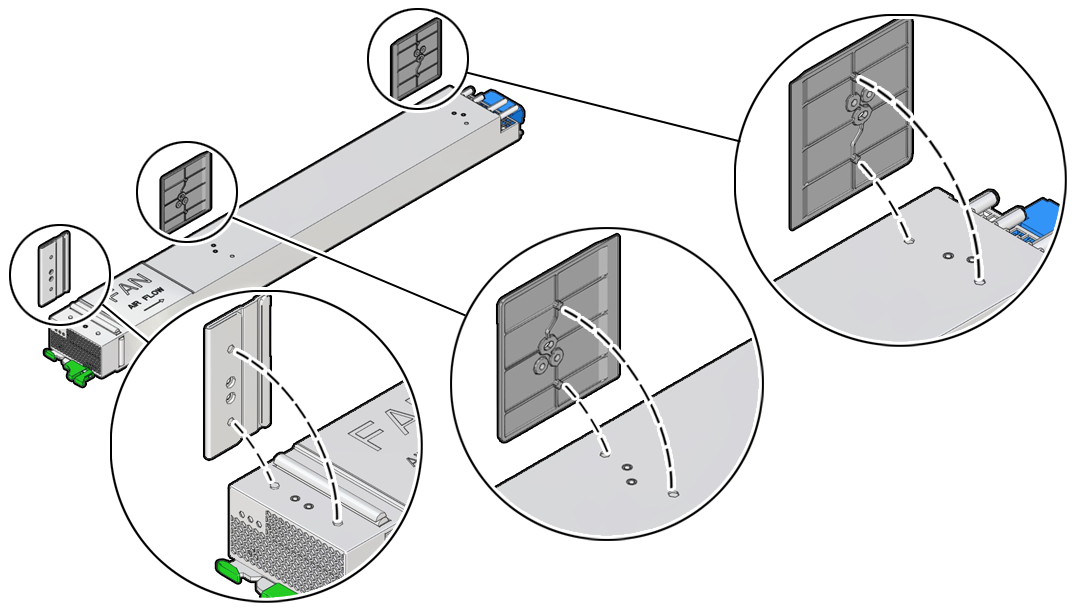
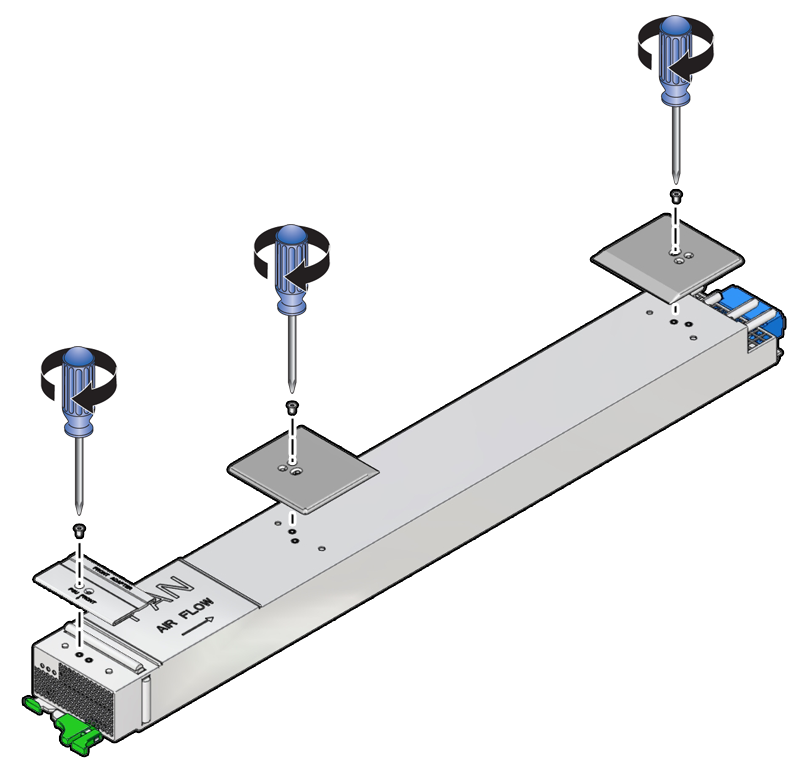
Before installing a power supply into the SPARC M8-8 server, install three shims along one side of the power supply.
-
Place the replacement SPARC M8 power supply on a grounded antistatic
mat.
Ensure that the three screw holes are facing upward.
-
Place the shims on the side of the power supply.
-
Use the guides located on the underside of the shims to place the
shims on the power supply correctly.
The right side of the middle shim should slope downward and the left side of the rear shim should slope upward.
-
Place the front metal shim to the front edge of the power
supply.
Note - Ensure that the arrow labeled PSU FRONT is pointing to the front of the power supply. The ESD foam tape should be facing upward.

-
Use the guides located on the underside of the shims to place the
shims on the power supply correctly.
-
Using a T8 driver, secure the shim to the side of the power supply with one M3
screw per shim.
Note - The screw locations might vary between SPARC M8 power supplies.
- Continue the procedure by installing the power supply into the server.