Install an Internal Interconnect Assembly
 | Caution - You must return internal interconnect assemblies to their original slots. If you are inserting one or more previously installed internal interconnect assemblies to the server (for example, because you removed them to gain access to other components), you must return them to their original locations in the server. |
-
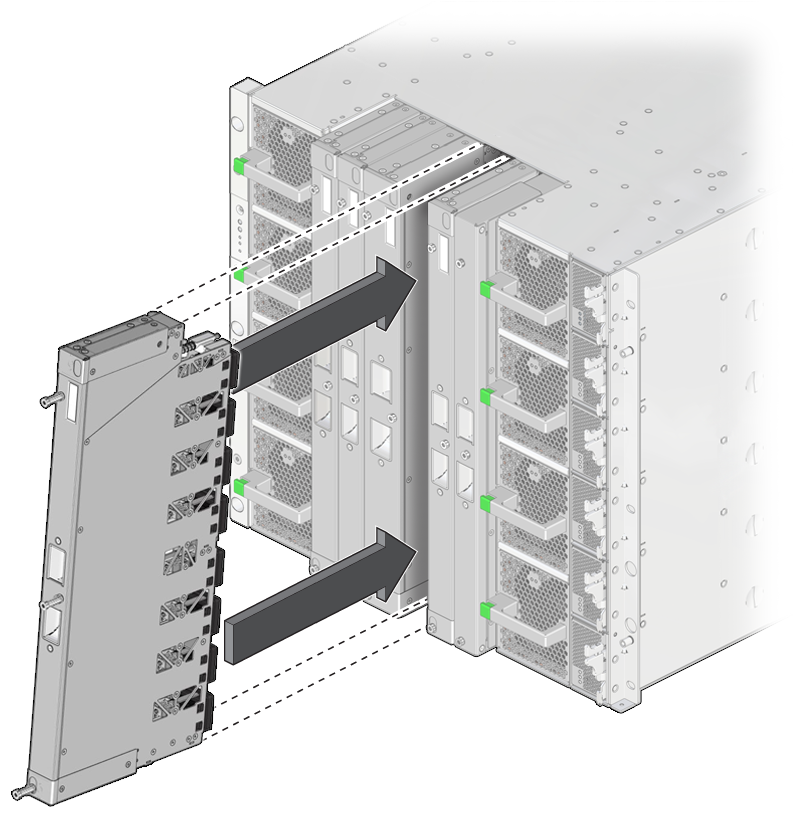
From the front of the server, carefully slide the internal interconnect
assembly into the chassis.
Guide the TOP end of the assembly into place first, then guide the BOTTOM end into place. Push the TOP end in until the safety latch clicks, then push in the BOTTOM end in.


Caution - The small connector pins on the back of the assembly are susceptible to damage. It is important that you align the assembly in the chassis and install the assembly slowly to avoid bending or otherwise damaging the connector pins.
-
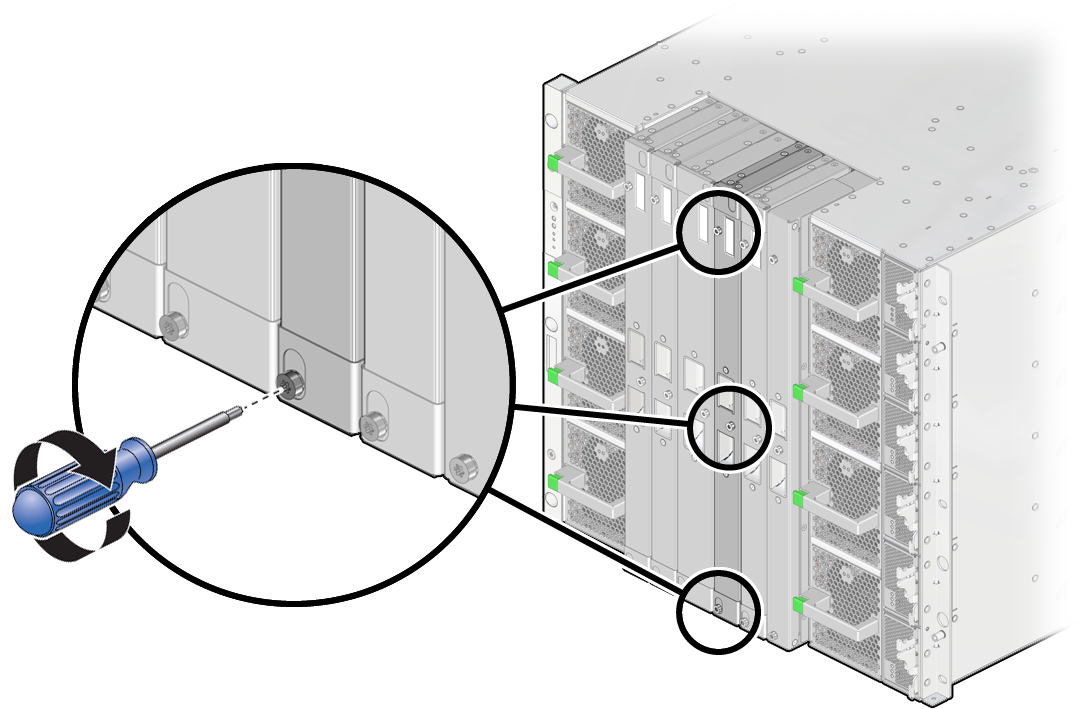
Secure the internal interconnect assembly by hand tightening the three captive
screws while ensuring that the screws install smoothly into the chassis.
Install the middle screws, then the top screws, and then the bottom screws by hand. Next, use a T20 driver to hand tighten the screws, in the same order, until they are seated snugly.

Caution - Do not overtighten the screws. The screws bear down on an internal feature to secure the interconnect. The screw heads will appear to float when properly tightened. You can damage the interconnect if you overtighten the screws.

-
Reseat all CMIOUs.
See Servicing CMIOUs.
- Reseat the SP tray and reinstall the SPs.
- Switch on the appropriate PDU circuit breakers and power on the server.
- Verify that the fault has been cleared and the replaced component is operational.